Back to Blog
How to invoice clients and get paid quickly
[Hide]
When I first started my agency, I had no clue how to actually send an invoice. I was laser-focused on landing those first clients that when it came time to get paid, I felt totally lost.
But I quickly realized getting comfortable asking for money had to be priority number one. After all, without cash coming in, it's game over for any service business. And if you're reading this, my hunch is you're ready to start getting paid — so congrats! That's a big step.
In this guide, I'll walk you through how I bill clients, accept payments, and manage the financial side of things now. Whether you're an agency, consultant, freelancer, or something else, these tips apply across the board.
I'll also show you how I automate invoices so I don't have to stress about remembering to send them or hound clients to pay. Game changer right there.
But before we dive in, one question I still get all the time is… how do you invoice politely without it feeling awkward or pushy? I've totally been there. The good news? There's a way to make it feel natural.
How do you politely send an invoice to a client?
Sending an invoice politely and professionally is essential to maintaining a positive relationship with your clients. After all, you want to come across as respectful and understanding of their needs while still ensuring you get paid for your work.
It’s normal to feel a bit intimidated when sending an invoice, especially if it’s your first time. But once you get the hang of it, it will become second nature. Here are some tips to help you send an invoice with confidence:
- Set clear expectations upfront: Make sure your client knows what to expect from the beginning. This includes discussing your rates, payment terms, and deadlines during the initial consultation or contract negotiation. Establishing a clear understanding from the outset will help avoid confusion and potential conflicts later on.
- Use a professional invoice template: A well-organized and visually appealing invoice makes a great impression on your clients. Use a template that includes your branding, logo, and contact information to make it easy for your clients to identify your invoice and know how to reach you if they have questions. We’ll go over this in more detail in a bit.
- Include a polite and concise message: When sending the invoice, include a brief message thanking the client for their business and reminding them of the payment due date. Keep it friendly and professional, focusing on the value you provided and expressing your gratitude for the opportunity to work with them.
- Send the invoice promptly: To make sure you have a smooth payment process, send your invoice as soon as the work is completed or according to the agreed-upon schedule. This helps your clients stay organized and aware of their financial obligations.
- Follow up professionally: If the payment is overdue, follow up with a polite reminder. It's essential to remain professional and understanding, as there could be various reasons for the delay. Offer to discuss any concerns they may have or work out a new payment arrangement if necessary.
By keeping these tips in mind, you'll create a positive invoicing experience for both you and your clients. Maintaining a professional and courteous approach will not only help you get paid on time but also contribute to building long-lasting client relationships.
What your invoice needs to include
At its core, an invoice should include information on the services you are providing and the rate at which you are charging. However, an invoice isn’t just a request for payment. There are a few key things you may want to add to make sure your finances are organized and you don’t run into any legal issues.
Here are some key things you’ll want to include in your invoice:
- Your company information: This is your or your company’s name, mailing address, phone number, and email address. If you have a logo, this is also where you can include that to make the invoice look professional — giving your client an easy way to see who this invoice is from.
- Your client’s information: This is pretty much the same as your company information. But all you really need here is your client’s name, address, and potentially their email. This makes sure the invoice reaches the right department and person.
- An invoice number: Each invoice you send should have a unique invoice number that makes it easy to track and reference. This is automatically generated when using invoicing software like Copilot, but more on that later. This invoice number also makes it easy if you or your client have an inquiry about a particular invoice.
- Date of issue and payment due date: This one is pretty self-explanatory, but you want to make sure that each invoice has a date of issue and due date. The due date is generally set for 30 days after the date of issue, but this is dependent on the payment terms you and your client agreed to before signing an agreement contract.
- Service list: This is where you list out the services that you will be providing.
- Costs and total due: This is where you list out the cost of each service. Here you can specify if you are charging per hour or per project. You also want to include the total amount due at the end of your service list.
- Payment methods: This is where you specify how you want to be paid. This can be through an ACH bank transfer, credit card, or payment processor like Stripe or PayPal.
Including all these elements in your invoice ensures transparency, reduces the chances of payment delays, and demonstrates your professionalism. In the next section, we'll explore how using invoicing software like Copilot can make the billing process easier and more efficient.
Benefits of using invoicing software
In the early stages of my service business, I used to manually create invoices using an invoice generator and create a folder on my computer to store all of them. While this worked for a while, as my client base grew, this method became time-consuming, and the risk of errors increased. Mainly because I would have to consistently remember who I sent invoices to and if those invoices were getting paid.
That's when I realized the importance of invoicing software, especially if the platform you use also lets you collect money for tax purposes. Having one central place for all of my finances makes it easy to manage cash flow and set automated payment reminders for late payments.
Copilot billing app
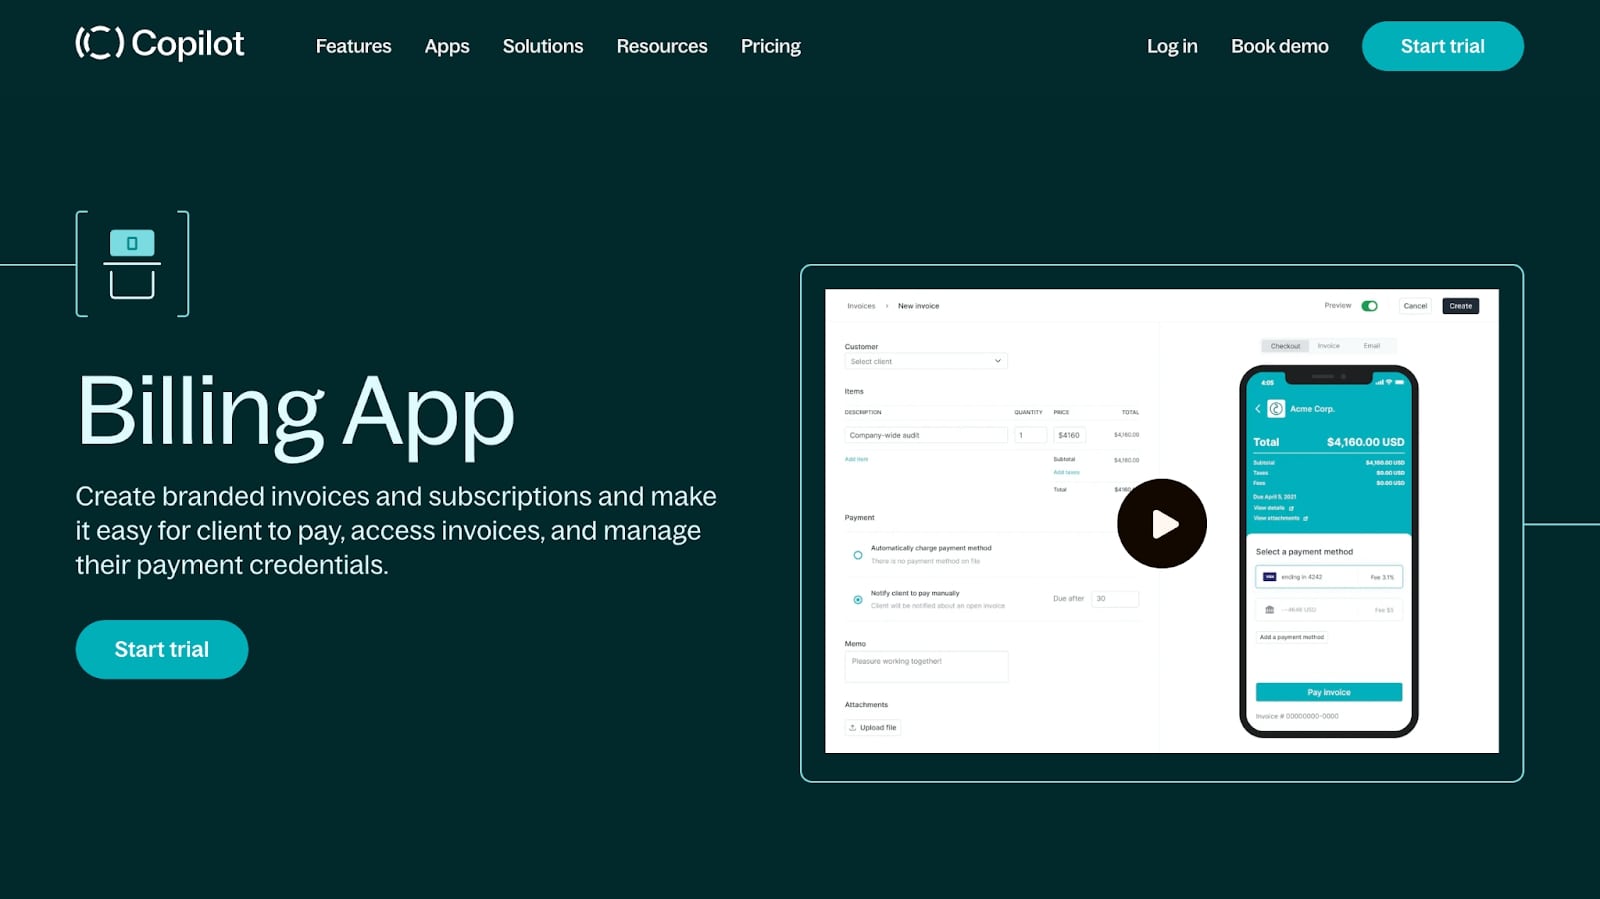
I personally use Copilot’s billing app to manage all of my invoices and payment methods. And while it may sound biased because I’m writing this on the Copilot blog, I am a customer of Copilot (not an employee).
Here are some of the benefits I’ve found while using invoicing software like Copilot:
- Automatic invoice generation and subscriptions: This allows me to create monthly invoices, like a SaaS (software as a service) product, and set everything on autopilot.
- Improved bookkeeping: I can integrate with Quickbooks to track invoices and all of my expenses — making it easier when tax season comes around.
- Payment links: Copilot integrates with Stripe as a payment gateway, so I can easily send payment links and have clients pay via credit card like they’re purchasing an ecommerce product.
- Automated client onboarding: You can automate your client onboarding process in Copilot. And (depending on when you’re reading this), you’ll be able to send an automated invoice as a part of your client onboarding.
- Reminders: This one is crucial. If there’s an outstanding unpaid invoice, I can set automatic reminders via email to make sure my client knows they have an invoice that is overdue.
- Templates: This one is self-explanatory, but having Copilot automatically generate invoices makes it easy to whip up a full invoice in just a few clicks. Then I can either export the invoice or directly send it to my client's email address via Copilot.
- Status: Once an invoice is sent via Copilot, I can see its status (if it’s been paid or not). This makes it easy to quickly see which clients have outstanding invoices.
Now that we know some of the benefits of using invoicing software to handle your online payments and billing needs, let’s go over how to send your first invoice step by step.
5 steps to client invoicing and getting paid on time
Here are five steps to creating and sending an invoice to your client:
- Generate an invoice template
- Add your services and manage payment options
- Email your invoice to your client
- Track and manage invoices in Copilot
- Manage your money with integrations
Alright, let’s go through each step in detail.
1. Generate an invoice template
Creating an invoice template is the first step in the invoicing process. An invoice template standardizes your invoices, making them look professional while saving you time. Here’s how you can do it with Copilot:
Step 1: Log into Copilot. First, you'll need to log into your Copilot account. If you don’t have one yet, you can sign up for a free trial!
Step 2: Navigate to the Billing section. Once logged in, click on the "Billing" tab on your dashboard. This will take you to the section where you can manage all your billing and invoicing needs.
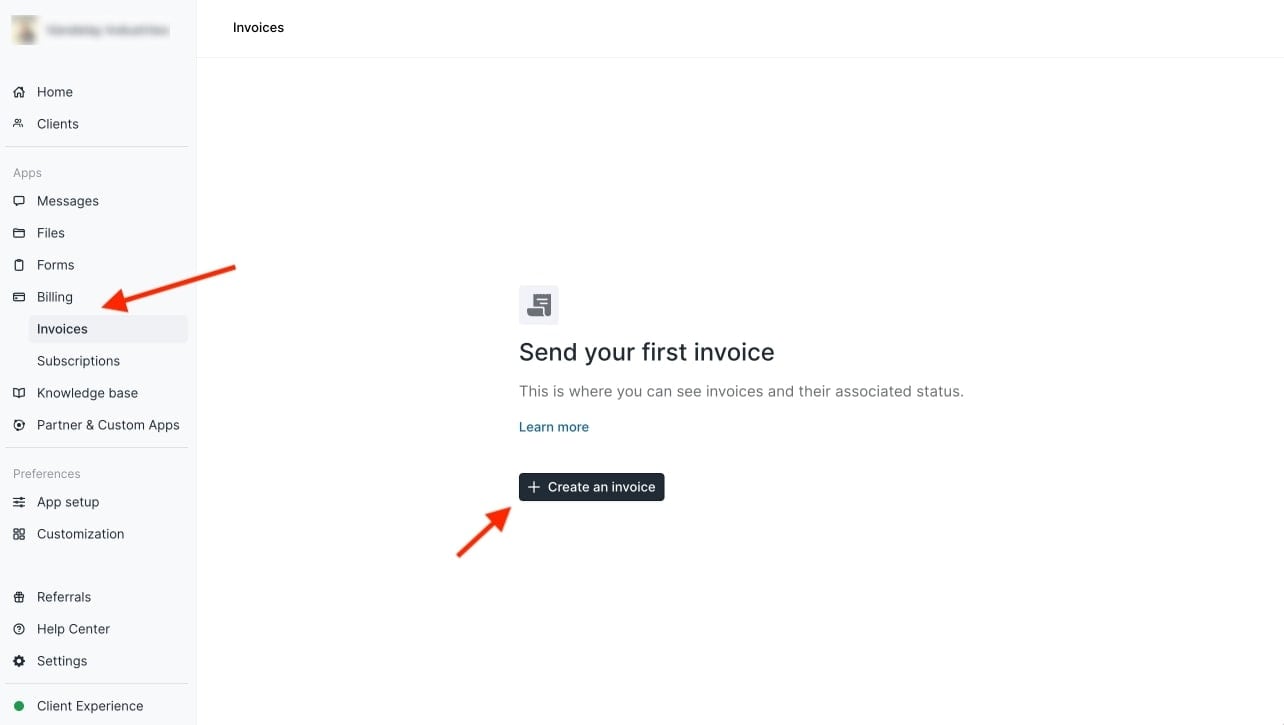
Step 3: Create a new invoice template. Click on "Create an invoice" to start creating your custom invoice.
You can now begin customizing your invoice template. Your business name, address, and logo will be generated from your Copilot account. And your client’s business information will generate from their client profile. You can also set the default payment terms, tax rates, and other details that will automatically populate in your invoices.
Generating an invoice template in Copilot is a one-time process. Once you have your template, you can use it for all future invoices, making the process quicker and more efficient. The next step is to add your services and manage your payment options.
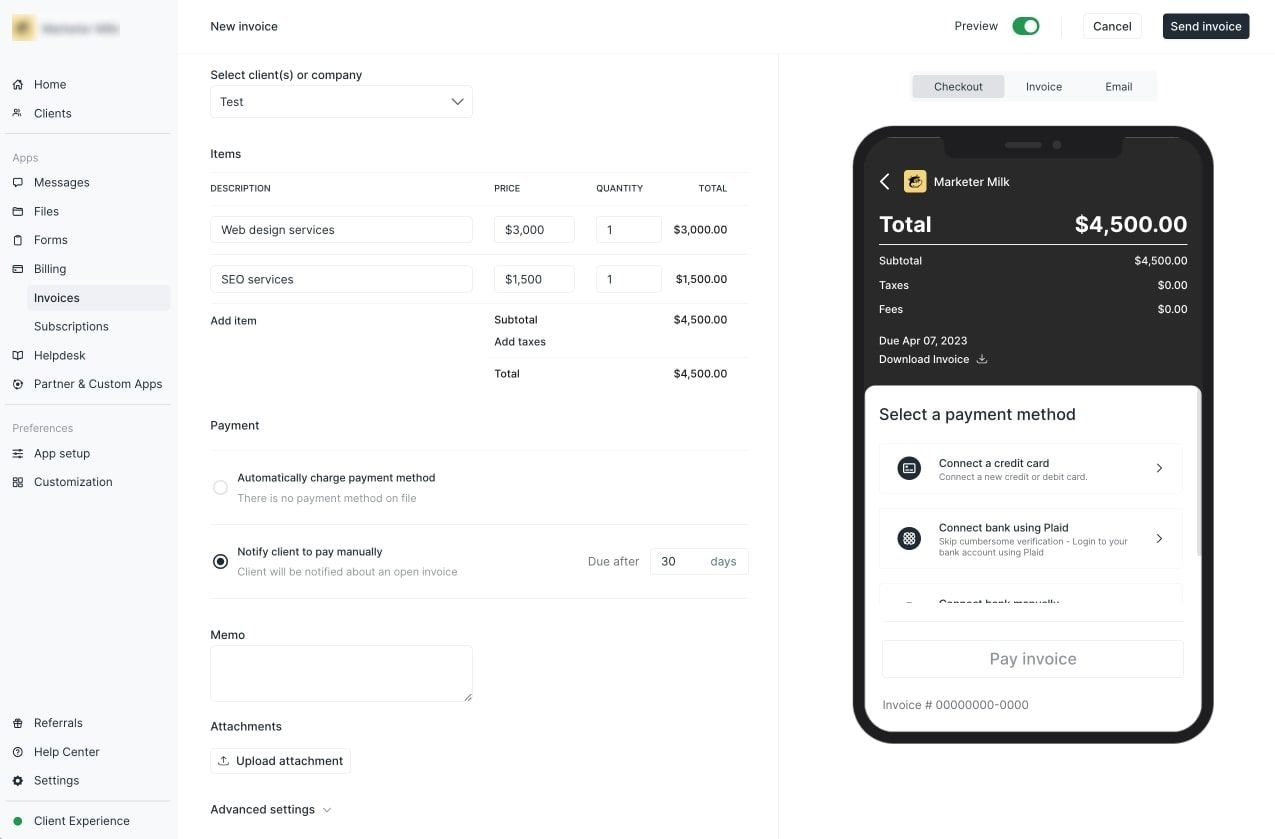
2. Add your services and manage payment options
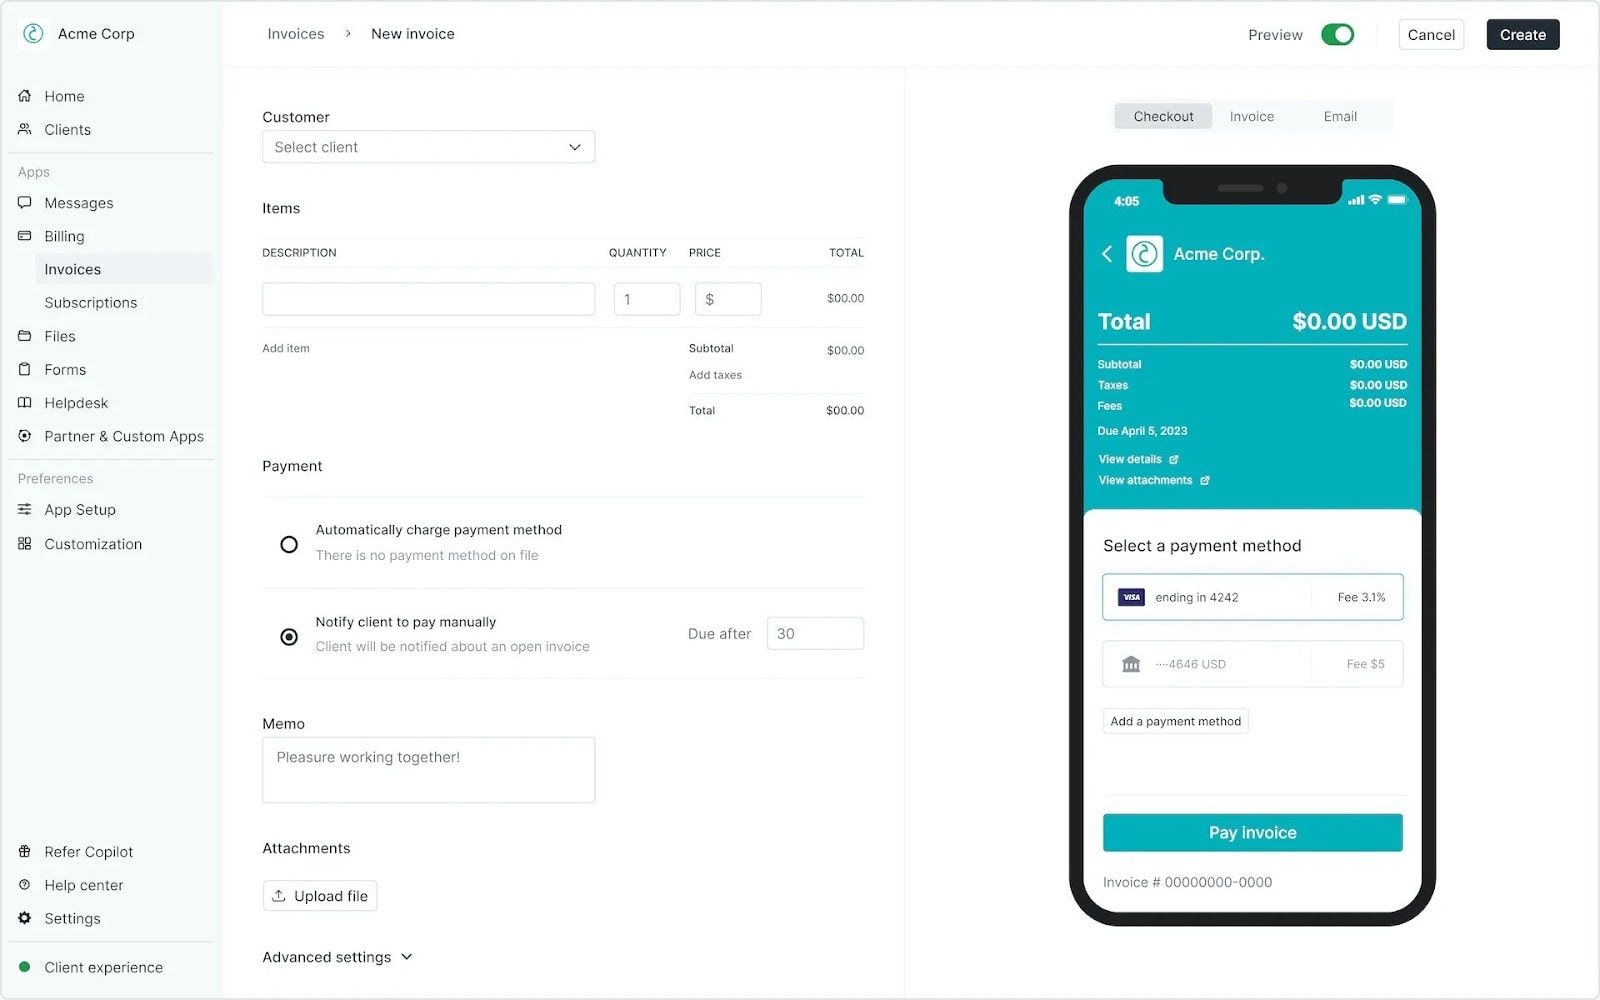
Once your invoice template is ready, the next step is to add the specific services you've provided and manage your payment options. Copilot makes this process straightforward and simple. Here's how to do it:
Step 1: Add services. Within the invoice template, you'll find an option to add items. This is where you list the description of services you've provided to the client. For each service, add a description, rate, and quantity. Copilot will automatically calculate the total for you.

Step 2: Set your payment terms. Determine when you want to get paid by setting your payment terms. This could be immediately upon receipt of the invoice, or within a set number of days (like net-30). You can also set your invoices as subscriptions so your clients get charged automatically.
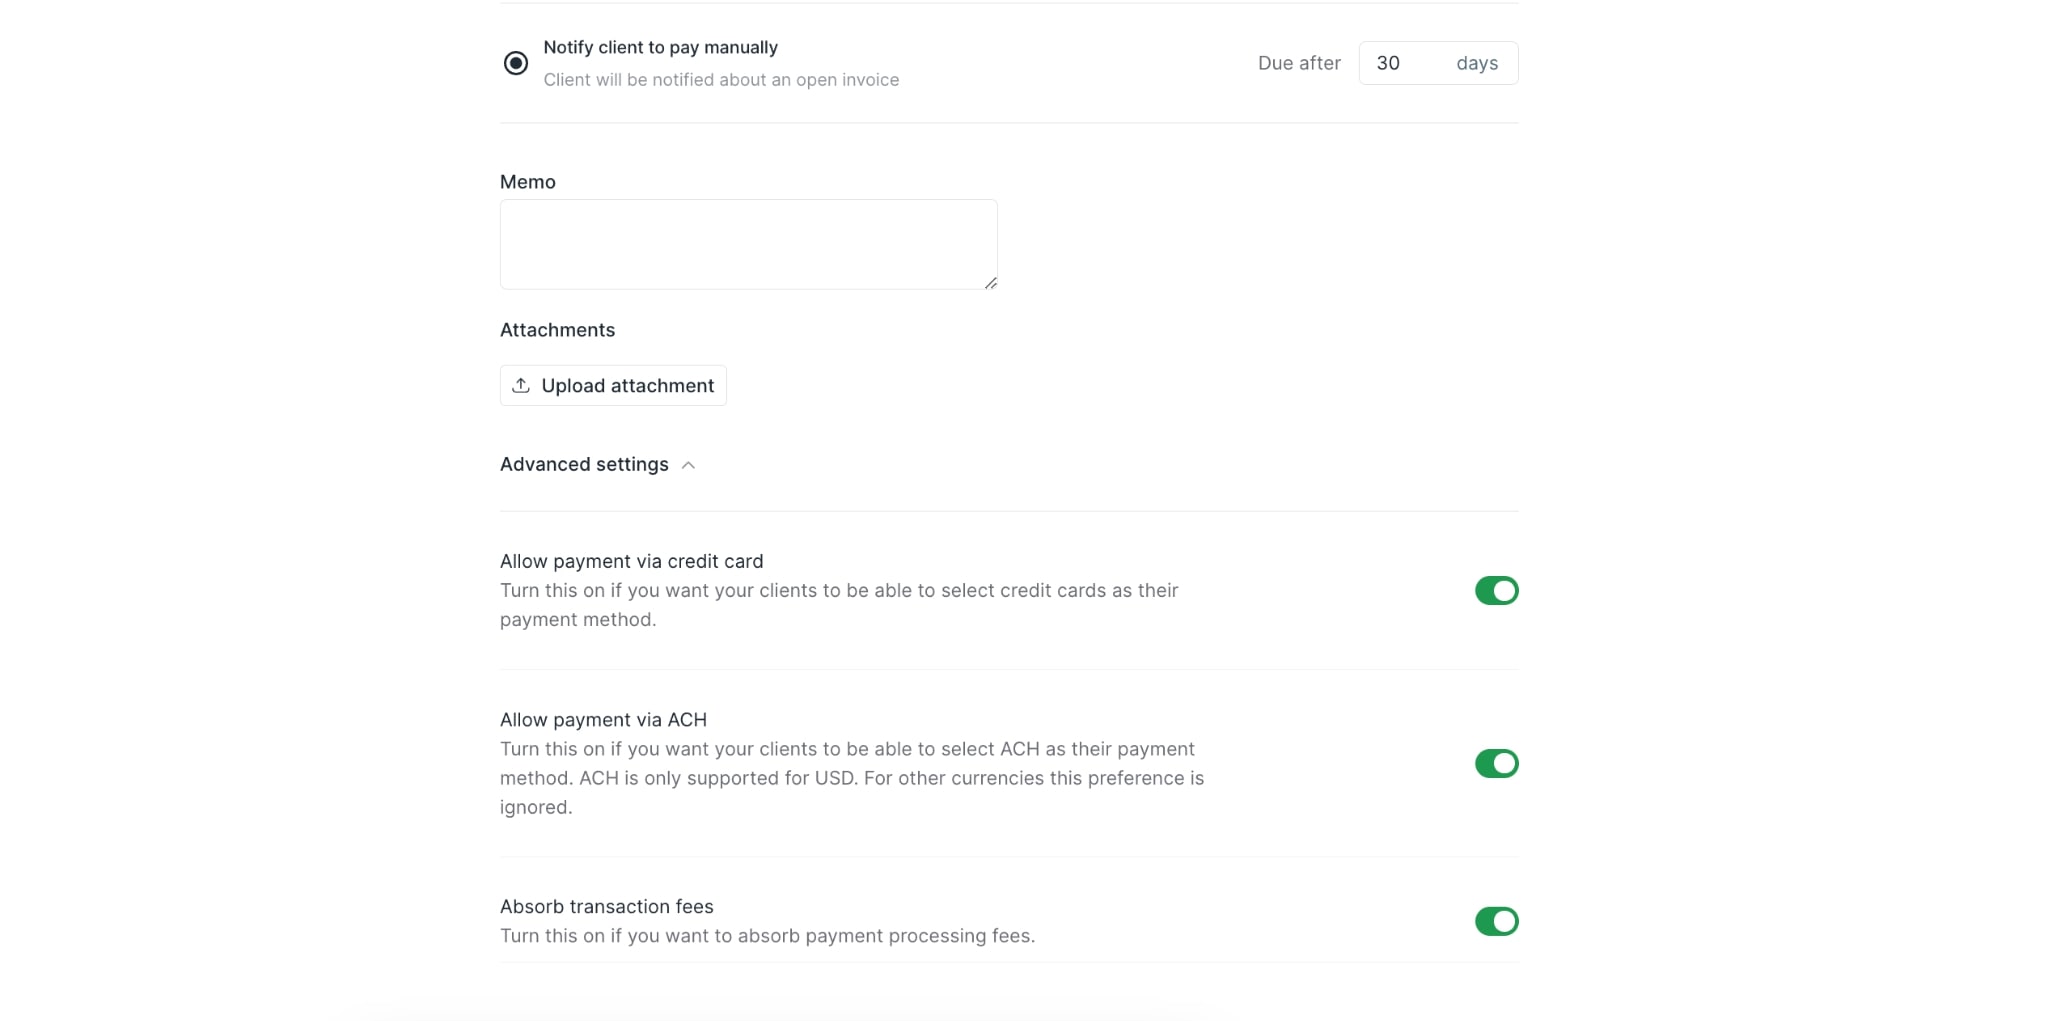
Step 4: Choose your payment methods. With Copilot, you can accept online payments through various methods including credit cards and ACH transfers. Navigate to the "Payment Options" section and select the methods you want to offer to your clients. You can also decide who should cover transaction fees.
Step 5: Save your changes. Once you've finished adding services and managing payment options, save your changes. Your invoice is now ready to be sent to your client.
Remember, the more payment options you offer, the easier it is for your clients to pay you, which can help you get paid faster. Now that your invoice is ready, it's time to email it to your client.
3. Email your invoice to your client
Before sending out an invoice, it's always a good idea to preview it to ensure everything looks perfect. Copilot provides an easy-to-use invoice preview feature so you can see exactly what your client will receive.
Once you're satisfied with your invoice, make sure to head over to the “Clients” tab on the right-hand sidebar and make sure your client’s email address is correct.
If you need help navigating this, be sure to check out this video:
Once you’ve verified your client’s information, go back to your “Invoices” tab and click on “Send Invoice.” The invoice will be sent to the email you set for your client’s profile.
And there you have it, your invoice is on its way to your client's inbox. But our work doesn't stop here. We still need to track and manage our invoices, a process made easy by Copilot. Let's explore this next.
4. Track and manage invoices in Copilot
Keeping track of your invoices and their payment status is essential for maintaining a healthy cash flow in your business. Fortunately, with Copilot, managing your invoices is as simple as a few clicks. In the 'Invoices' section of your Copilot dashboard, you can see a list of all your invoices along with their status — 'Draft', 'Paid', 'Open', or ‘Void’.
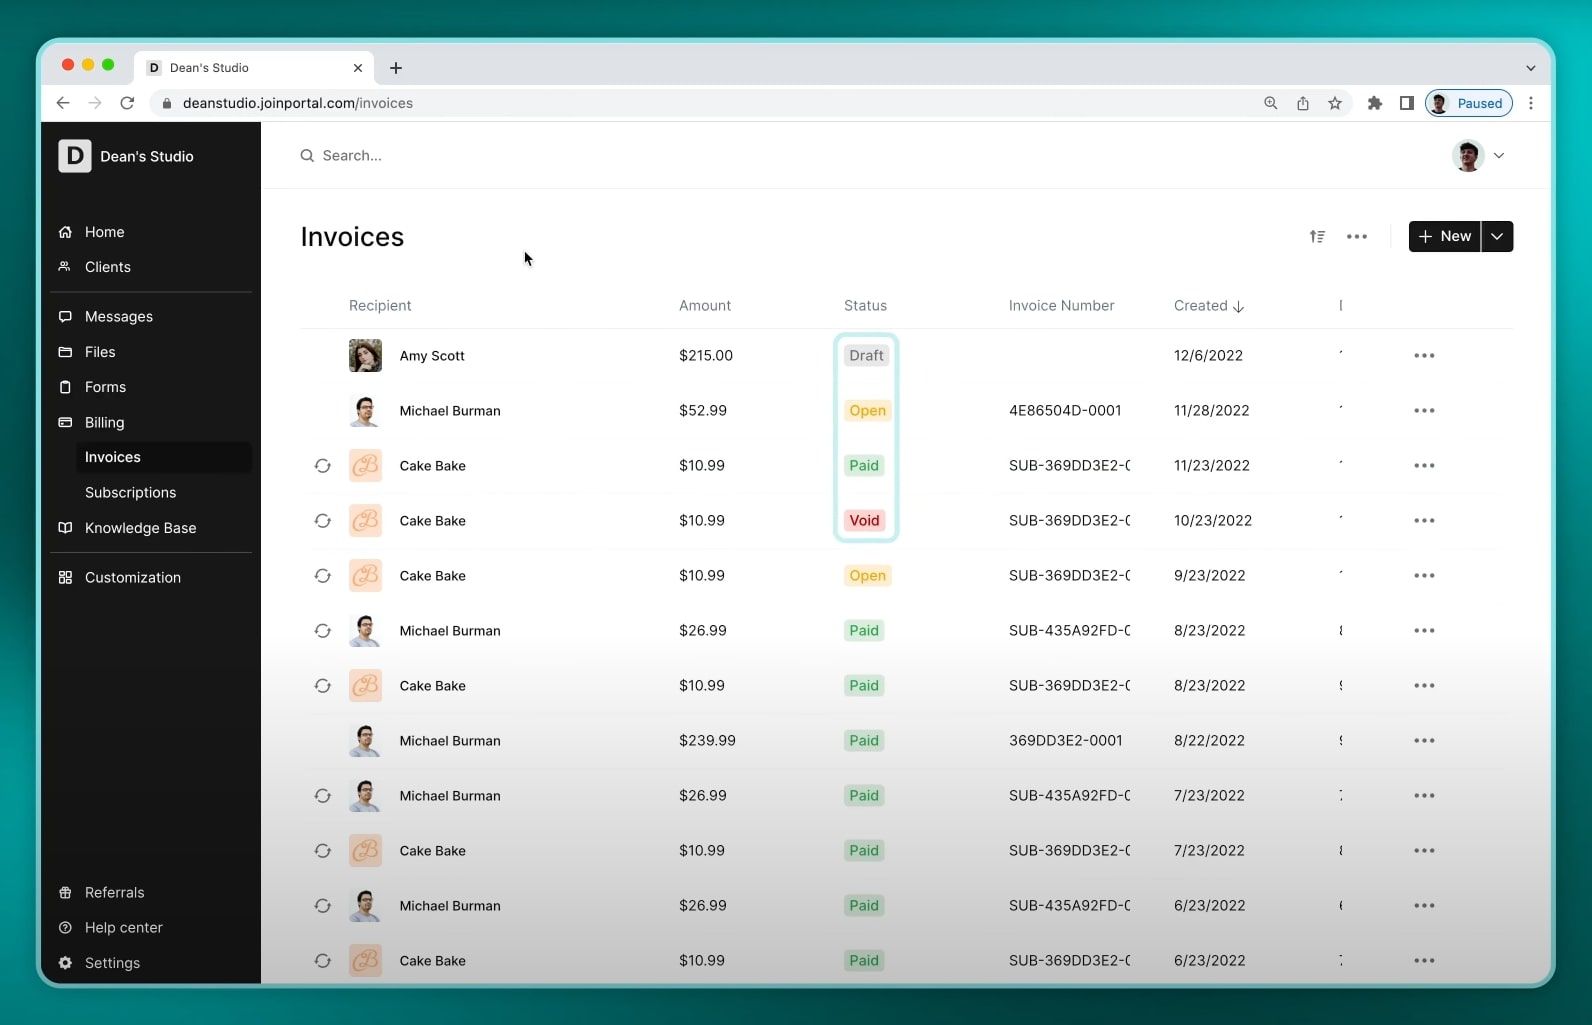
You can also use filters to sort your invoices by client, date, invoice number, or status for easy tracking. By offering a centralized location for all your invoice data, Copilot streamlines the management process and saves you precious time that can be used to grow your business.
In the next step, we'll see how Copilot helps with managing your money through seamless integrations.
5. Manage your money with integrations
Managing your finances efficiently is just as crucial as billing your clients. With Copilot, you have the power to integrate your billing system with popular financial management tools. Through the Copilot App Directory, you can easily integrate with QuickBooks, a leading accounting software, for seamless expense tracking and cash flow management.
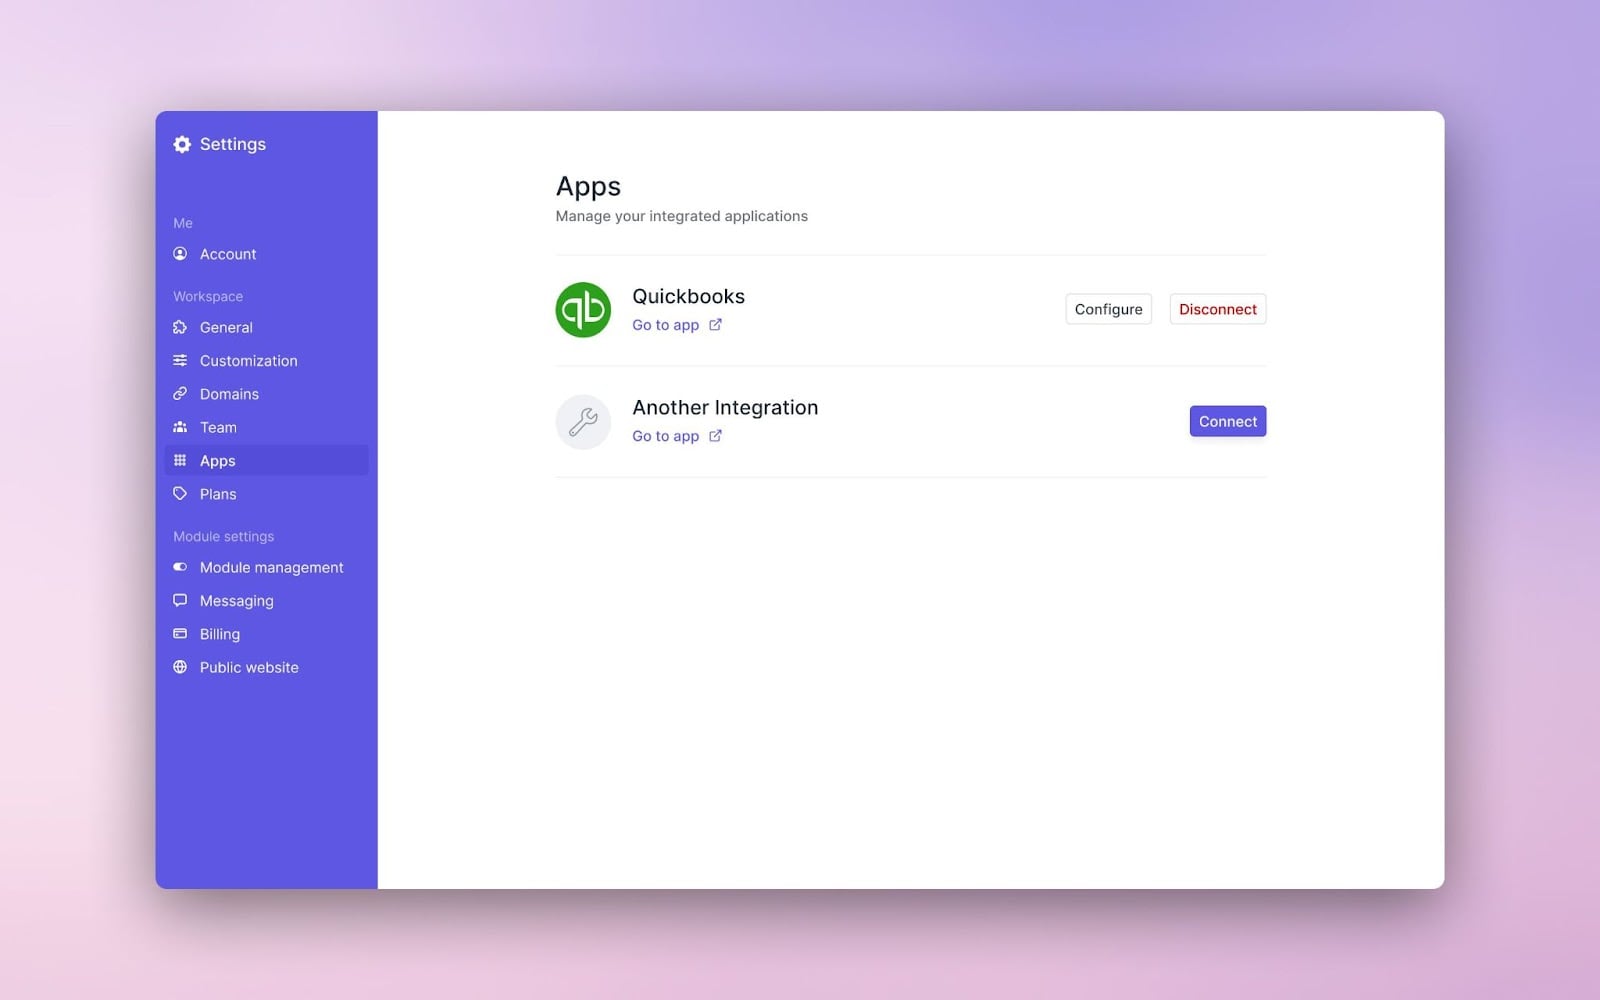
But that's not all. For those who prefer other financial and accounting software, or even just want to track their financials in Google Sheets or Excel, Copilot's integration with Zapier makes that possible. Simply set up the integration, and Copilot will sync your bank accounts and online invoicing data with your preferred platform, making financial management a breeze. With these integrations, you can rest assured knowing your financial data is always up-to-date and easily accessible.
Conclusion
Invoicing doesn't have to give you headaches or send you into a panic spiral. I know if you run a small service business, tackling stuff like billing can feel daunting. Been there! But with the right tools streamlining things — it's smoother sailing.
That's the beauty of leveraging Copilot — it's designed to make financial admin-like invoicing dead simple for you. We're talking easy-to-customize templates, options to showcase what services you offer, tools to directly email invoices to clients, and integrations to auto-sync everything with your accounting software. Huge time saver.
So instead of letting invoices intimidate you, take advantage of today's modern solutions. They handle the tedious work so you can keep all your mental bandwidth on delivering 5-star service experiences to your clients.
Because that's what this is really about — not just getting paid, but cementing why your clients are thrilled to invest in your offerings. When you have tools like Copilot in your corner efficiency up invoicing, you earn with more confidence and focus. So embrace it and know behind the scenes that you've got this streamlined!
Share this post
Sign up for our newsletter
Subscribe to our newsletter to receive emails about important announcements, product updates, and guides relevant to your industry.
