Back to Blog Home
How to create a Squarespace client portal (easiest guide)

If you’re reading this, chances are you’re looking for a way to allow your clients to create user accounts on your Squarespace website.
This way, clients can sign up and log into your agency or firm’s website portal so they can view everything from messages, reporting dashboards, documents, payments, and much more, specifically tailored for them.
Well, in this article, I’m going to show you exactly how you can create a Squarespace client portal. What makes me qualified to teach this? I run a marketing agency myself and have a client portal that my clients can log into. So, I’ll go over everything you need to know step-by-step.
Let’s get into it.
Does Squarespace have a client portal?
When using Squarespace as a website for your agency or firm, a common question that may come up is if Squarespace has a native client portal feature that allows your clients to log in and access important content. The simple answer is no, Squarespace does not have a native client portal feature.
However, Squarespace is a widely-used website builder and is popular for its use of use and simplicity. Because of this, there are many tools available on the market that allow you to “add on” a client portal to your Squarespace website. With so many options, all the way from platforms like Memberstack that are a bit more technical in nature, to Copilot that are designed specifically for client portals, there are many different routes you can take.
In this article, I’ll show you how to quickly set up a Squarespace website (if you don’t have one already), how to create a white-label client portal, and how to “marry” the two together to create a seamless experience for both you and your clients.
6 steps to create a client portal for any Squarespace site
Here are six steps to creating your Squarespace client portal:
- Setting up your Squarespace website
- Creating a ‘Sign up’ and ‘Log in’ button on your site
- Choosing a no-code client portal builder
- Customizing your client portal experience
- Connecting your client portal to Squarespace
- Maintaining and updating your client portal
Okay, grab a cup of your favorite drink and let’s dive in.
1. Setting up your Squarespace website
The first step to creating your client portal is to build a basic website on Squarespace. You don't need any technical skills. Think of it as piecing together LEGO blocks, but instead of plastic pieces, you're using pre-designed templates.
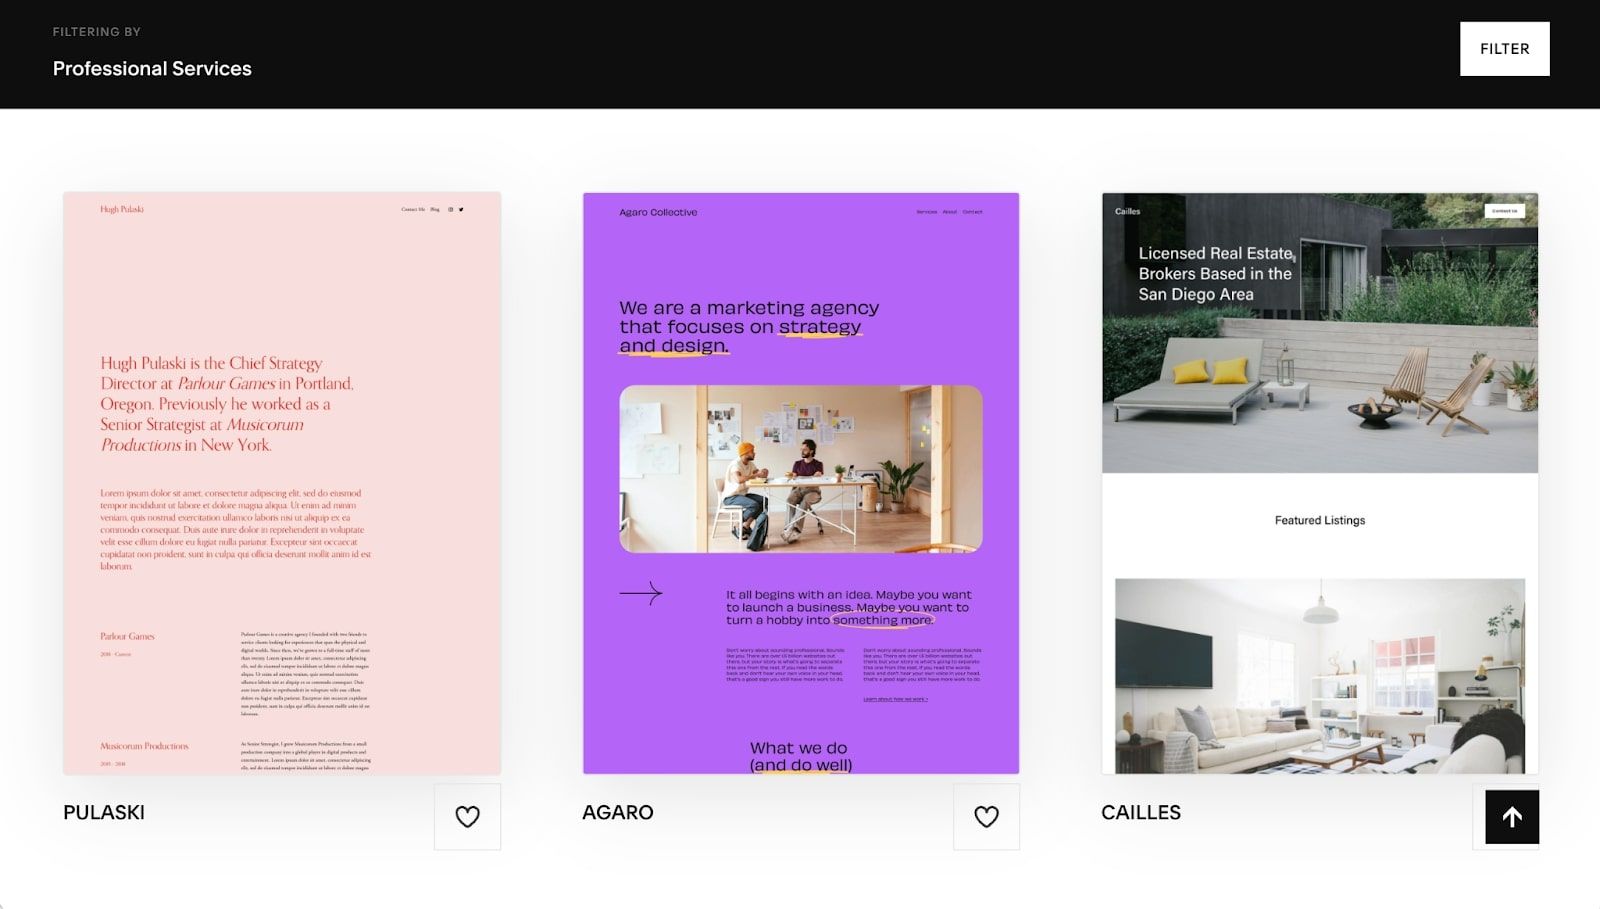
Squarespace offers a ton of different website templates for different industries and website types. In the case of this article, we’ll pretend like we run a marketing agency (because I actually do) and go with the Agaro website template.

To keep this tutorial straight to the point and not waste your time, I’m going to keep this template as is. But, you’ll definitely want to update the copy, colors, and any branding logos to reflect your actual business.
Most likely, you already have a Squarespace website if you’re reading this, so let’s jump straight to step two — creating sign up and log in buttons.
2. Creating a ‘Sign up’ and ‘Log in’ button on your site
To start, let's talk about adding the essential sign up and sign in buttons to your website. It may appear to be a minor detail, yet these two components are essential for setting up an efficient customer entryway.
To do this, you'll need to first navigate to your Squarespace site editor, where you can make changes or insert new items. Look for the option “EDIT” in the top left corner of your site editor:

Once you click the edit button, you will be able to add new elements on your site. Next, you want to hover over your navigation bar and click on “EDIT SITE HEADER.”

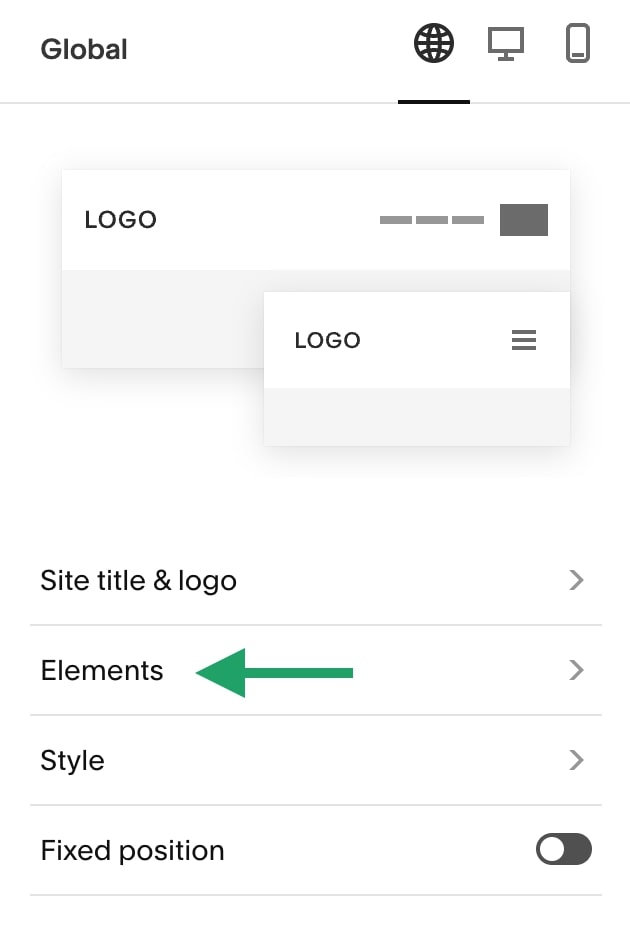
Once you do that, you’ll see a small pop-up window that allows you to edit different elements of your navbar. You’ll want to click on the “Elements” option.
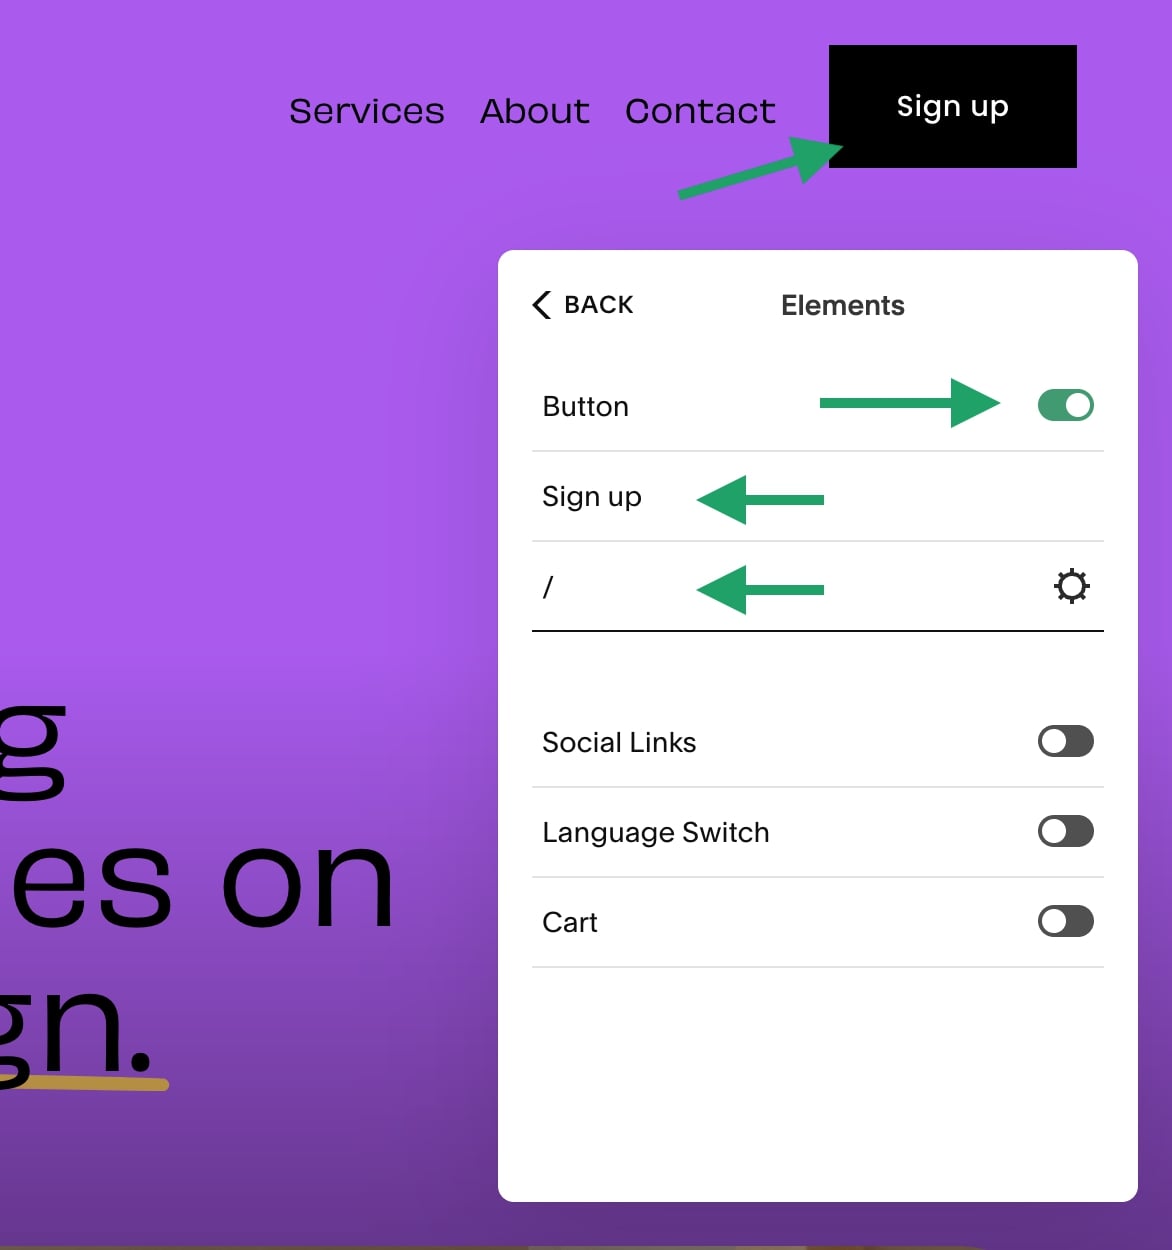
From here, you’ll want to turn on the toggle for “Button.” Once you do that, you’ll notice a button appear in your navigation bar, along with the option to edit the button text and link that the button points to.
You’ll want to change the button text to ‘Sign up’ and keep the link the button points to blank for now (we’ll come back to this in step five).
Before you move on, make sure to click “SAVE” in the top left corner.
As an optional step, you can also add a ‘Log in’ option in your navbar. By default, your sign up button can also act as a log in button. But if you want to make the log in experience a bit more seamless and not have existing clients click on the “Already have an account?” option on your client portal sign up page each time they try to log in, it’s a good idea to add a log in option.
For this, we don’t need to make it as prominent as our sign up button in our navbar. Instead of having this be another large button, we can simply create a link in the navigation bar with the text ‘Log in’.
To do this, you can watch this video from Squarespace:
Or, you can watch me do it real quick through a series of screenshots below. First, you’ll want to go back to your main site editor. From there, you’ll want to click on “Website” in the left-hand column of your editor.
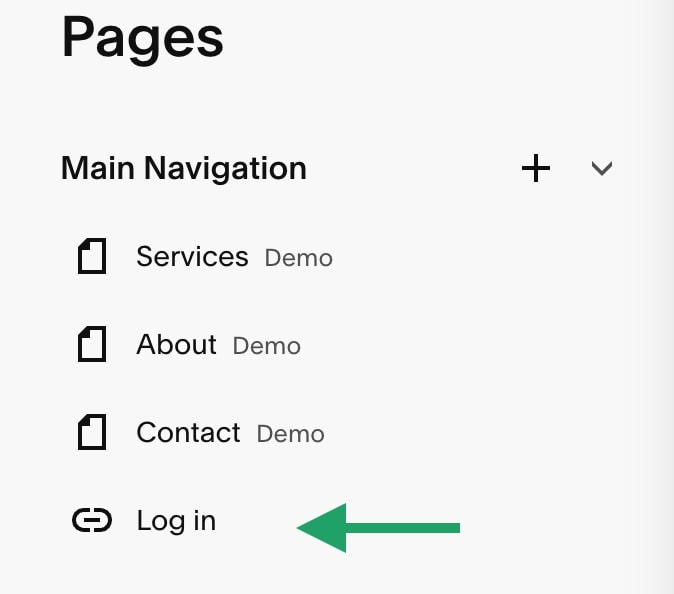
Here, you’ll see the option to edit your homepage, and more specifically, you’ll be able to add new elements to your navigation bar. Click on the plus icon under “Main Navigation.”

Once you do that, scroll down to the bottom of the pop-up and click on “Link.” Again, another pop-up will appear and here you can enter the name of your link and the destination URL.
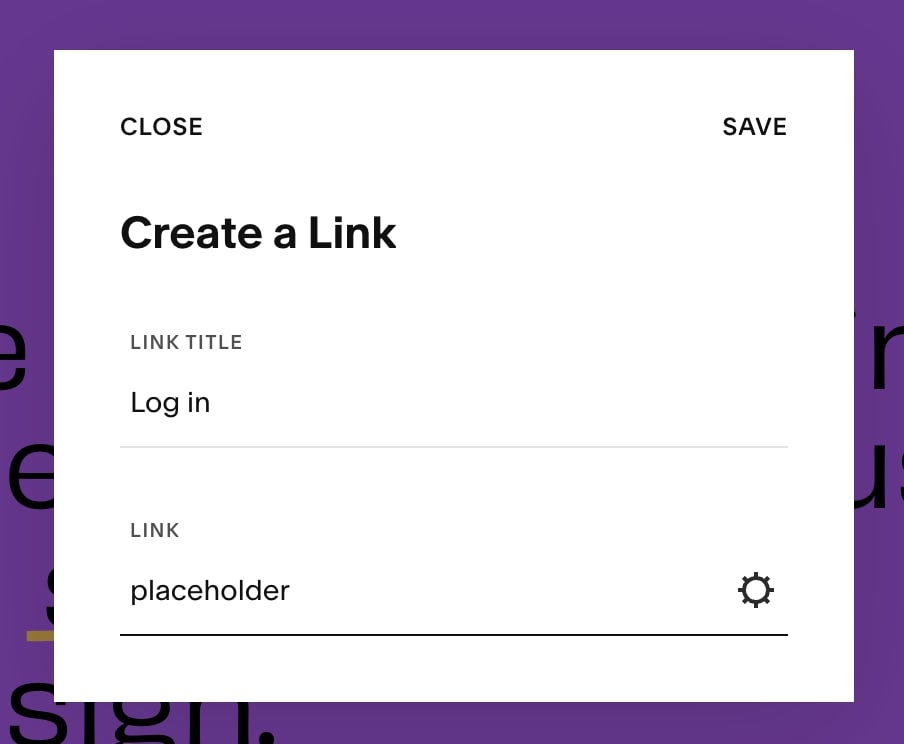
For the text, add ‘Log in’ and for the link you can add any random text as a placeholder for now (we will come back to this part in part five of this guide). Next, click save.
You’ll now notice a log in link in your navbar. But, you’ll want to bring this to the right — next to your sign up button. To do this, just hold and drag the link to the bottom in your “Main Navigation” editor:
Sweet! Now our Squarespace website has a sign up and log in option.

Now, it’s time to create the client portal section of your website.
3. Choosing a no-code client portal builder
With the surge of no-code solutions, creating a client portal has never been easier. Even without coding knowledge, platforms like Copilot offer an intuitive way to set up and manage your own client portal.
With Copilot, this means providing clients with access to services such as messaging, payments, file-sharing, and more within their personalized white-label portals.
Disclaimer: I don’t work at Copilot but I am a customer and love their platform. There are other no-code client portal tools out there that you can check out here. But, Copilot is my personal favorite.
Copilot has a full guide on how to set up and navigate your client portal here. But, for the sake of this article, we’ll quickly walk through the initial setup stages. The first step is to create a free Copilot account, which you can do here.
Once you log into your admin portal, you will see this page:
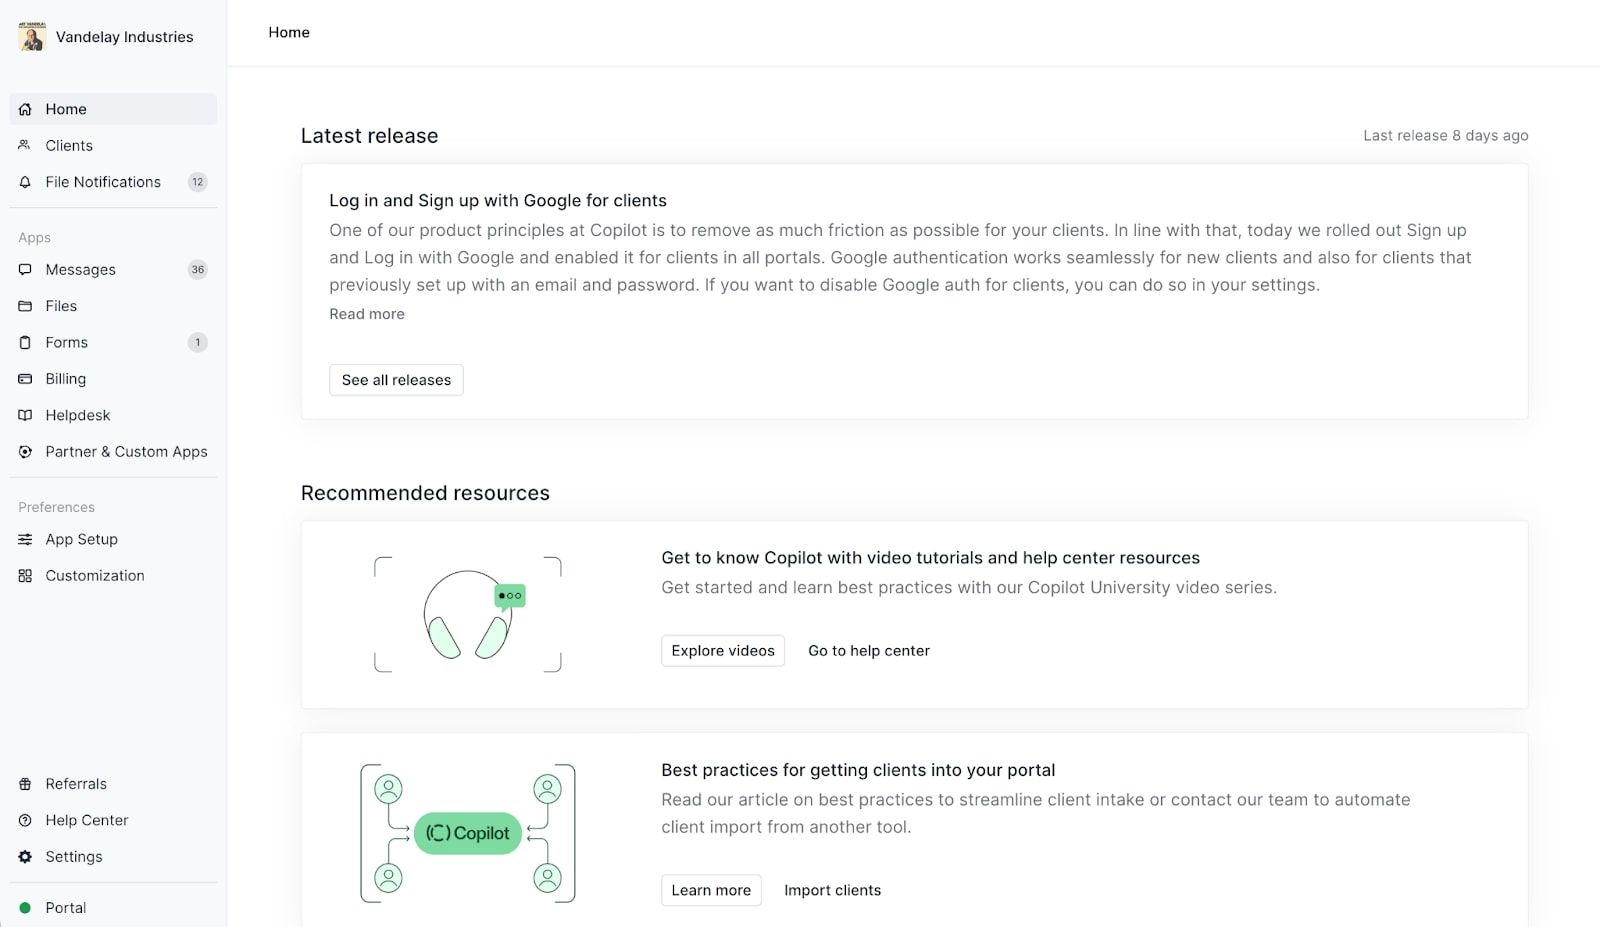
This is the view you will have as an administrator. Here, you can see all your clients, check messages from them, and handle things like forms, billing, files, messages, app integrations, and your helpdesk.
Good news — setting up a client portal is pretty straightforward. Once you add a client, they'll get their own custom portal, which you can style to match either your look or theirs.
To get a feel for how Copilot works, you can play around with this demo portal. But, if you’ve already made an account, you’ll want to invite a client (real or fake) and take it for a test run.
To do this,
- Navigate to the Clients page.
- Click on New client > Create one client.
- Enter a name and email. Note that you can use the same email you used for your internal user.
- Copy the invite link and paste it into a browser tab. Or, send an email invite to yourself and log in from the provided link.
- Activate the test client.
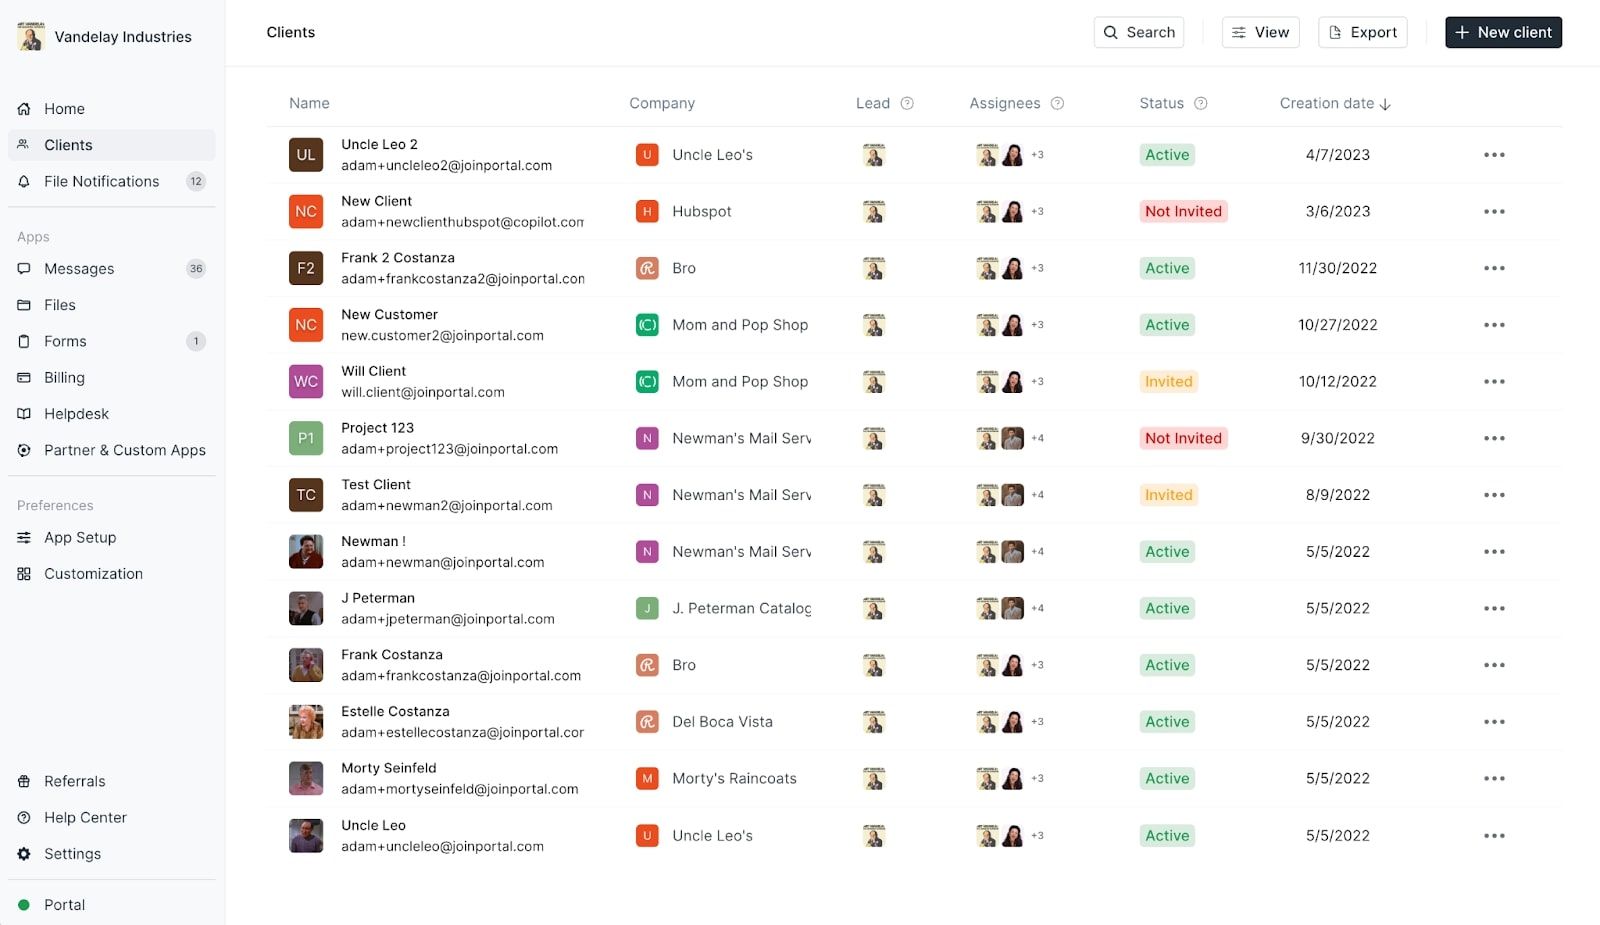
Now, you can see all your clients in the ‘Clients’ tab of your admin portal.
Once you find your way in Copilot, you’ll want to add a custom domain so it fits the branding and URL of your Squarespace website. Copilot has a library of YouTube tutorials to help you do this, and many other things. But, we’ll go over this briefly in the next section.
4. Customizing your client portal experience
With Copilot, you have the power to change a bunch of things like how your sidebar looks, colors, logos, and analytics codes, even the name that shows up for your brand.
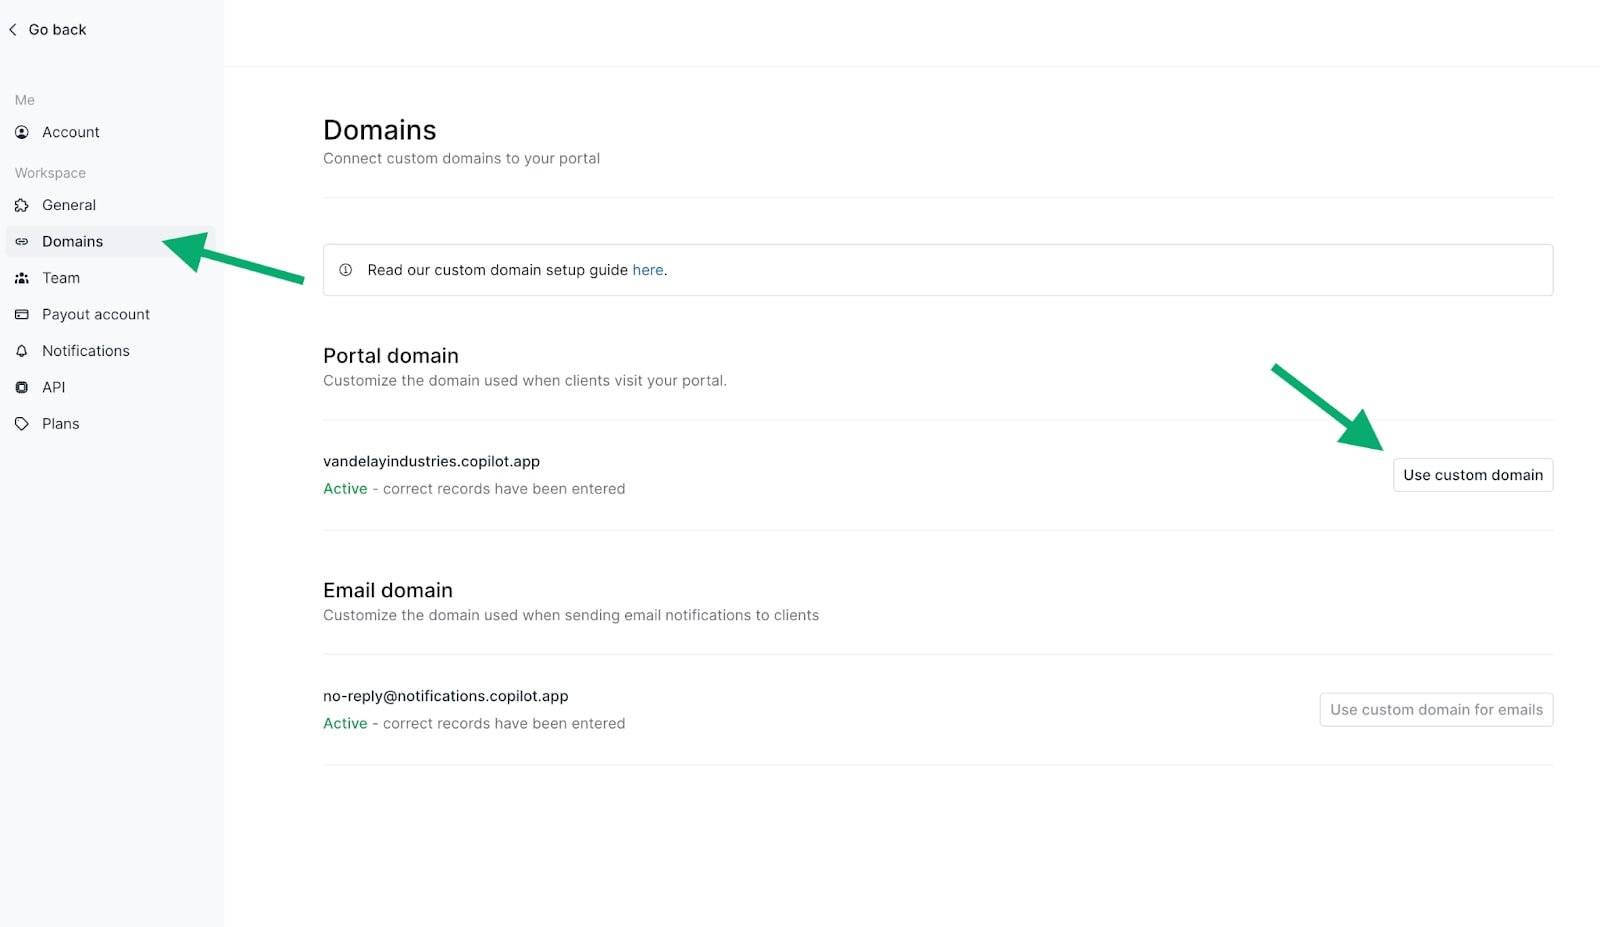
For this guide, we’ll stick to just customizing our website name, aka our "domain." To give your client portal an on-brand name for your Squarespace site, head over to your admin area and find “Settings” at the bottom left.
The side menu will switch up a bit, showing some new special settings. Look for the one that says 'Domains' and click on it.
Most users who add a client portal to their site choose a special address for it, like a subdomain within their main domain. For example, if your main Squarespace site is yourwebsite.com, your client portal for your customers or clients could live on portal.yourwebsite.com. Many businesses like using the name “portal”, but you can pick whatever you like.
If you decide to do this, you'll need to add your subdomain in your website’s DNS settings. The steps for this depend on where you bought your domain name. But don't worry, there’s a step-by-step guide on doing that right here.
In our example, we have our main site, copilot.app. But our special Copilot client area is on vandelayindustries.copilot.app. That's the address we'll put on our main Squarespace site.
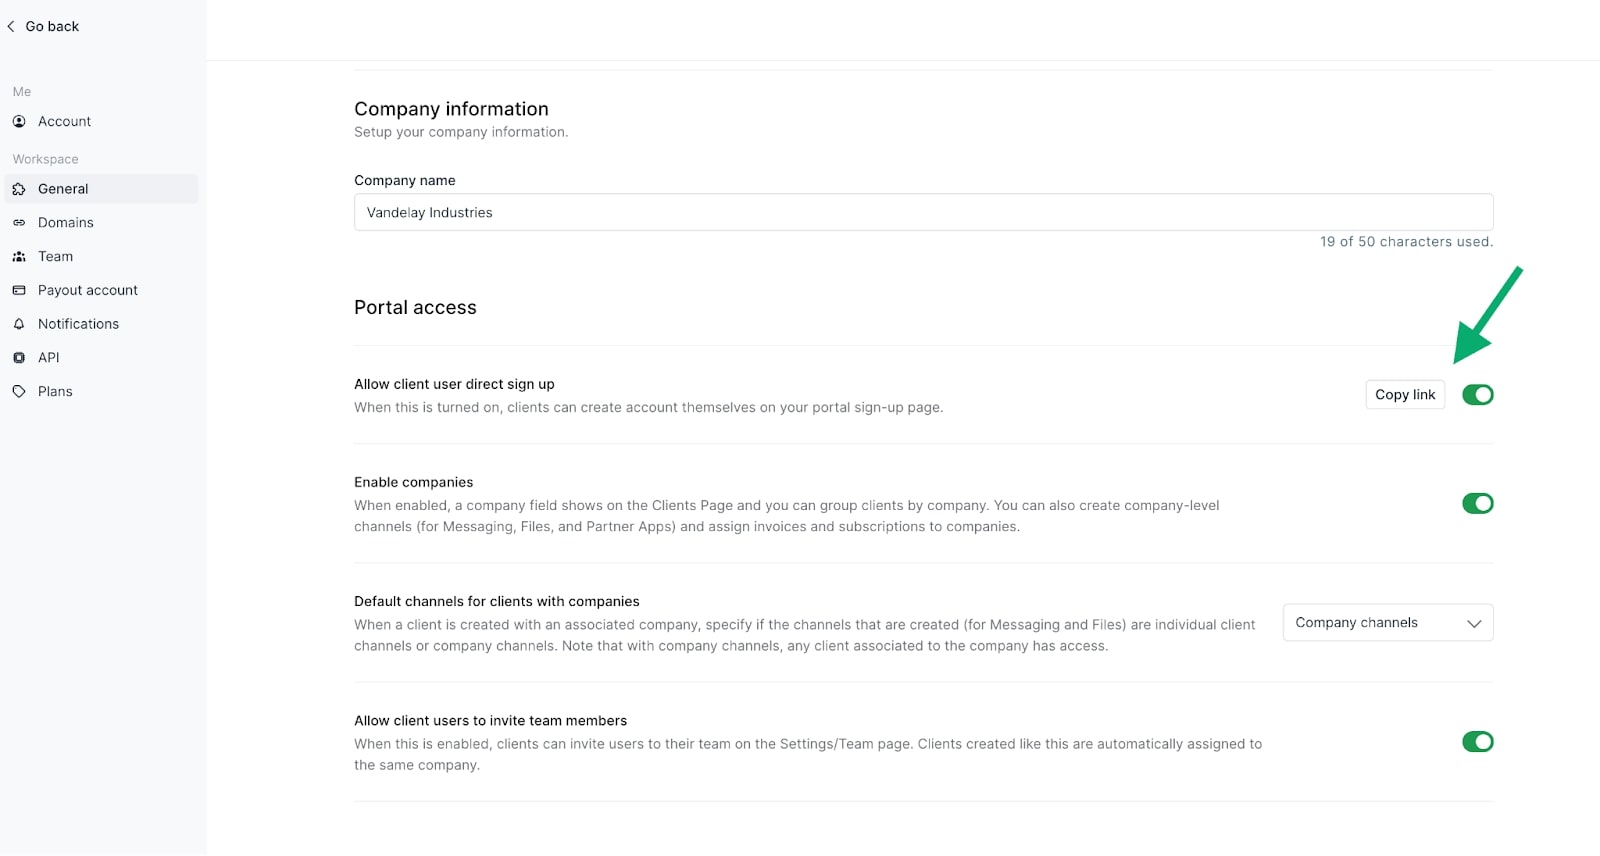
But before we get to that step, head back to your portal settings and this time click on the ‘General’ tab. Here, you’ll want to turn on the “Allow client user direct sign up” option so clients can sign up directly from your website. You’ll also want to click on “Copy link.” This will be the link we add to our sign up button on our main Squarespace website.
Now, let's see how to make this all work!
5. Connecting your client portal to Squarespace
Finally, this is the part where we make our Squarespace client portal come to life. Because we set up our website in part two of this guide, this part will be super quick.
The first step is to go back to your Squarespace site editor. Go to your navigation bar settings, click on ‘Elements’, and paste the link you copied in the previous section of this guide (see the last screenshot above).
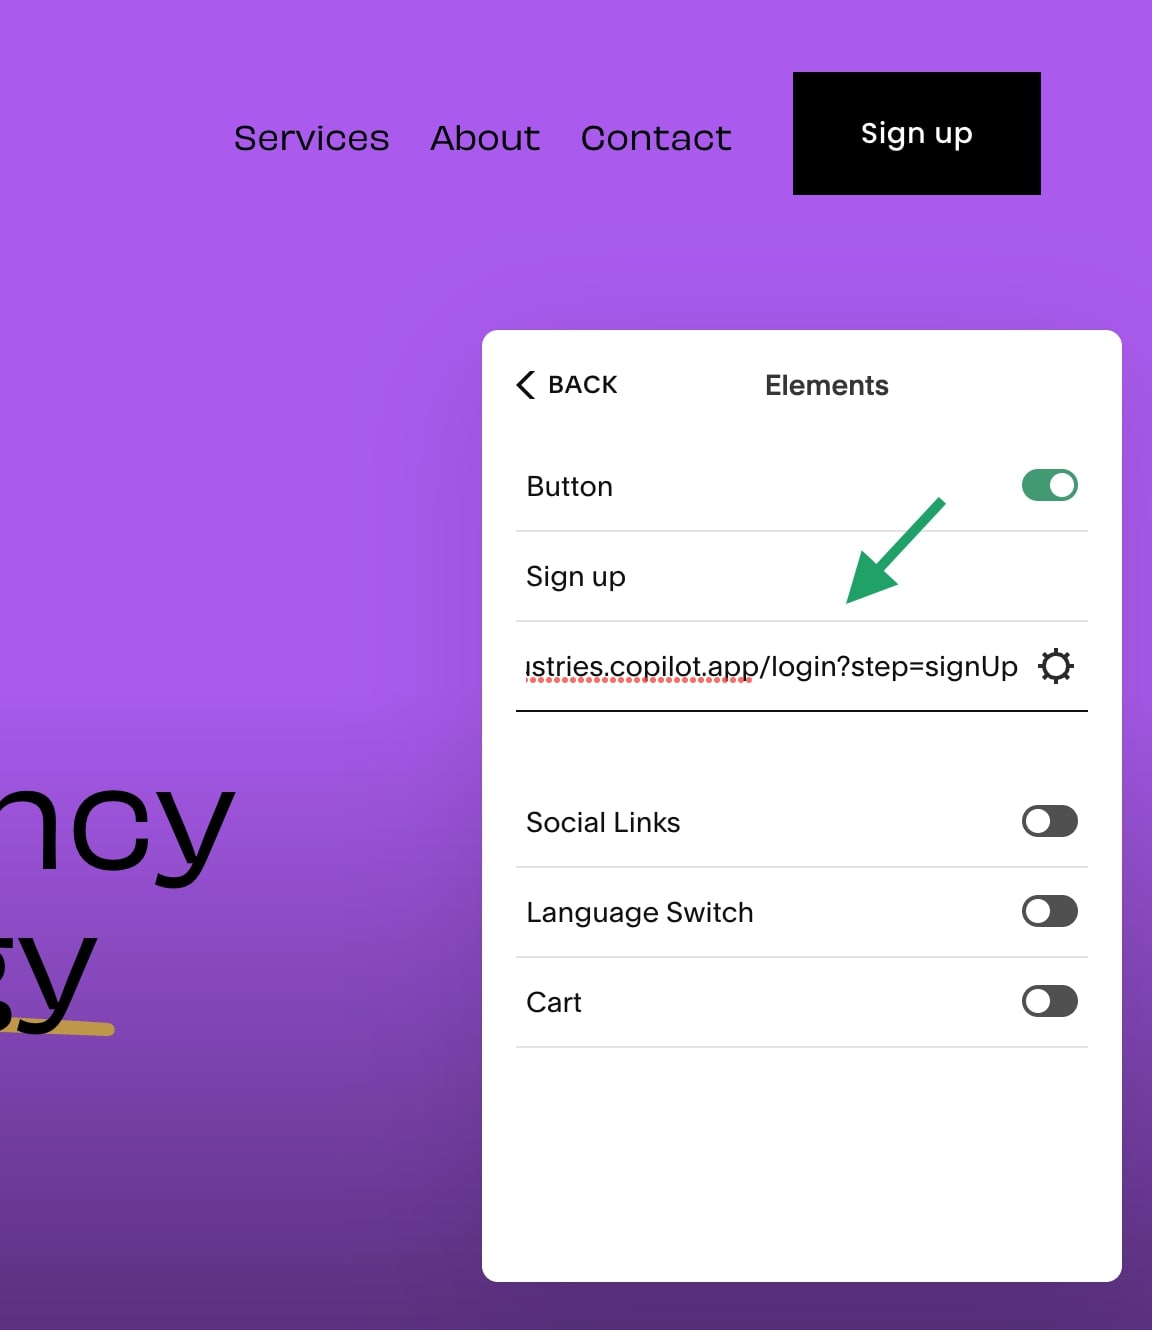
Once you paste your link, click ‘SAVE’ in the top left corner of your site editor. Now, when you click on the sign up button on your Squarespace website, it should open your client portal sign up page. Here clients can sign up via Google or their own email!

Just to note, your sign up page can be customized with your own logo and image (as done with the demo example above).
Great, we have a working sign up button now! But, we still need the log in link to work. To get the link to add to our ‘Log in’ navbar link, click on ‘Already have an account?’.
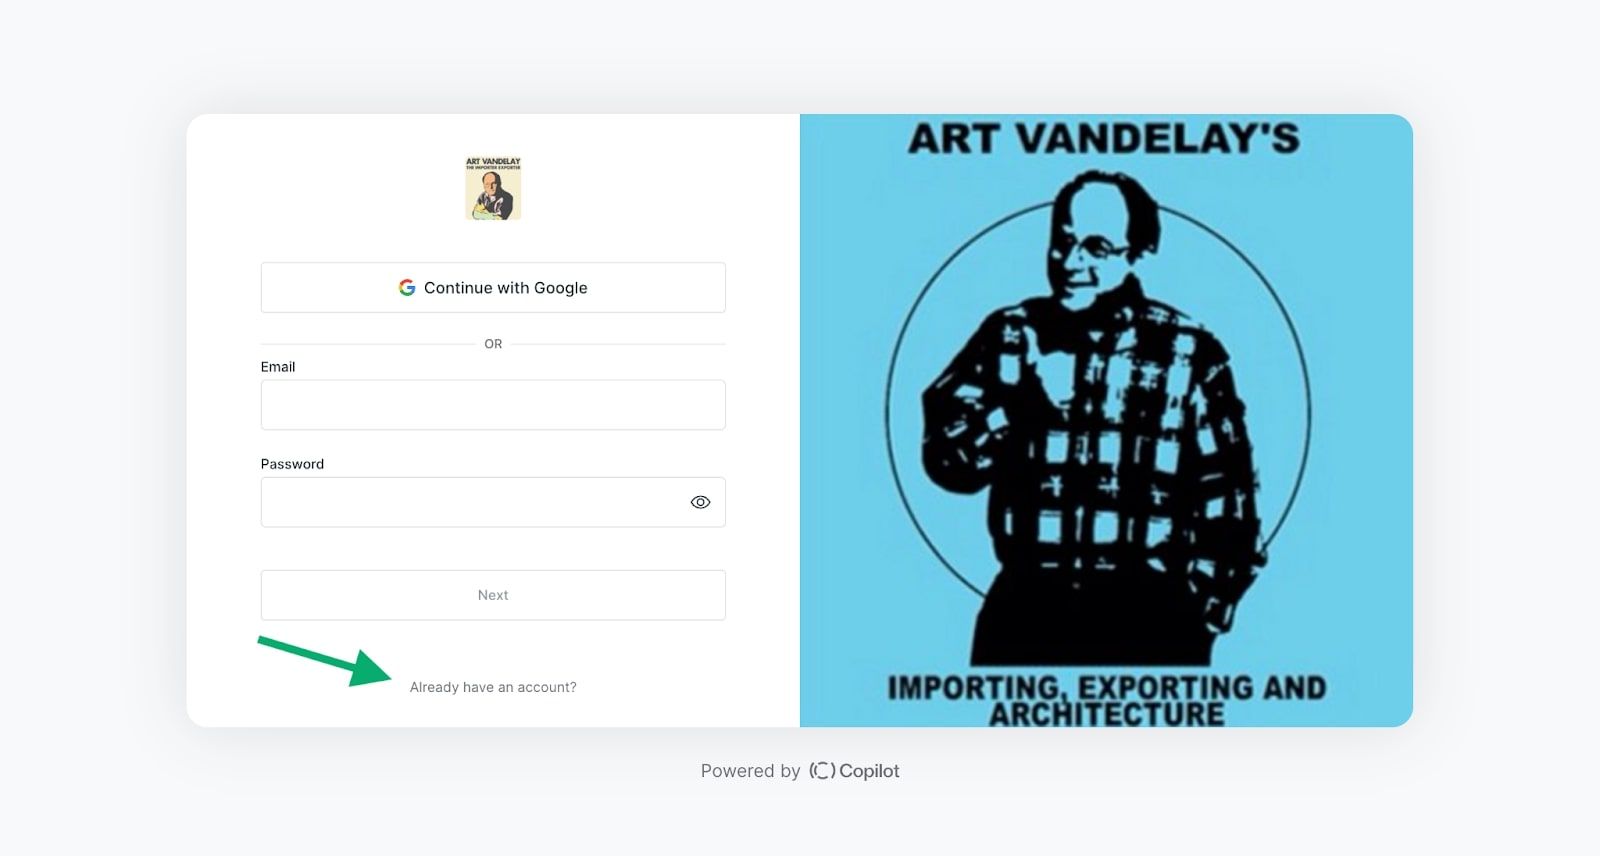
This will open your log in page for your client portal. The URL will have a small difference compared to your sign up link — having ‘?step=signIn’ at the end of your client portal login URL. Copy the link of your sign in page and head back to your Squarespace site editor to paste this link into your ‘Log in’ link button.
As a reminder, go to Website > Main Navigation > Log in and click on the setting icon to open this pop-up:

Paste your sign in link and click ‘SAVE.’ Now, go back to your main website and click the ‘Log in’ option in your navigation bar to test if it works.

Voila! We now have a fully functioning Squarespace client portal.
6. Maintaining and updating your client portal
At this point, you’re pretty much done creating a client portal for your Squarespace website. But, you’ll always want to look for new integrations to add to your Copilot client portal based on client needs.
Keeping your client portal in top shape is a bit like tending to a garden. It requires regular attention, occasional pruning, and an eye for potential improvements.
No one knows how well things work better than those who use them daily: your clients. Gathering their feedback using Copilot’s forms feature, and looking for where there may be room for improvement.
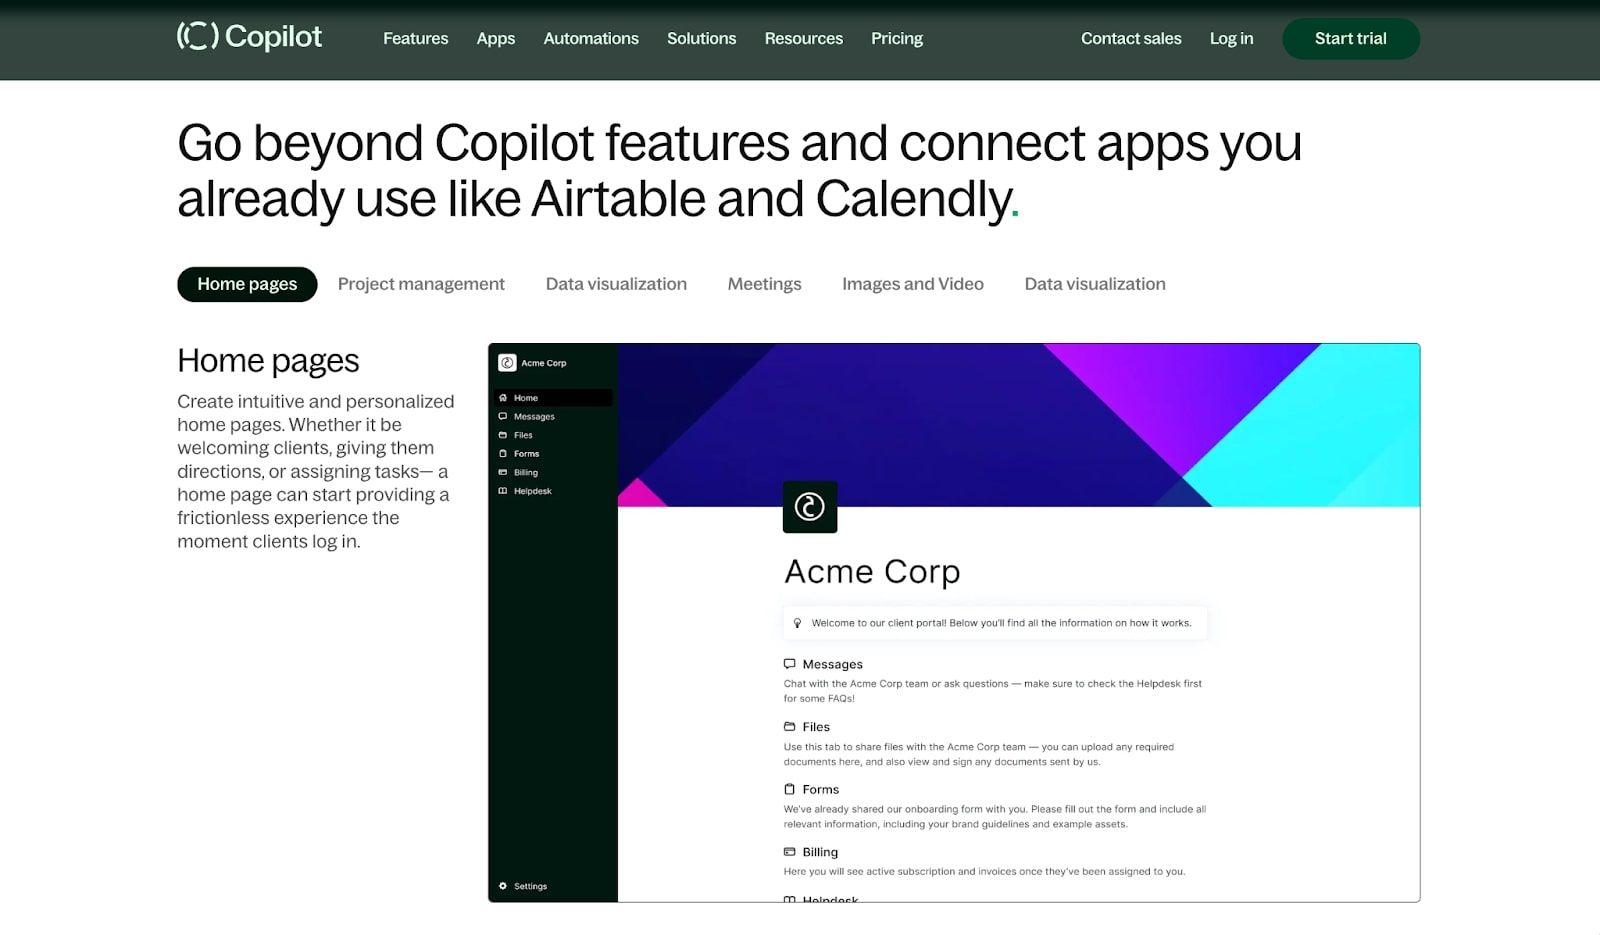
Depending on the services you provide, you can also integrate content calendars, SEO dashboards, spreadsheets, and much more for your clients to view directly in their client portal.
You can also use Copilot Automations to automate your client onboarding flow or any repetitive tasks in your workflow.
The look of your client portal also matters too. If necessary tweaks become apparent over time (like changing button colors), don't hesitate to make those changes. After all, a garden isn't just about functionality — it's also an aesthetic experience.
Conclusion
So, you've made it through the twists and turns of setting up a Squarespace client portal. Not too shabby! We started with crafting our Squarespace website and laid down those crucial sign up and log in buttons. Then, we met no-code client portal builders like Copilot, making it super easy to connect a client portal to our Squarespace website.
And finally, we fine-tuned the user experience in our client portal by customizing features to fit our clients' needs perfectly. Moving forward, remember: keep updating and maintaining that shiny new client portal. It's an evolving tool for efficient communication — not just a one-time setup gig.
Share this post
Sign up for our newsletter
Subscribe to our newsletter to receive emails about important announcements, product updates, and guides relevant to your industry.
