Back to Blog Home
How to onboard a new bookkeeping client: A full checklist

You just found a client and they’re ready to start working with you.
Now, you have a bunch of things going on in your head.
How do I provide an amazing experience so my client wants to work with me for many years to come? How do I make sure I get paid for my services on time? How do I keep everything organized and secure so I can keep track of everything and no sensitive information gets leaked?
Well, in this article, I’m going to address all of these.
I’m going to show you a six-step bookkeeping client onboarding checklist that will allow you to onboard clients with ease. We’ll go over everything you need to think about to create a 5-star onboarding experience. And we’ll also go over how you can automate many aspects of your onboarding process so you can create a repeatable system that is free from errors.
Alright, let’s get started.
What does a bookkeeper need from their clients?
When going through your bookkeeping client onboarding checklist, it’s important to make a list of things you need from your clients. This can look different depending on the types of services you offer and the industry your clients are in.
We’ll get more into this in step four when we talk about intake forms. But to get straight to the point, this typically includes:
- Bank and credit card statements: Your clients should give you access to their bank and credit card accounts or send regular statements to their bookkeeper. This allows the bookkeeper to reconcile transactions and make sure that all financial activity is recorded.
- Receipts and invoices: Your client should provide copies of all receipts and invoices related to their business expenses. This helps the bookkeeper categorize expenses and prepare accurate financial statements.
- Payroll information: If the bookkeeper is responsible for managing payroll, they will need access to employee information, pay rates, and hours worked. Clients should provide this information on a regular basis and notify the bookkeeper of any changes.
- Sales data: For businesses that generate revenue, clients should provide detailed sales data, including customer information, product or service details, revenue numbers, and transaction amounts. This helps the bookkeeper track income and prepare accurate tax filings.
- Loan and investment documentation: If your client has any business loans or investments, they should provide you (the bookkeeper) with relevant documentation, such as loan agreements, interest statements, and investment account statements.
- Previous financial records: If your client has worked with other bookkeepers in the past, it’s important that they give you their previous years' tax returns, financial statements, and any other relevant historical financial data. This helps you get a better picture of your client's financial history and helps you create a plan of action moving forward.
It's important for you as a bookkeeper to communicate these needs clearly to your clients and to set up secure channels for sharing sensitive financial information (which we will get into in step one below).
Alright, without further ado, let’s get started with a bookkeeping client onboarding checklist that will help you stand out from other financial services providers.
6 steps to onboarding a new bookkeeping client
Here is a standard bookkeeping client onboarding checklist:
- Get your client portal ready
- Send a contract to be e-signed
- Send an invoice or start a subscription
- Send a client intake form
- Personalize your client's workspace
- Have a kickoff meeting to set expectations
Alright, let’s get into the good stuff.
1. Get your client portal ready
The first step in your onboarding checklist actually starts before you get your client involved in the onboarding process.
Consider this part of your onboarding, step 0. In step 0, we want to set the stage so our professionalism and client experience blows away our client.
One way to stand out from other accounting firms and CPAs providing bookkeeping services is to leverage technology to create a “tech-enabled” approach. Not only will this impress our clients when they first start working with us, but this will actually make your life a lot easier when it comes to delivering on your services as well.
The foundation of a tech-enabled approach to onboarding is with a white-label client portal, like Copilot. With Copilot, you can create a branded client portal that matches your firm's identity, making a professional first impression on your new clients.
I’m not going to go into too much detail in this article on how to set up Copilot, but I highly recommend checking out this video:
Here, we want to create a profile for our client within our admin client portal (as shown in the video above). This way, as we go deeper into the onboarding process, we can keep all of our client data organized.
Think of this like a secure, digital filing cabinet (that your client can access remotely) that’s ready for any exchange of information, data, or payments.
By investing time in setting up your client portal before engaging your new client, you’ll set yourself up for a 5-star onboarding experience. Your client will appreciate the effort you've put into creating a personalized experience, setting the stage for a successful long-term relationship.
Plus, with a well-organized client portal, you'll be able to streamline your work, reduce back-and-forth communication, and provide a better overall service to your bookkeeping clients.
2. Send a contract to be e-signed
Once your client is in Copilot, and you’ve sent them a link (or email notification) to create their own personal portal, it’s time to send them a contract.
Here, we can leverage Copilot’s built-in contracts app. And as of recently, you can now generate contract templates as well.
A well-drafted contract is essential for setting clear expectations, defining the scope of work, and protecting both your firm and your client. With Copilot's Contracts App, you can streamline the contract signing process and get started on the bookkeeping work faster.
To send a contract through Copilot:
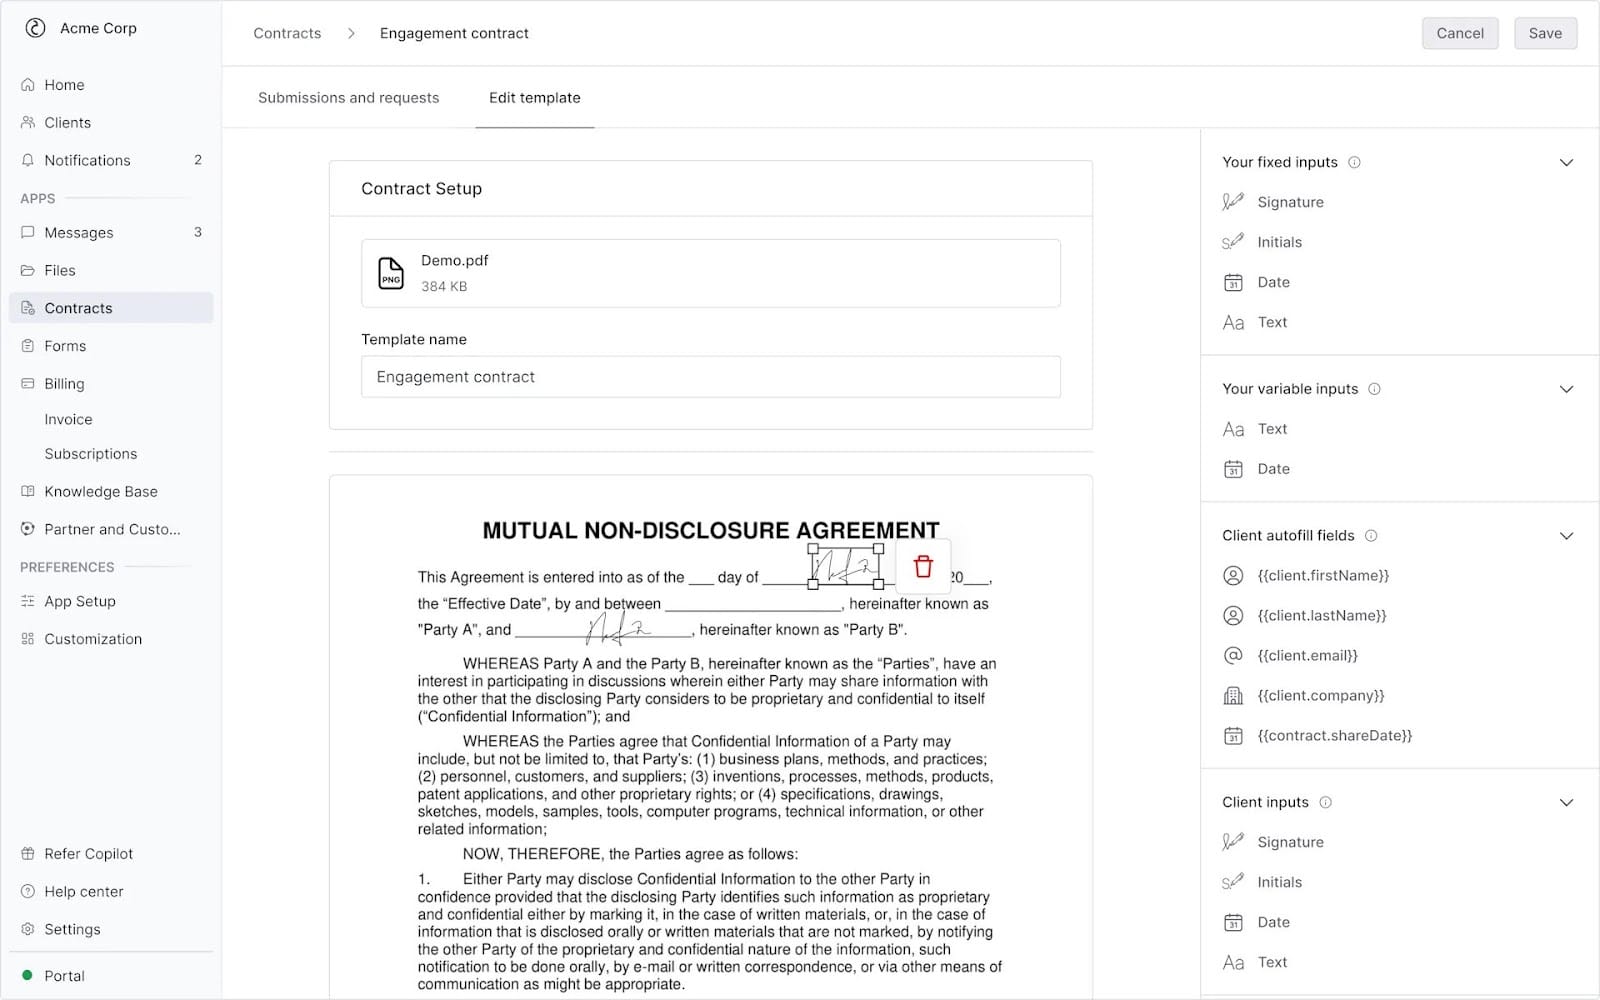
- Create a new contract by uploading your own pre-existing contract and setting it as a template.
- Customize the contract to fit your specific client's needs. Include details such as the scope of work, pricing, deliverables, and any special terms or conditions.
- Use Copilot's built-in e-signature tool to send the contract to your client for signing. Your client can review and sign the contract directly within their portal, eliminating the need for printing, scanning, or mailing physical documents.
- Once the contract is signed, it will be automatically stored in your client's workspace for easy reference. You'll also receive a notification confirming that the contract has been executed.
By using Copilot's Contracts App, you not only save time and streamline the onboarding process but also demonstrate your professionalism and commitment to legal best practices. Your client will appreciate the ease of signing the contract electronically and the clarity it provides regarding your working relationship.
Plus, with the signed contract stored securely in Copilot, you'll always have easy access to it if needed, providing peace of mind for both you and your client.
3. Send an invoice or start a subscription
Next up, getting paid! This part will depend on how you approach payments in your business and the types of services you provide. For example, some professionals like to bill upfront before the work begins (or bill a partial amount). While others, like to bill after a project is completed.
So this step is going to depend on how you approach getting paid. It may be a later step if you don’t bill upfront. But regardless, I want to explain a few things about billing.
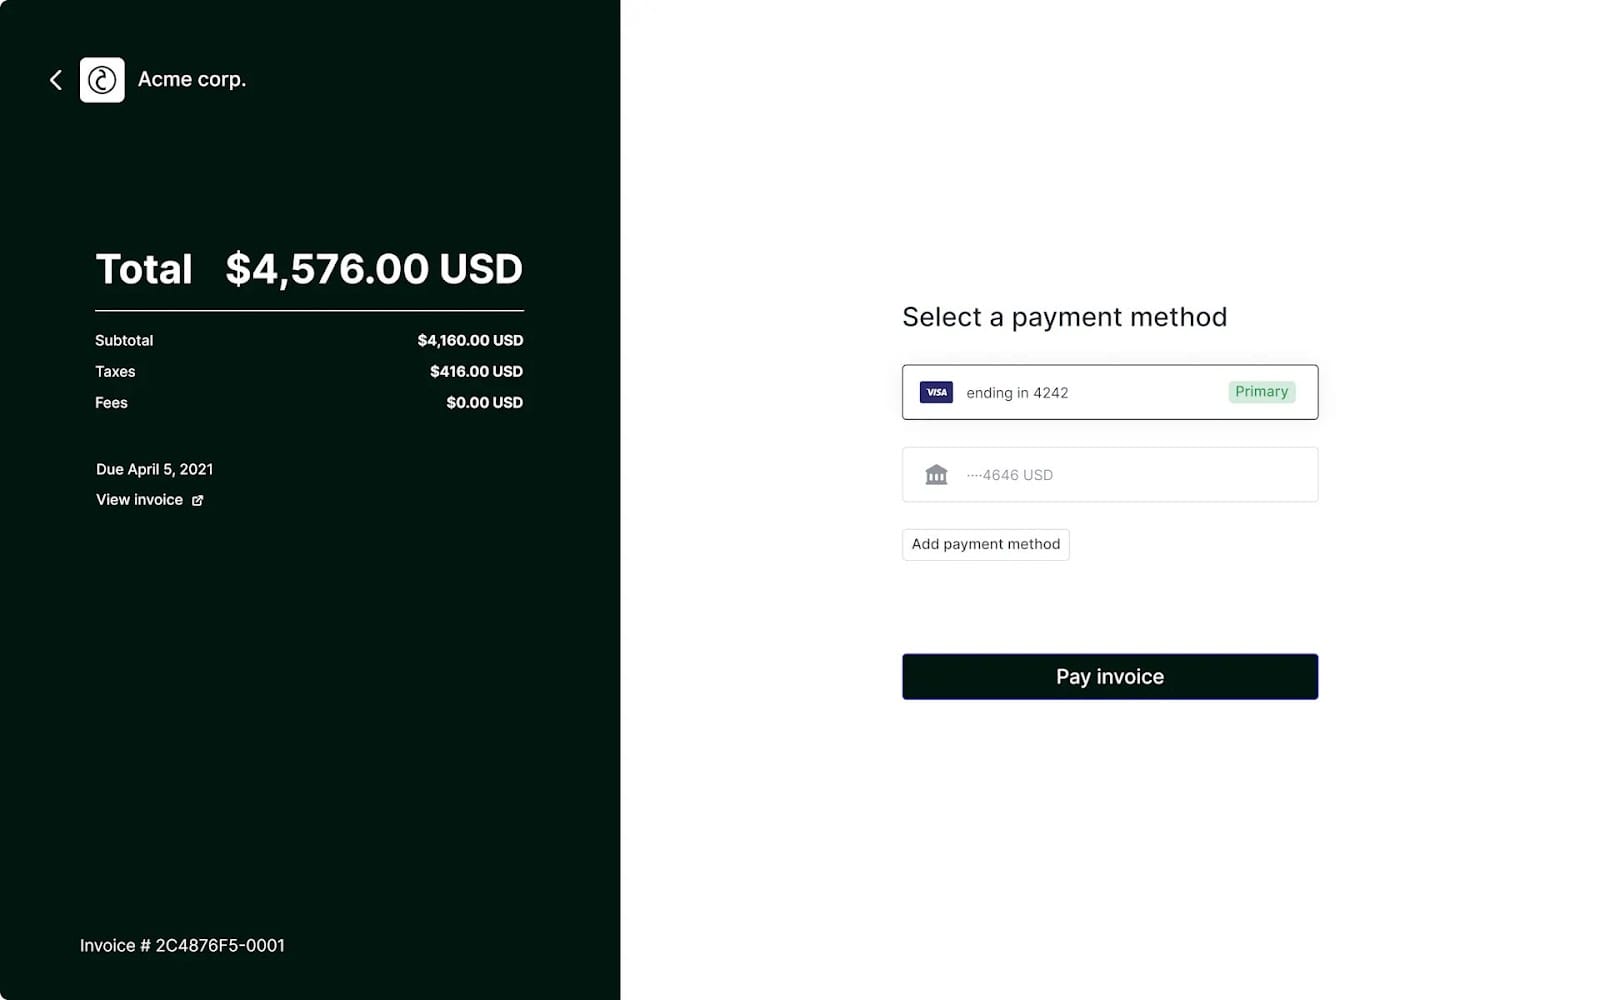
The great thing about Copilot is that it also has a built-in payment system. You can create branded invoices, or create a recurring payment (also works like a subscription). This way, you can cater to the types of services and people you work with.
For example, if you work with families and individuals, you might just need to send an invoice once a year when they file their taxes. But if you’re working with businesses that need ongoing bookkeeping and quarterly tax filings, you could create a recurring subscription and charge on a more frequent basis, like monthly or quarterly.
I wrote a guide on how to bill a client with Copilot. But as a quick recap, to send an invoice or start a subscription in Copilot:
- Determine your billing approach based on your services and client needs. Decide whether you'll bill upfront, after the work is completed, or on a recurring basis.
- Create a new invoice using Copilot's invoicing tool. Customize the invoice with your branding, itemize the services provided, and set the payment terms.
- If you're offering ongoing services, set up a recurring subscription. Determine the billing frequency (e.g., monthly or quarterly) and the subscription amount based on your agreed-upon pricing.
- Send the invoice or subscription to your client through Copilot. Your client will receive a notification and can view and pay the invoice or subscribe directly within their portal.
- Track the status of your invoices and subscriptions in Copilot's billing dashboard. You'll be able to see when invoices are viewed, paid, or overdue, and manage your recurring revenue streams.
By using Copilot's built-in payment system, you'll save time on billing and provide a convenient, professional payment experience for your clients. Plus, with the ability to create branded invoices and customize your billing approach, you can tailor your services to meet the unique needs of each client.
And by automating your recurring billing with subscriptions, you'll make sure you have a steady flow of money coming in for your firm. This is especially useful for clients who require continuous bookkeeping support and financial management.
4. Send a client intake form
The next step in the bookkeeping client onboarding checklist is to gather all the information you need from your client so you can deliver on your service effectively.
This part might include asking for things like:
- Bank account or QuickBooks details
- Business entity information (e.g., LLC, S-Corp, etc.)
- Previous year's tax returns
- List of current vendors and customers
- Inventory details (if applicable)
- Payroll information (if applicable)
While you could gather this information through emails or phone calls, a more efficient and professional approach is to use Copilot's Forms App.
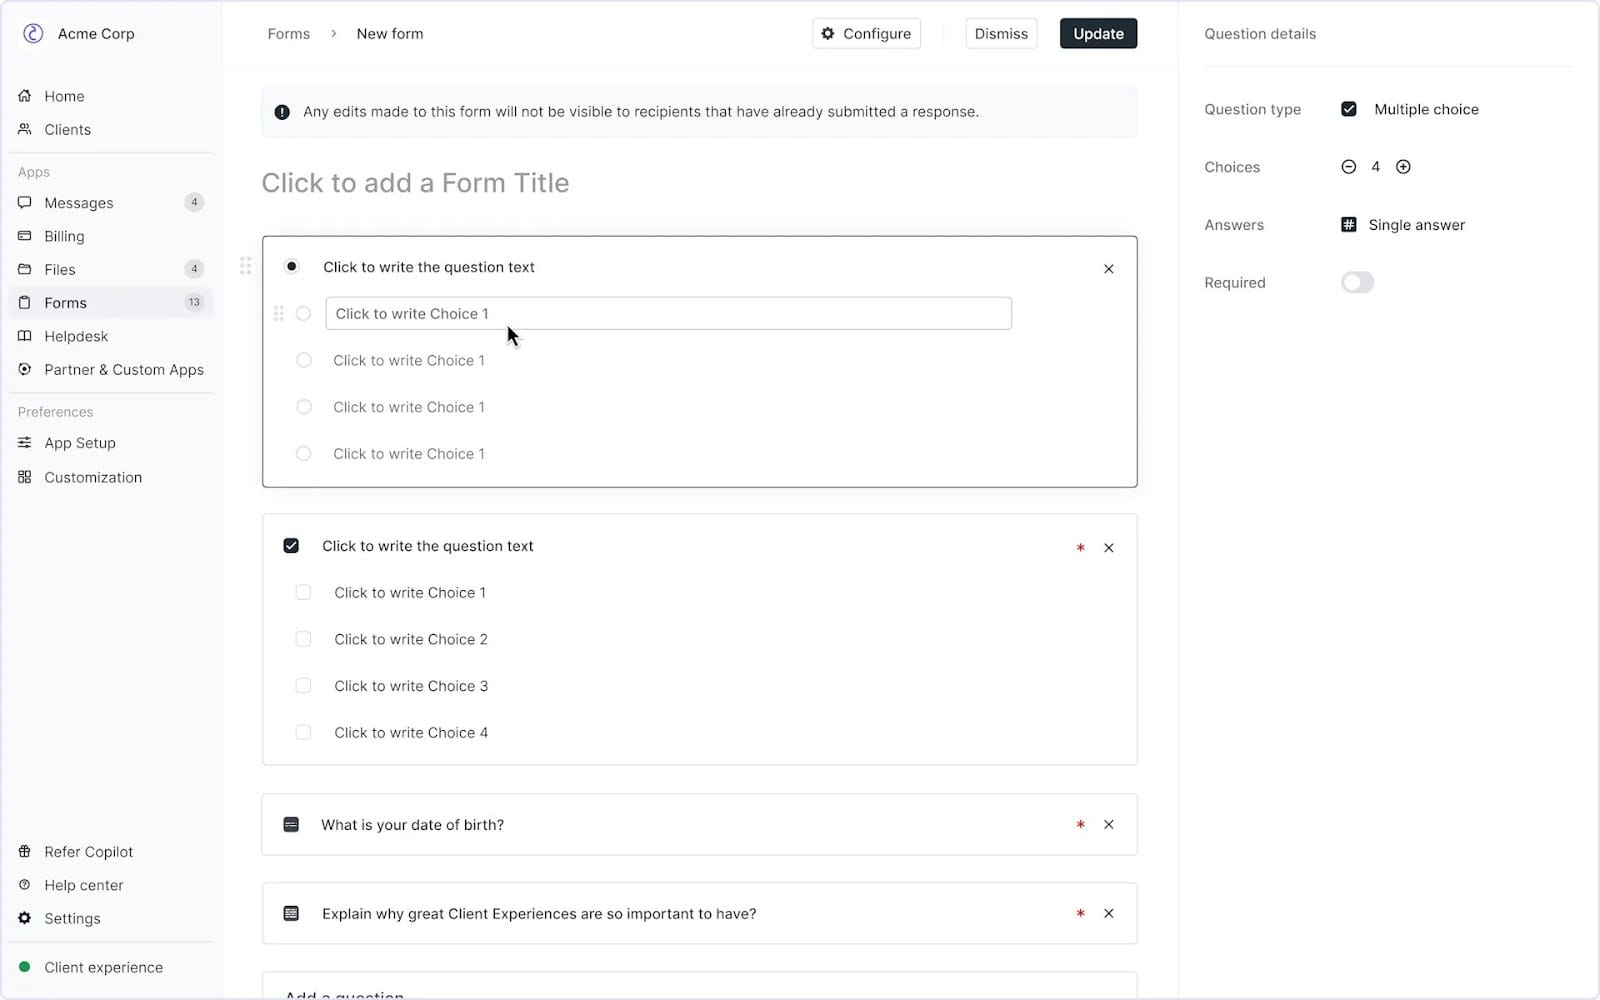
With Copilot's intake forms, you can create a branded questionnaire that covers all the essential information you need from your client. The form can be customized to fit your specific services and can include various question types, such as multiple-choice, open-ended, and file uploads.
To create and send an intake form in Copilot:
- Design your intake form using Copilot's form builder. Add your questions, customize the form's appearance, and include your branding elements.
- Send the intake form to your client through Copilot. Your client will receive a notification and can complete the form directly within their portal.
- Review the submitted form in Copilot and follow up with your client if any additional information is needed.
To take it a step further, you can leverage Copilot's Automations feature to automate the intake process. For example, you can set up an automation that sends the intake form automatically to new clients once they sign their contract. This way, you can make sure that the intake process starts right away without any manual intervention.
You can also use tools like Zapier or Make to create automations that notify you when a client completes their intake form or that send a welcome email to the client once they submit the form.
By using Copilot's intake forms and automations, you'll gather the necessary information from your clients and set the stage for a successful, long-term relationship with your client.
5. Personalize your client's workspace
Once you gather all the necessary information from your client, you can begin to create a more personalized feel for their client portal. You can edit the branding of their portal, integrate any third-party apps they're using into their portal, or set up any welcome messages.
The goal here is to make your client feel at home in their workspace and provide them with a tailored experience that meets their specific needs. By personalizing their workspace, you impress your clients and boost the likelihood that they want to continue doing business with you.
Here are a few ways you can personalize your client's workspace in Copilot:
- Customize the workspace branding: Use Copilot's white-label features to add your client's logo, colors, and other branding elements to their workspace. This creates a more cohesive experience and reinforces your client's brand identity.
- Integrate third-party apps: If your client uses specific accounting or project management software, you can integrate these apps into their Copilot workspace. This allows for seamless data syncing and makes it easier for you to access the information you need to provide your bookkeeping services.
- Set up welcome messages: Add a personalized welcome message to your client's workspace homepage. This message can include a brief introduction to your team, an overview of the services you'll be providing, and any important next steps or deadlines.
- Share relevant resources with a helpdesk: Create a knowledge base in your client's workspace with resources that are specific to their business and industry. This could include tax checklists, financial best practices guides, or industry-specific news and updates.
By taking the time to personalize your client's workspace, you'll create a more engaging onboarding experience. Your client will feel valued and supported, knowing that you've made the effort to tailor their workspace to their unique needs.
6. Have a kickoff meeting to set expectations
By this point, you’re pretty much done with the bookkeeping client onboarding process. However, it’s important to also educate your clients on how to use their client portal, along with setting expectations on deliverables and timelines.
Schedule a kickoff meeting with your client to walk them through their personalized workspace and explain how to use the various features, such as document sharing, communication tools, and invoice payment. This meeting is also an opportunity to introduce your team members who will be working on your client's account and establish a primary point of contact.
During the meeting, discuss the specifics of your bookkeeping services, including the scope of work, deliverables, and deadlines. Communicate your expectations for the client, such as providing timely access to necessary information and responding to requests for additional documentation.
Finally, set up a regular meeting schedule to review the client's financial performance, discuss any challenges or concerns, and make strategic recommendations. This ongoing communication helps to build trust and makes sure that everyone is on the same page.
Benefits of using Copilot for onboarding
How you approach your onboarding process sets the foundation for how your client views your approach to business. In other words, your onboarding experience is generally the first impression a client has working with you.
Create a great onboarding experience, past your client’s expectations, and you’ll most likely keep them around for a long time. Come off as disorganized and create unnecessary frustrations for your client in the beginning, and there’s a good chance they won’t return to you next year during tax season.
This is why having a great client experience from day one is so important. And one of the easiest ways to make sure your onboarding process goes smoothly is to leverage technology. This is where a tool like Copilot comes into play.
Used by thousands of accounting firms, every feature in Copilot was designed with your client in mind. It’s a client portal tool that focuses mainly on the client experience. But, at the same time, Copilot also gives you the tools you need to deliver on your services and get paid without any hiccups.
If you’re ready to experience the power of Copilot, be sure to play around with the demo portal! And if you think there’s a fit, be sure to try the 14-day free trial (no credit card required).
Here’s to providing exceptional services and building a fruitful business that will stand the test of time!
Share this post
Sign up for our newsletter
Subscribe to our newsletter to receive emails about important announcements, product updates, and guides relevant to your industry.
