
When running a growing service business, one of the biggest obstacles you’ll inevitably face is efficiency — or rather, the lack thereof. Every moment spent manually performing small, repetitive tasks is time you're not spending on growth strategies or delivering excellent service to your clients. These seemingly minor inefficiencies can quickly accumulate, acting as a drain on your time and resources and acting as a barrier to scaling your operations.
Recognizing these inefficiencies is a common pain for growing agencies. Many business owners find themselves stuck in a cycle of 'busy work', tangled in the minutiae of the day-to-day and unable to focus on the bigger picture. This often leads to missed opportunities, increased stress, and a decline in the quality of client service.
So, how do you combat this pervasive problem? How do you reclaim your time, improve your productivity, and pave the way for future growth? The answer lies in the concept of leverage — specifically leveraging technology, AI, and automation.
In this article, we'll go over how you can leverage AI to create automated intake forms to free up your time, reduce human errors, and provide a smoother, more efficient experience for your clients. But before we dive in, let’s look at some different use cases and examples of client intake forms you might want to automate.
What is an example of a client intake process?
Client intake processes can vary widely depending on the specific nature of your business and the services you offer. However, regardless of industry or vertical, the main goal remains the same: to gather critical information about your client that will allow you to serve them in the best possible way. Let's take a look at a few common scenarios where client intake forms are typically used:
Qualifying Inbound Leads: Here, the intake form may include questions about the potential client's current needs, budget, timeline, or other factors that can help you determine if they are a good fit for your services. The information gained can guide your initial consultation and set the stage for a productive conversation.
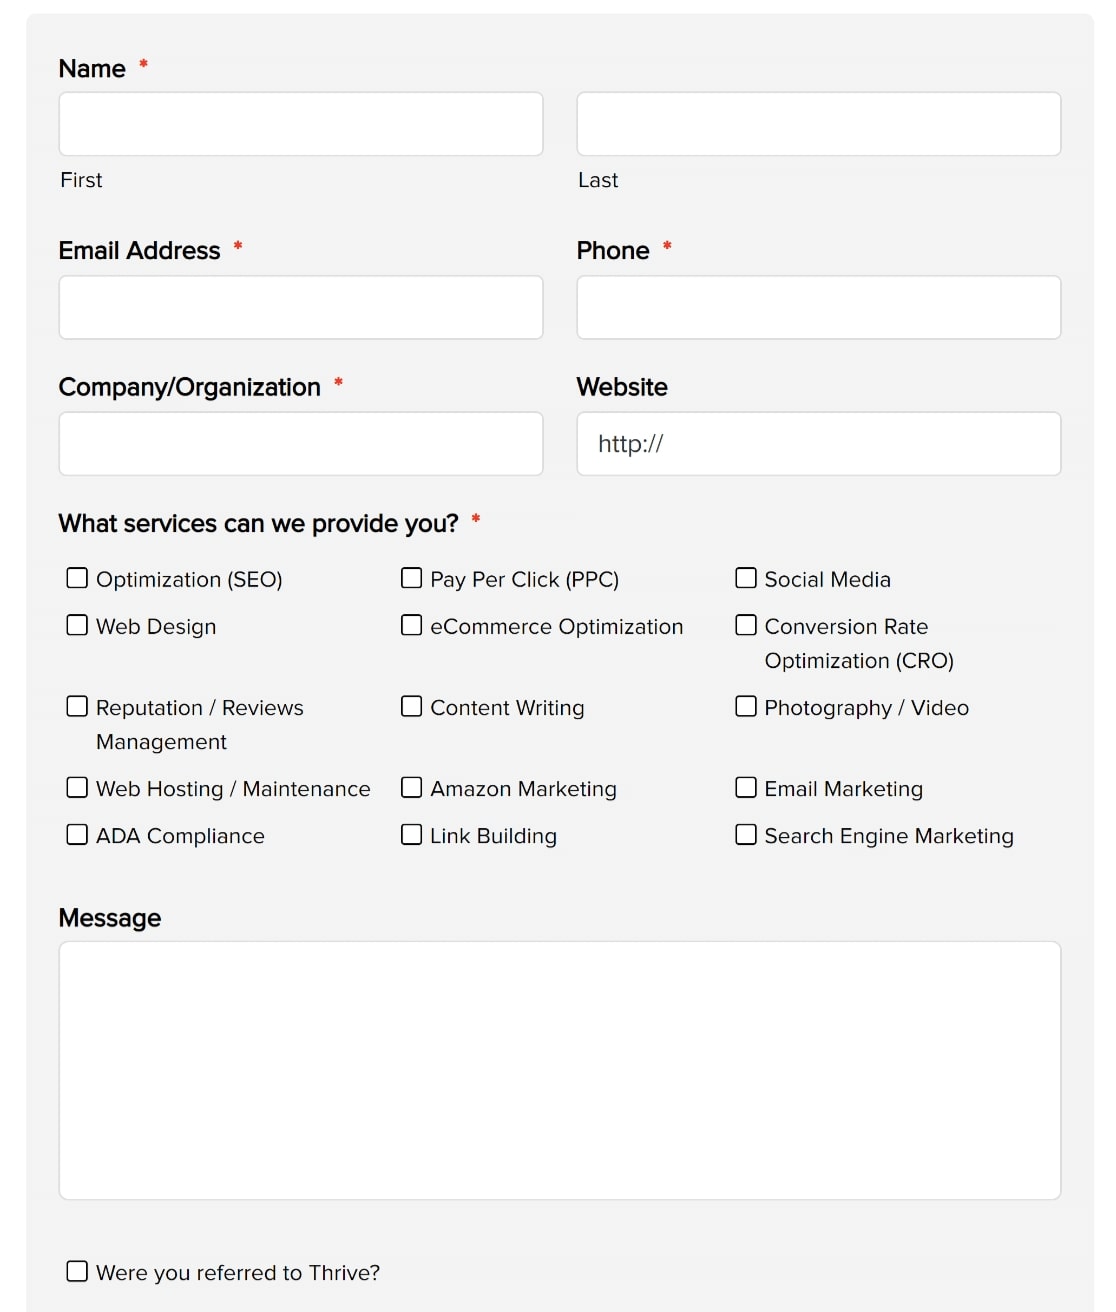
Onboarding New Clients: Once a client has decided to engage your services, you'll need more detailed information. The intake form might request essential data such as contact details, preferred communication methods, and specific expectations for the engagement. This information can help streamline your processes and ensure you deliver a tailored, client-centric service.

Ongoing Requests: Client intake forms aren't just for new clients or leads. They're also handy for existing clients who may need additional services or assistance. For example, if you offer different service packages, you can use a customized intake form to gather data about what the client is interested in exploring next.
Regardless of its specific application, a well-crafted client intake form can significantly enhance your client relationship management, ensuring you're always in tune with your client's needs and expectations.
Now that we’ve seen some examples, let’s go through a four-step process to creating automated client intake forms.
How to automate your client intake form
Here’s how to automate your client intake process:
- Choose a CRM to Manage Clients
- Use a Form Builder
- Create Your Intake Questionnaire
- Automate Sending and Receiving of Forms
Let’s dive into each one.
1. Choose a CRM to manage clients
The first step to automating your client intake process is to choose the right platform to manage your client relationships. This is where a robust CRM (Customer Relationship Management) system comes into play.
Now, your CRM isn't just a digital address book. It's where you go to organize, manage, and understand all your client-related data. From keeping tabs on tasks and interactions to storing essential client specifics, an effective CRM system will serve as your ultimate ally for handling client information and relationships seamlessly.
But, here's a pro tip: when selecting a CRM system, look for one that comes with a client portal.
A client portal can enhance the level of service you offer by providing a dedicated space for clients to access resources, send intake forms, make payments, and interact with your team. The CRM landscape is rich with numerous choices like Zendesk, Copilot, and Notion — each with its own unique strengths.
One CRM used by thousands of service businesses, from marketing agencies, accounting firms, legal firms, and startups, is Copilot. Copilot is built with agencies in mind, and it’s what I personally use for my own content marketing agency. It also integrates with different tools in my existing tech stack.
In the case of automating intake forms, Copilot also has a form builder feature that allows you to automate your client intake process easily. But we'll get to that in a bit. For now, suffice it to say that choosing a CRM like Copilot can be a big step forward in your quest to automate your client intake process.
2. Use a Form Builder
Now that you've chosen a reliable platform to manage your service business, the next step is to create your initial form. And to make things even simpler, you'll want a CRM and client portal that includes an intuitive form builder feature. Fortunately, most top-tier tools available today offer this feature right out of the box, making your automation journey smoother.
Taking Copilot as an example, Forms 2.0 is now live with an updated UI (user interface) and more support for different form automations. To access your forms in Copilot, head over to the “Forms” tab in your Client Experience dashboard.
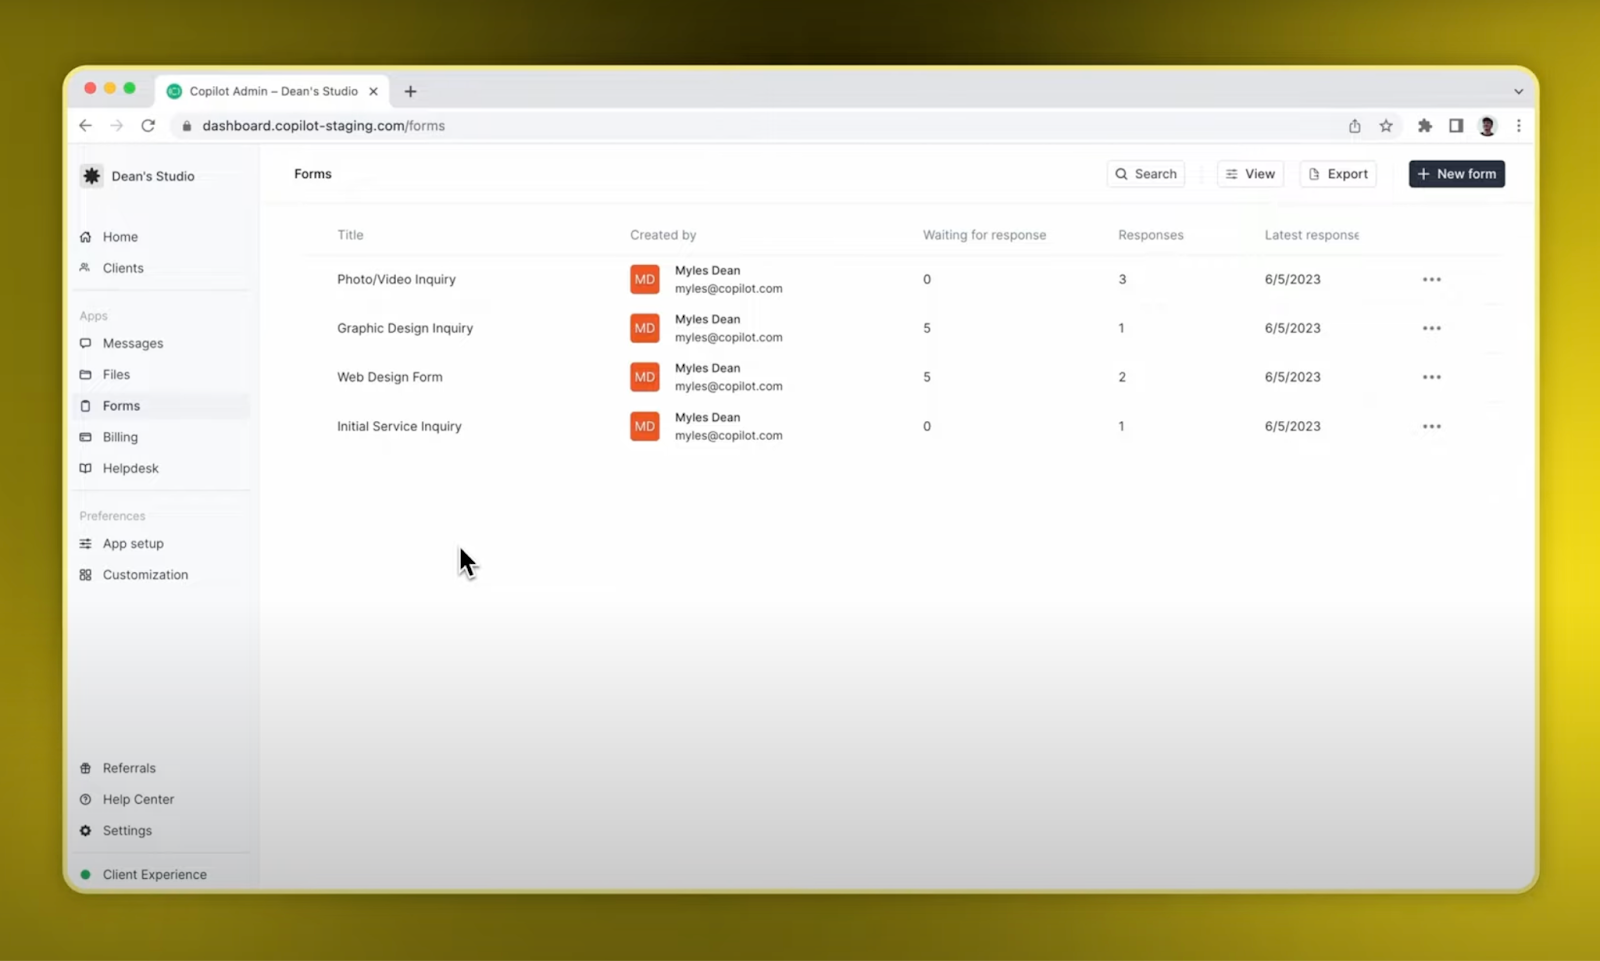
Here you can see any forms you or your team have created. For each form, you can see the:
- The title of the form
- Who created the form
- The number of clients that still need to respond
- The number of form submissions
- The time of the recent submission
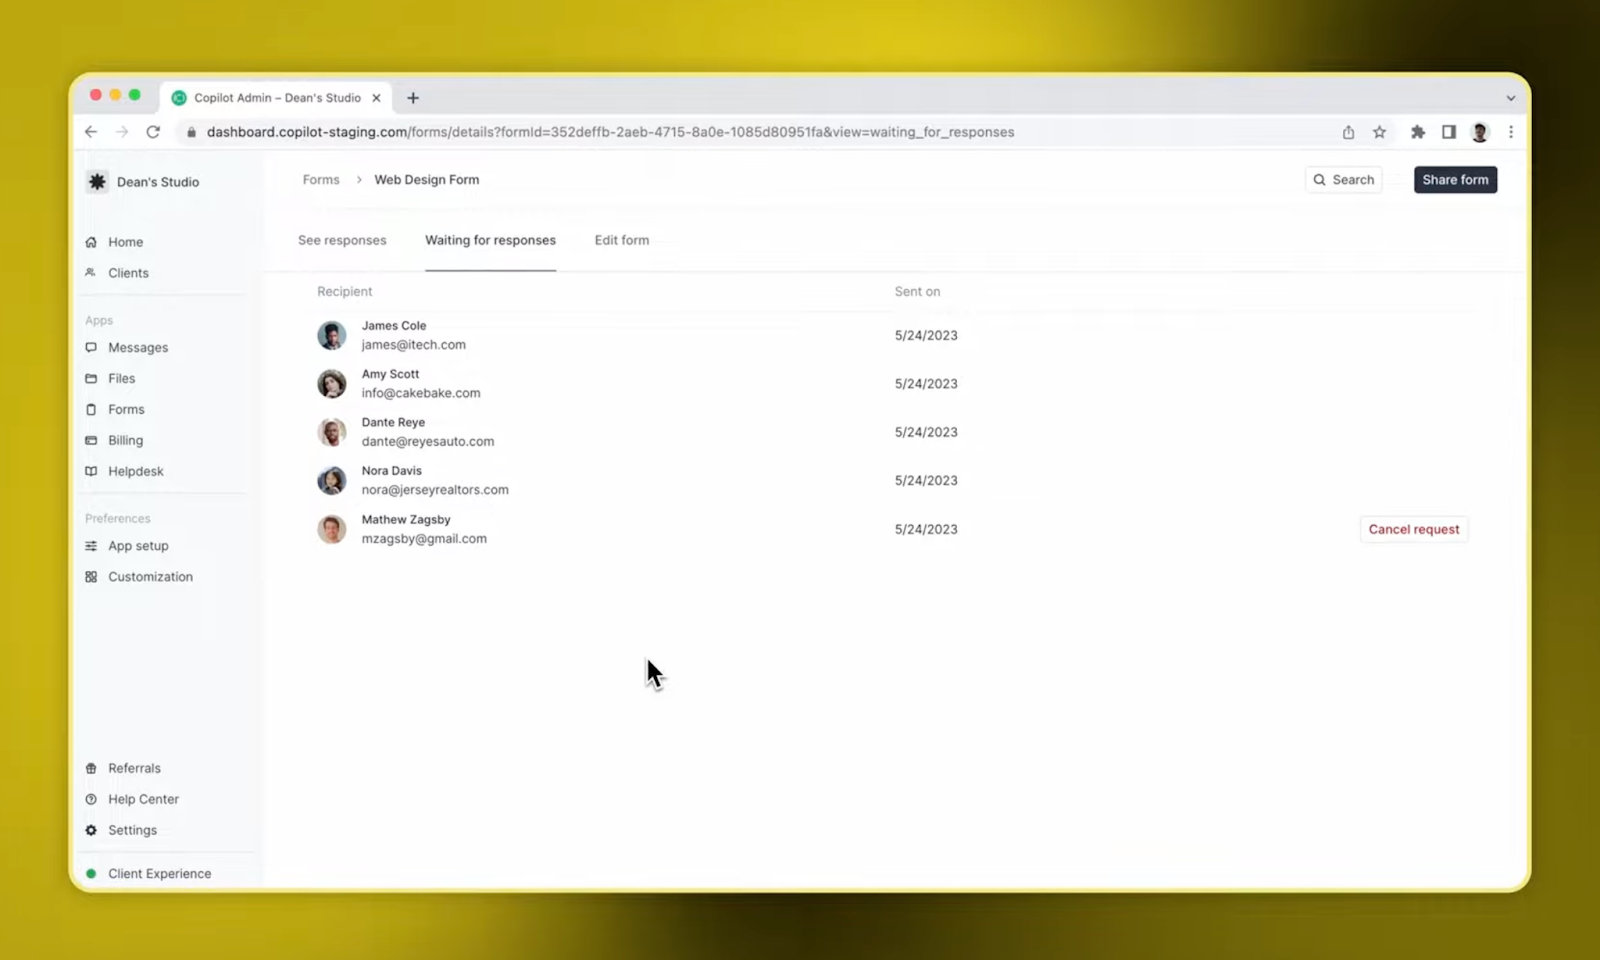
Once you click on a form, you’ll be taken to the form details page. Here you can search, export, or share your forms.
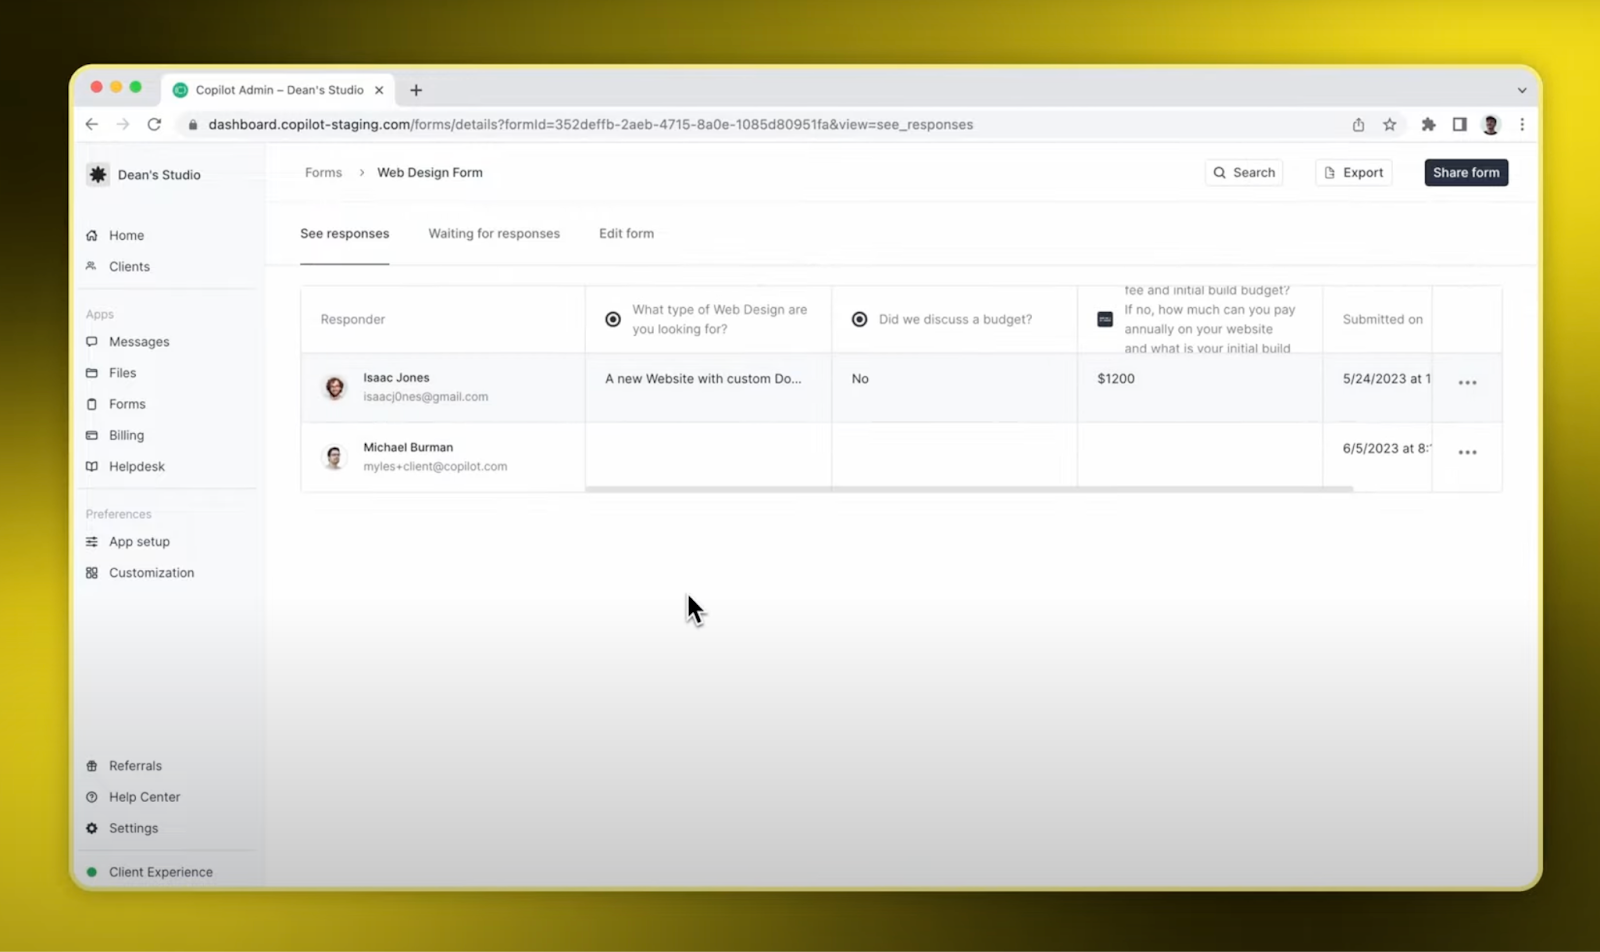
Using a form builder like the one found in Copilot makes this process significantly more manageable. Now let’s create a form that needs to be assigned to clients.
3. Create your intake questionnaire
Once you have your CRM and form builder set up, the next step is to create the questionnaire for your intake form. This process is quite crucial as it determines the kind of information you'll be collecting from your clients, which will further shape the services you provide.
So, how do you go about creating an effective intake questionnaire?
First, determine what kind of information you need from your clients to effectively serve them. This could be their contact information, specifics about their business, their expectations from your service, and more.
For example, if you’re onboarding new clients for a marketing agency, you might want to ask them to:
- Give you access to their Google Analytics
- Give you access to their website
- Access to any specific documents
- A list of competitors
- Company mission and vision statement
- Point of contact
- Success metrics
These are just a few examples. You can view a full list of 13 onboarding questions in our client questionnaire template.
Once you know what information you need from your clients, be it in the form of short or long responses, file uploads, or multiple choice, it’s time to head over to your form builder.
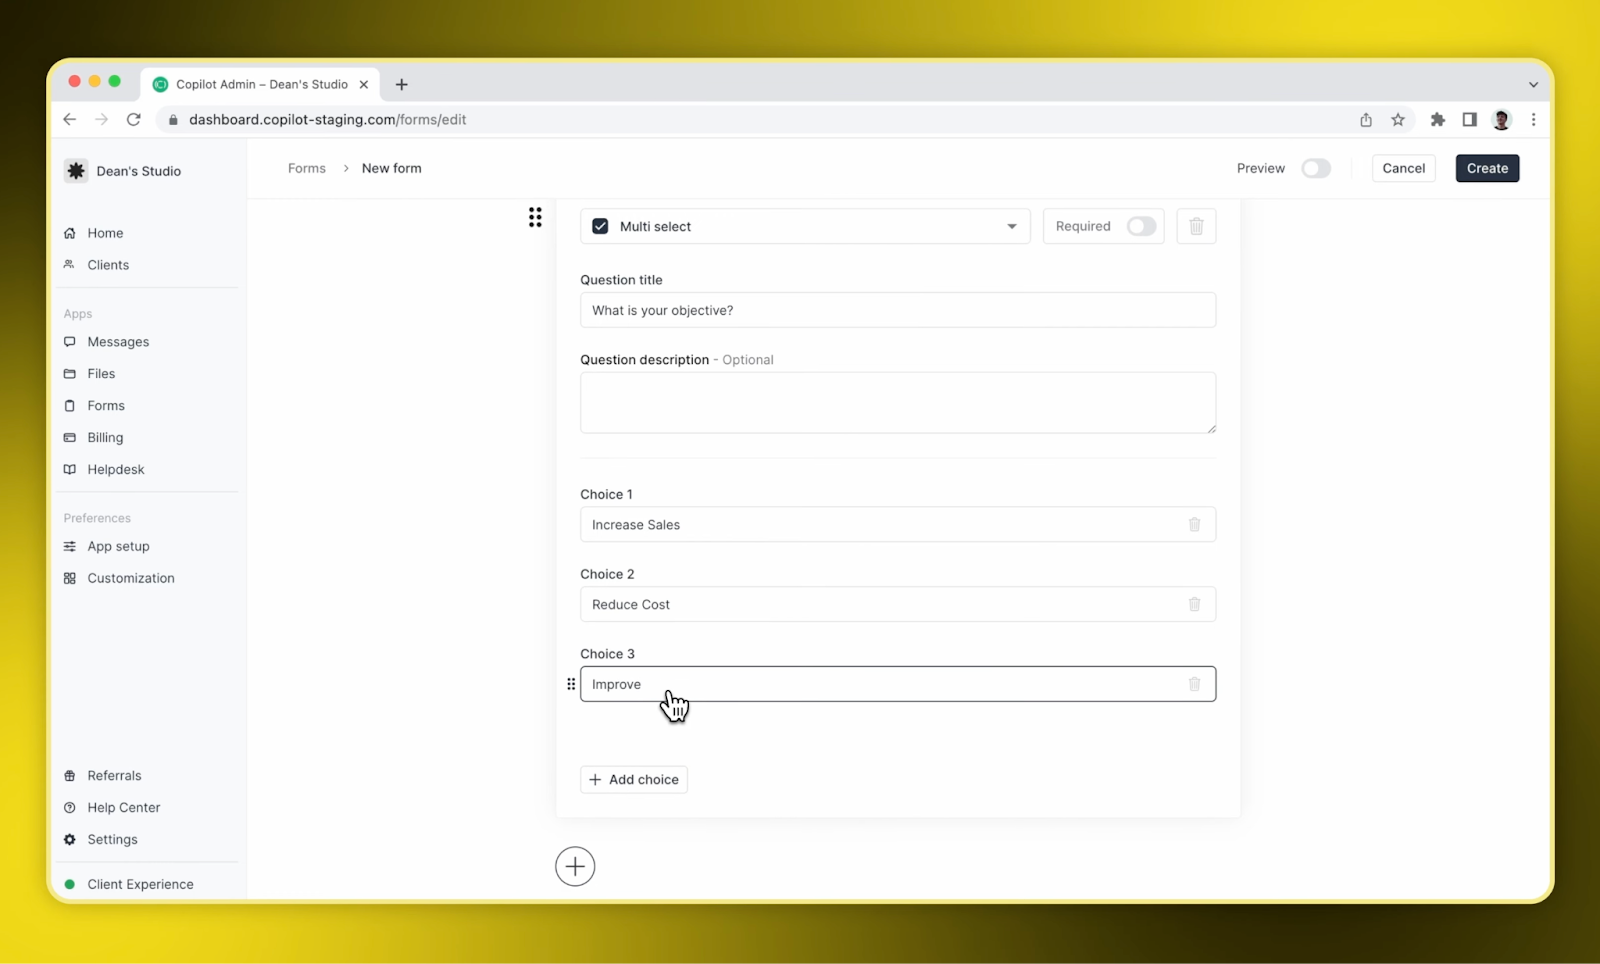
In Copilot, you can create a form for whatever use case you need. You can even adjust the frequency of your forms, whether it’s a one-time form or an “always on” form. You can also set the form visibility to have all clients see the same intake form or customize it for a specific client.
Copilot’s no-code form builder makes it easy to build out the different components you need to collect the right information.
Once your form is built out, it’s time to automate the sending process.
Remember, the ultimate goal is to gather the necessary information from your clients in a manner that's both straightforward and convenient for them. This will set a positive tone right from the start of your relationship with your clients.
4. Automate Sending and Receiving of Forms
Once your form is created, it’s time to set up an automation. To do this, we’ll use Zapier with Copilot so we can create a trigger and action flow — without writing any code.
In the case of this tutorial, we want our onboarding client questionnaire to automatically be sent to any new client created in our client portal. In this process, you'll be creating a new form in Copilot and setting up an automated workflow (or 'Zap') in Zapier. Here’s how to do it:
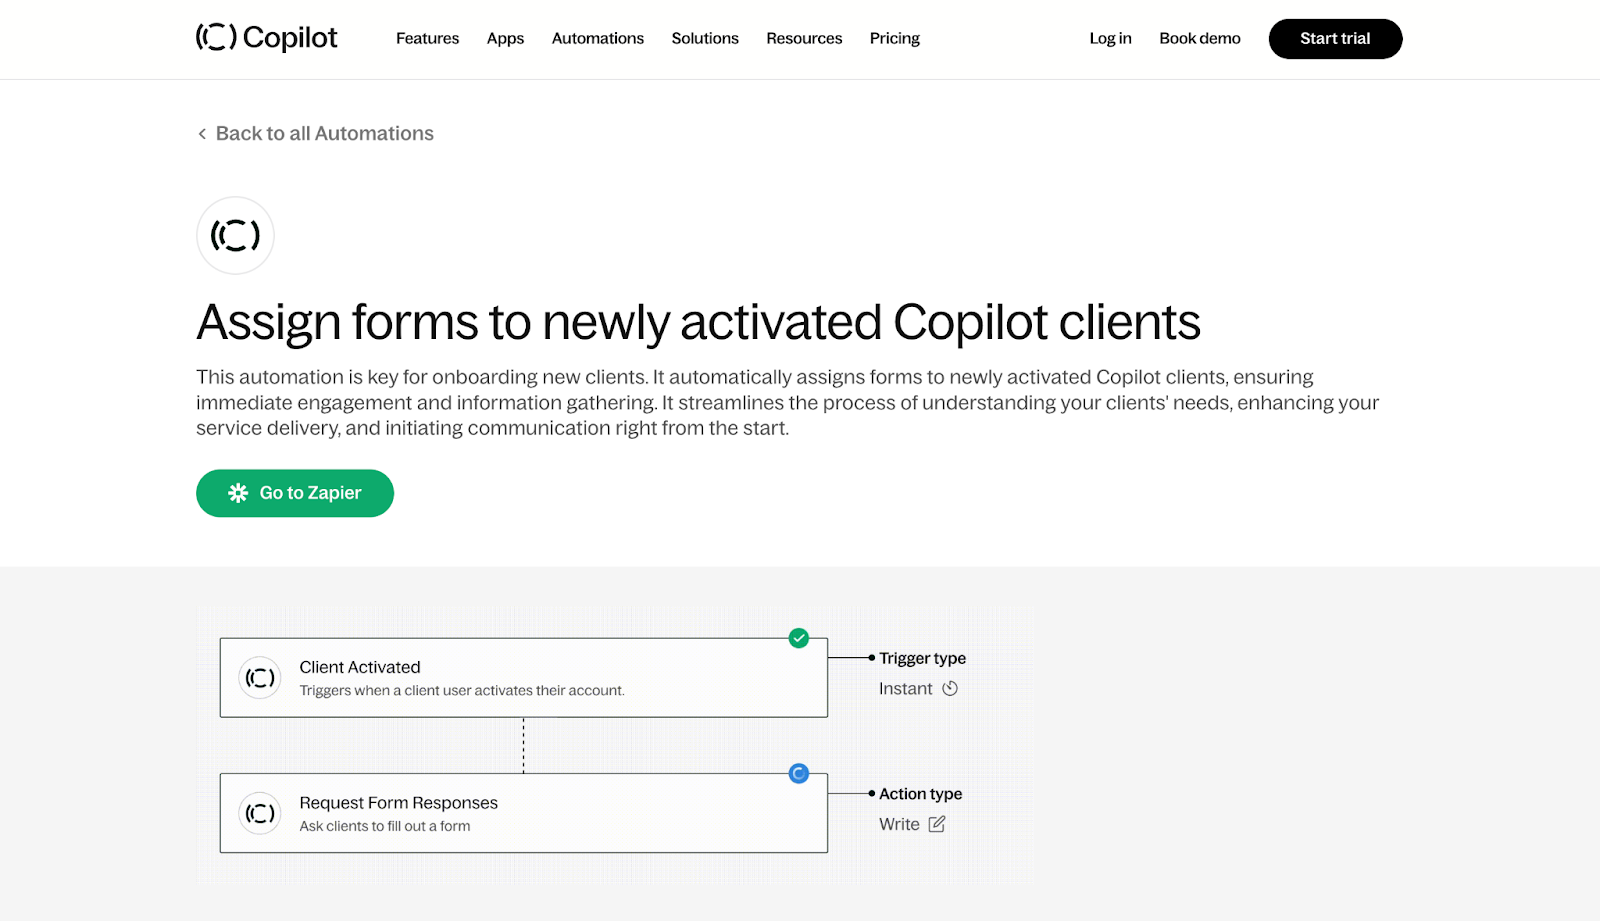
Begin by crafting a new form within Copilot. Next, navigate to Zapier, a platform designed to facilitate seamless communication between many different apps. Here, you'll need to design a new Zap — an automated sequence of events triggered by specific actions.
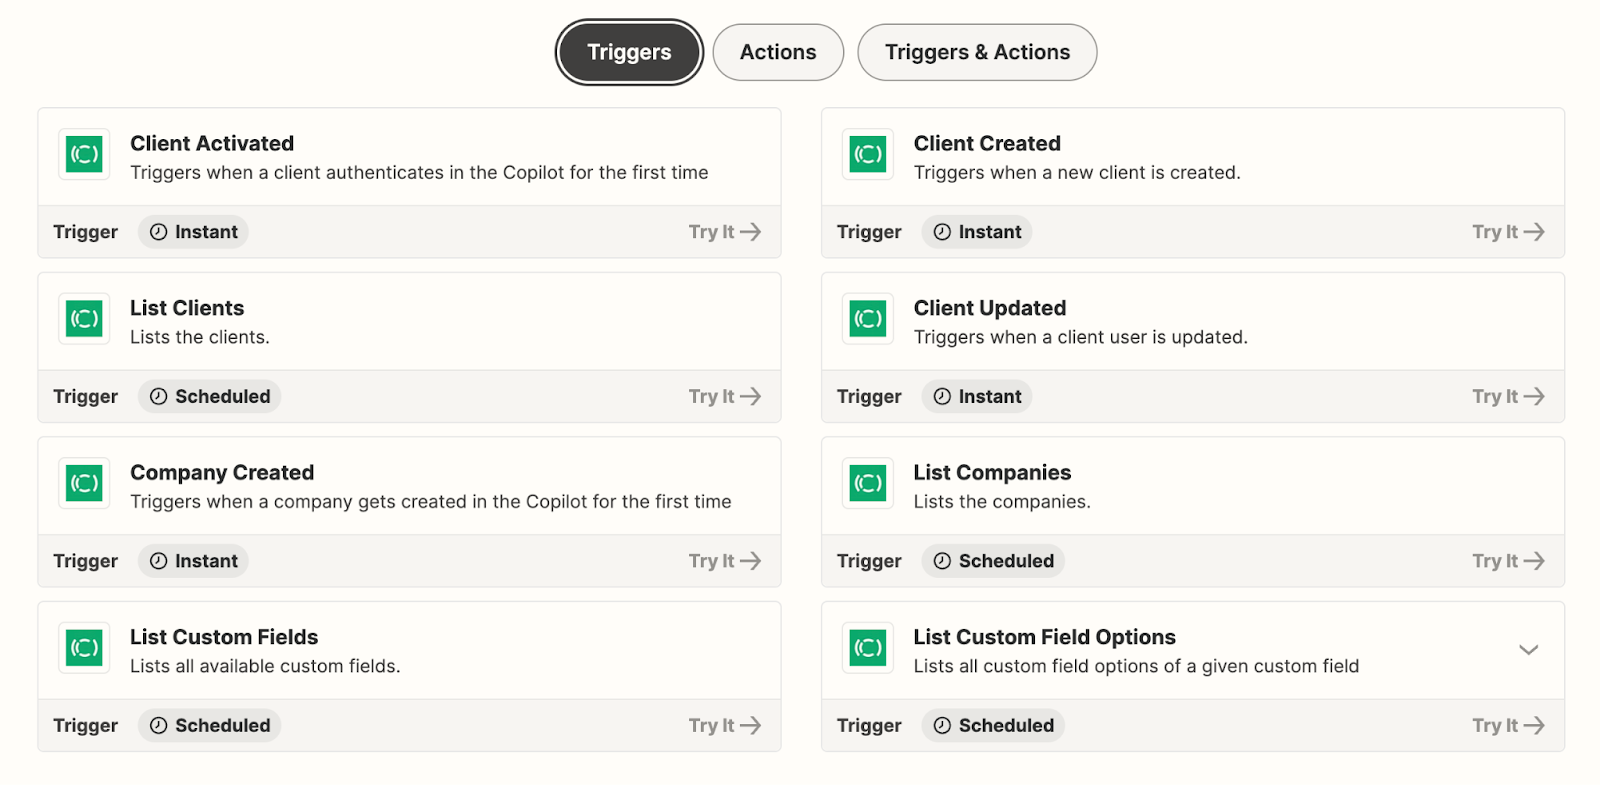
Set Copilot as your trigger app. This means that an event within Copilot will set your Zap into motion. In this scenario, the event is 'New Client'.
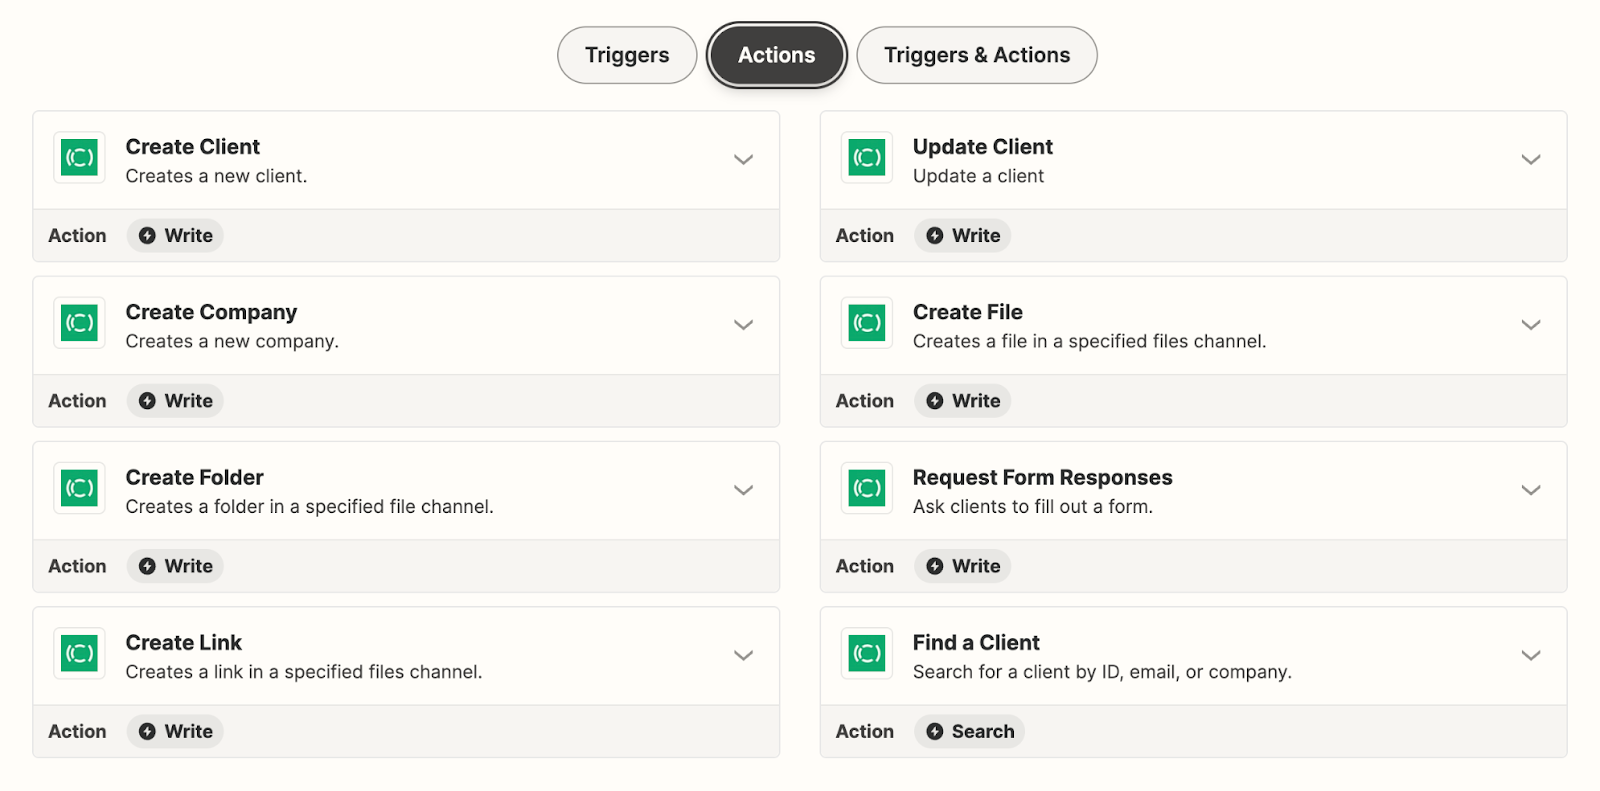
Now, you must specify an action for Zapier to execute in response to your trigger. Choose Copilot once more, but this time pick 'Assign Form to Client' as your action.
Your next task is field mapping. In this phase, you'll instruct Zapier on which form to allocate when a fresh client appears. Pick the form you devised earlier.
Lastly, test your Zap using Zapier's in-built testing function. If everything runs smoothly, your Zap can be activated. It will then automatically execute whenever a new client is introduced in Copilot.
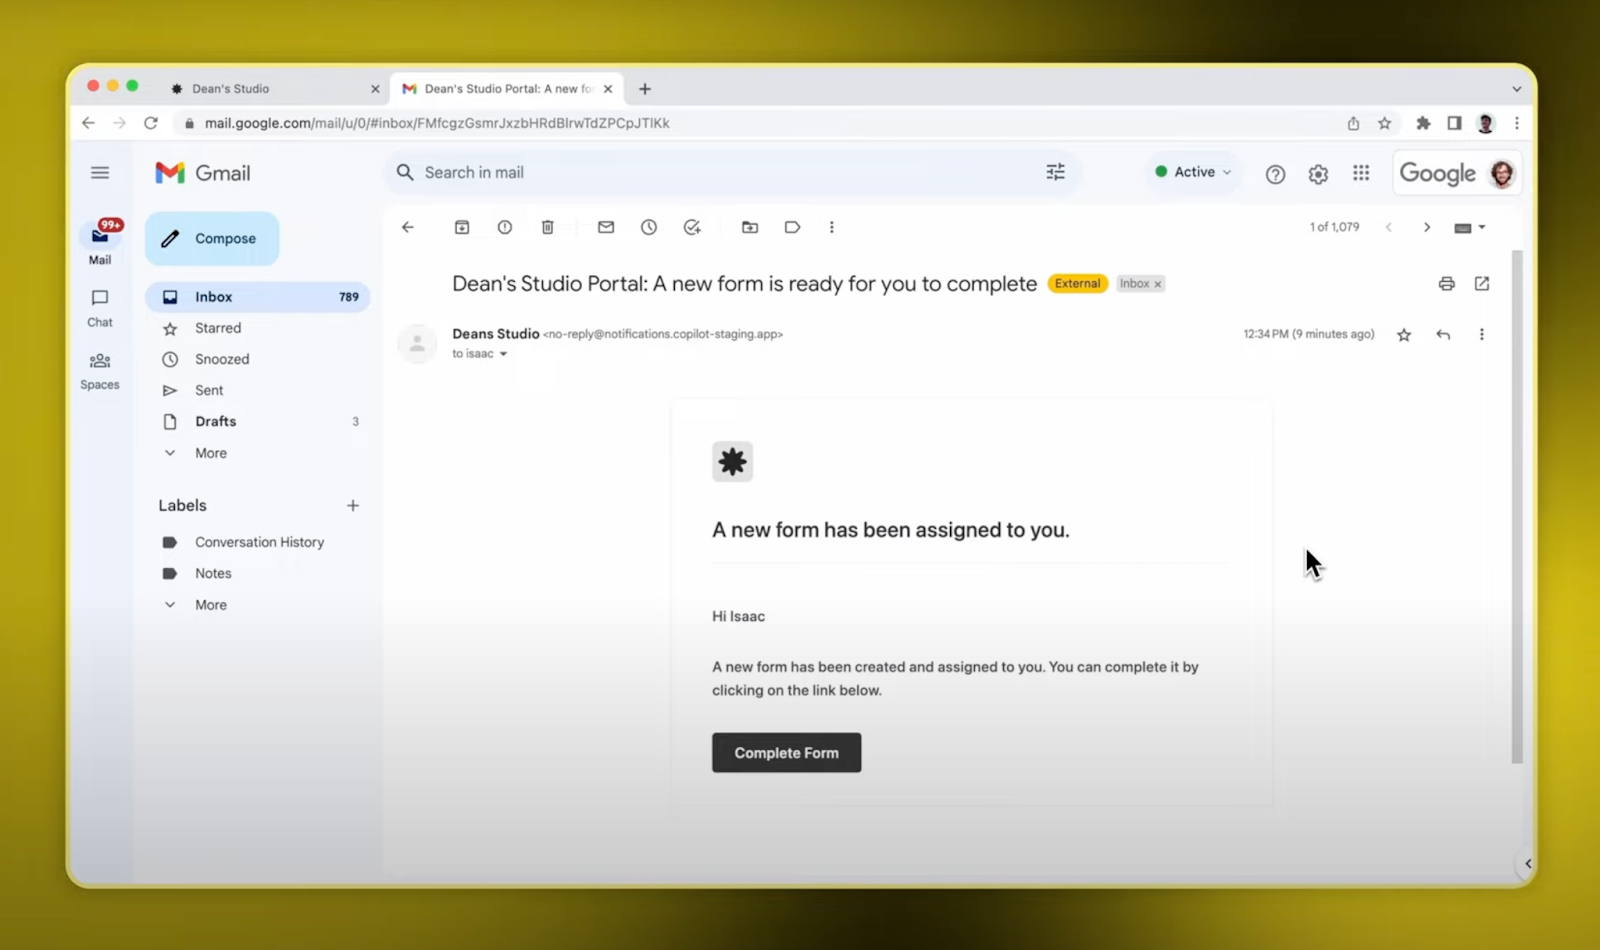
Now when a client creates an account in their client portal, they will get an email notification for the first onboarding form.
Your client will also see a notification on the Forms tab of their portal.
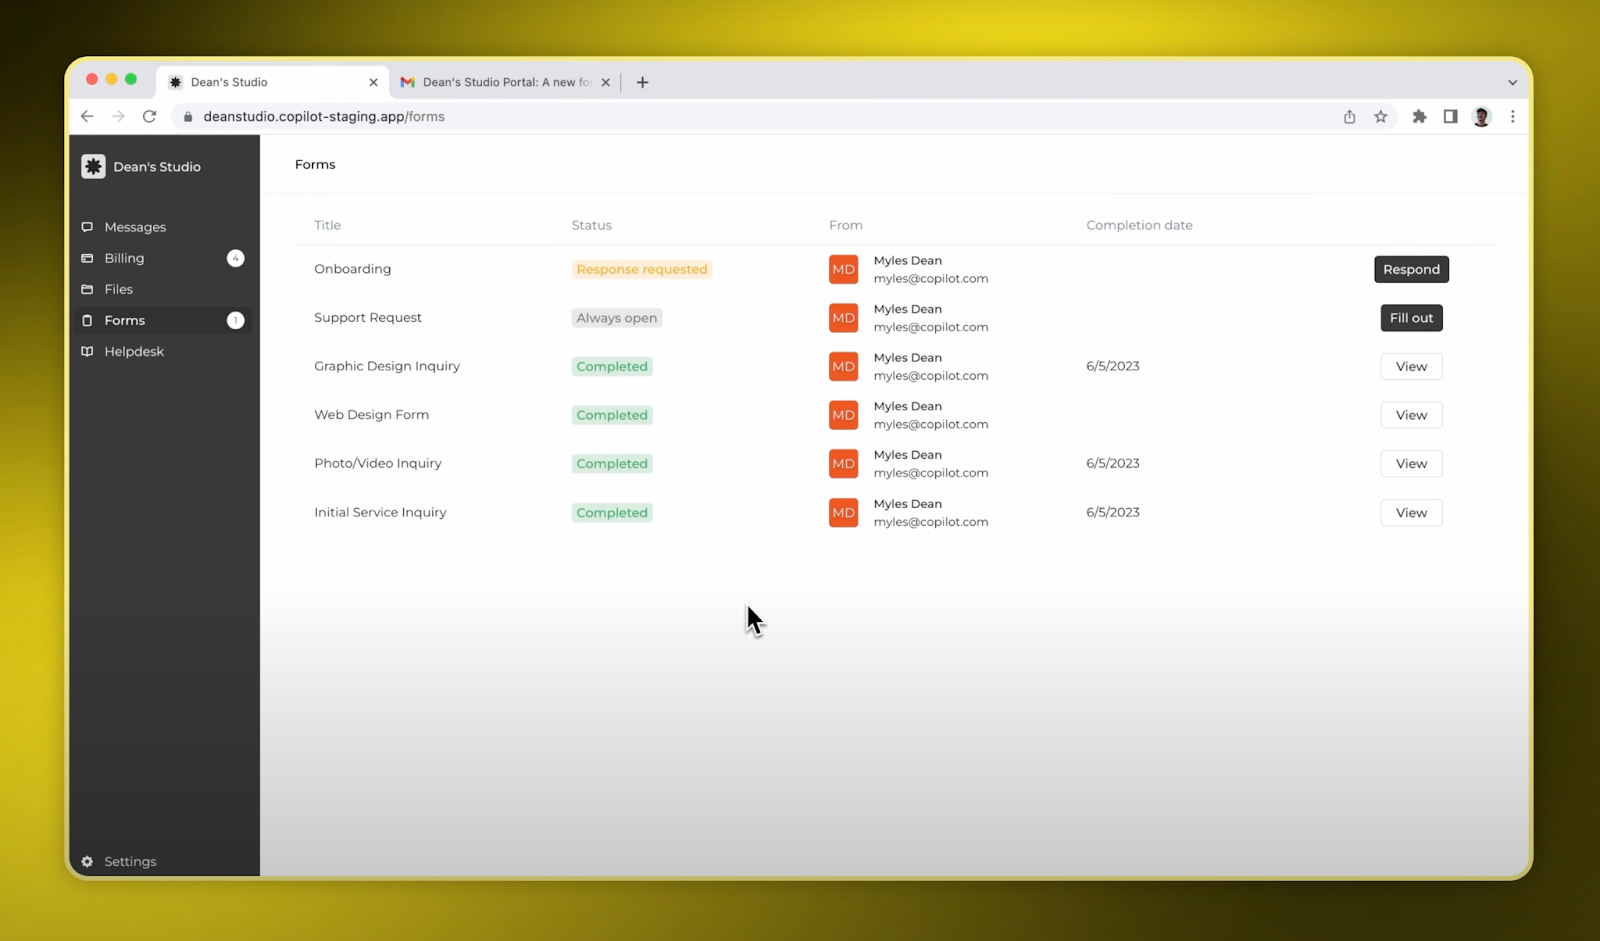
And we’re done! Now your client can go ahead and fill out the intake form and you will receive a notification when the form is complete.
But that’s not the only thing you can automate. Copilot also has tons of other form automation templates, giving you the ability to create form automations outside of just your onboarding process.

If you want to explore automating different types of intake form requests, be sure to check out the automatons directory.
Automation goes beyond intake forms
We’ve just gone over how to create an automated intake form, with the example of automating an onboarding form. But it’s important to know that automation can extend way beyond just intake forms. With the rise of AI tools, there are now numerous opportunities to streamline your service delivery process, enhance your client engagements, and boost the overall productivity of you and your team.
For example, you can also automate consent forms, contracts, and other essential documents that require your client's e-signature. This way, you save time and make the process easier for your clients, giving them the flexibility to provide their consent or endorsement with a few simple clicks.
Lastly, with integrations, you can connect Copilot to other tools like QuickBooks, Calendly, Airtable, and more — creating an interconnected ecosystem of apps that work together to simplify and enhance your business operations. If you’re ready to automate your client intake forms, and take your service business to the next level, be sure to start your free trial of Copilot!
Share this post
Sign up for our newsletter
Subscribe to our newsletter to receive emails about important announcements, product updates, and guides relevant to your industry.
