Back to Blog Home
How to bill a client for the first time (5 step checklist)
[Hide]

Get paid on time
Get access to advanced invoicing and subscription tools to help you get paid on time — every time.
4.9 rating
Starting your client business is not just about what you do, but how you do it — especially when it comes to how you nurture your client relationships.
How you set expectations around your pricing models and billing procedures will allow you to confidently ask for what you’re worth, while also getting paid in a timely manner.
In this article, we’ll go over everything you need to know about how to bill a client for the first time. From onboarding your first client to getting money deposited in your bank account, we’ll go through it all.
But before you bill your first client, the first thing you need to do is figure out what platform you are going to use to manage your invoices, contracts, and client relationships.
Client billing starts with a modern platform
Having the right systems in place to send invoices and accept payments will give you the confidence you need to say “yes” to any deal that comes your way.
As a freelancer, agency, or firm, it’s important that you stay as organized as possible. Not just with your client projects and deliverables, but also with your finances. This is why many service-based businesses use client portal software to manage everything from client relationships to payment processing.
Ideally, you want to find billing software that allows you to:
- Generate branded invoices
- Give you the ability to create subscription payments
- Connect to your bank of choice
- Give clients the flexibility to pay with a card or ACH transfer
- Decide which party pays transaction fees
- Let you connect with QuickBooks for money management
Not only that, if you’re just starting your business, you want to make sure you can manage everything in one central place. This means going beyond just client billing and payments.
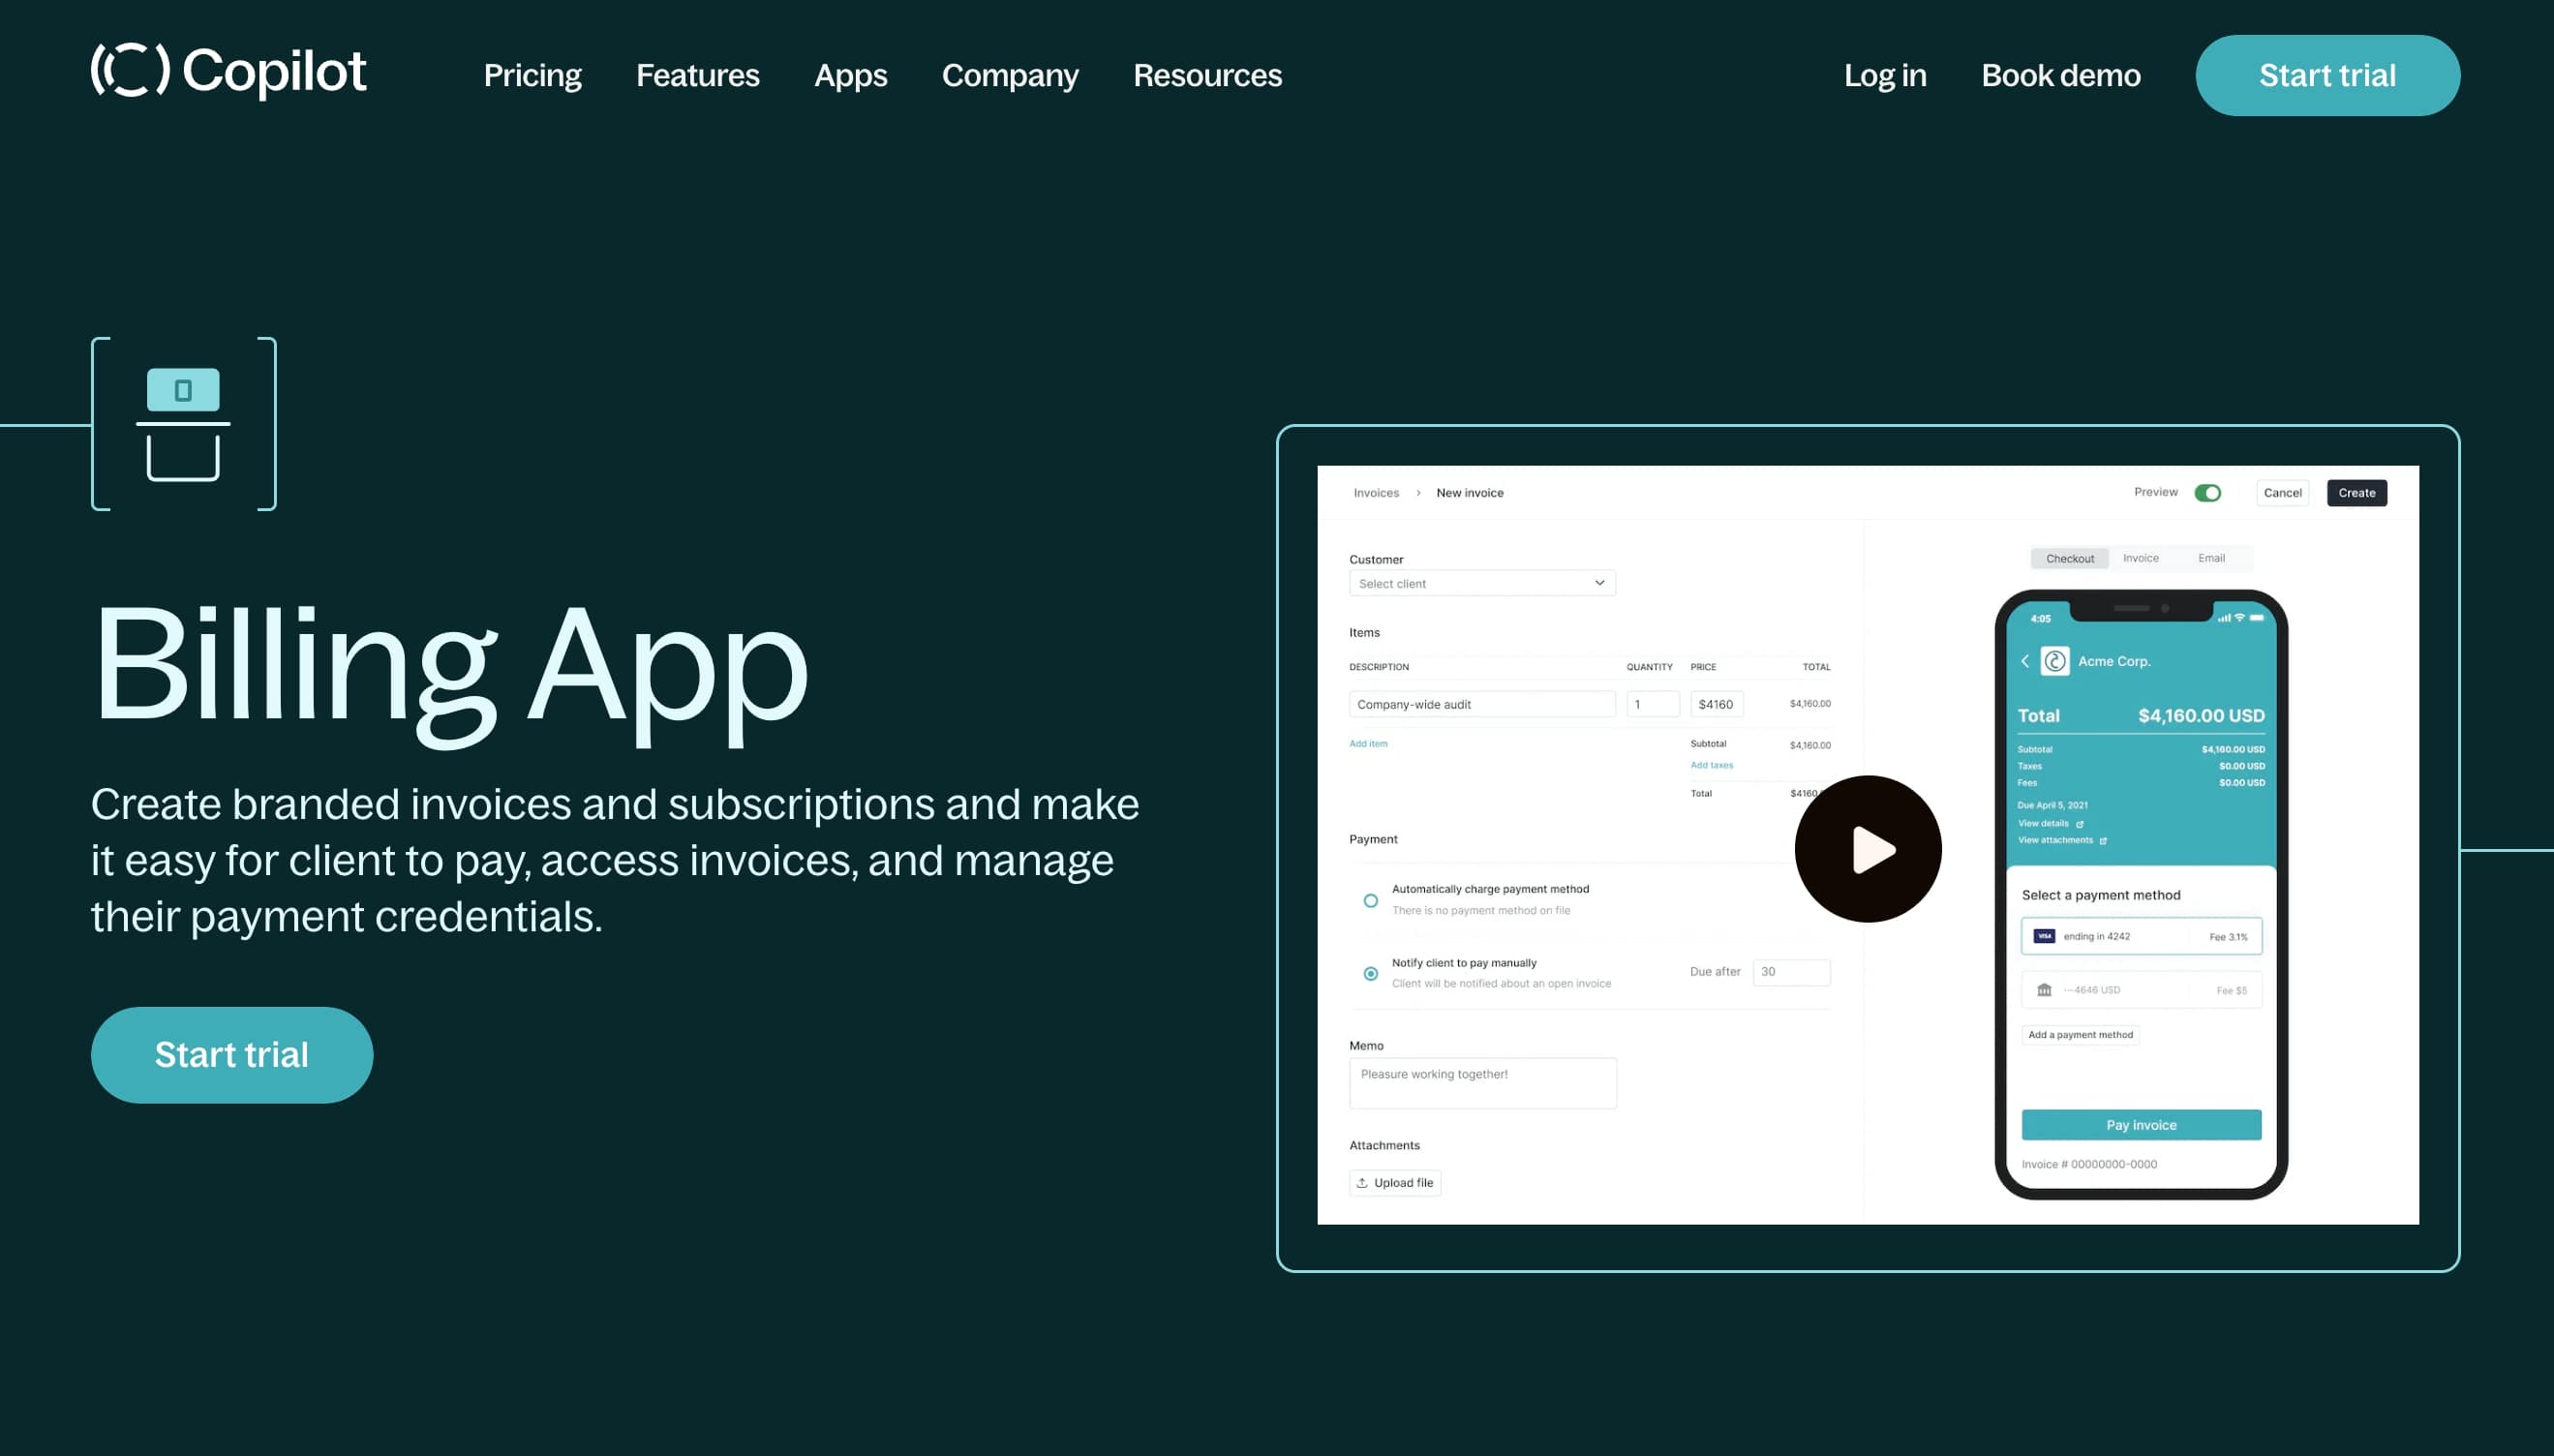
This is why thousands of business owners use Copilot to start, run, and grow their service businesses. Everything from onboarding your first client to getting paid straight to your bank account can be done in Copilot.
With that, let’s get into how to bill a client for the first time.
How to a bill client and accept payments in 5 steps
Here are five steps to billing clients for the first time:
- Send a proposal or statement of work
- Get the contract signed
- Create a branded invoice or subscription
- Connect your banking details
- Connect your accounting software
Let’s dive deeper into each one.
1. Send a proposal or statement of work
You’ve worked so hard to package your services and market yourself. Maybe you built your network, put yourself out there on a service marketplace, or did some good old-fashioned cold email outreach.
You get off a call, and a potential client is eager to work with you. You’re ecstatic. But that feeling of excitement can quickly turn into overwhelm if you don’t have a standard operating procedure for following up with a proposal or statement of work (SOW).
Many times, depending on how large the client is, you will get asked to send over a statement of work. This is basically a written statement of exactly what services you will be providing. And if it’s your first time sending something like this, don’t worry. This part is actually a good thing for you because it gives you the opportunity to lay out what you will and will not tolerate — your proposal helps you eliminate scope creep.
At a high level, here’s what you need to include in your proposal:
- Define what problem you are helping your client solve
- Define your solution (i.e. project details and tasks)
- Define your costs
- Define deliverables and project timelines
- Define ongoing communication style
If a client is eager to work with you, your proposal can be a simple email. But if you know your client is “shopping around” and you want to stand out, it’s worth putting in some extra work that gives your client a good first impression about you.
If you want to learn more about how to write a proposal, this is a great video to watch:
Once your proposal is sent, and your client agrees to the costs and deliverables, it’s time to make it official with a written contract.
2. Get the contract signed
At this point, you might want to jump in and send your client an invoice right away. But before you do that, it’s important to get a written agreement in place. This will not only help you avoid scope creep once you kick off your project, but it will also protect you from a legal standpoint.
Getting a contract ready to send to a client is going to look different for each business. It all depends on the type of services you provide and the scope of work. Contracts could also look different if you’re a freelancer or a large company with employees.
Regardless of the type of business you are, a contract should include (at least) the following:
- Contact details for both you and your client
- Project scope, deliverables, and time tracking
- Rates, costs, billing timelines
- Project ownership and copyright
- Contract cancellation terms
- Expenses and equipment needed for the project
- Legal terms and conditions (varies based on project and type of clients)
These are just some of the essentials. Make sure you talk to a legal expert on this matter.
If you’re using Copilot, you can easily upload any PDFs or generate contract templates so your clients can electronically sign them.
3. Create a branded invoice or subscription
Once your client electronically signs the agreed-upon contract, it’s time to get paid. This part is going to depend on your pricing strategy and how you intend to invoice clients.
Some questions you should ask yourself include:
- Is this a one-time project?
- Is this project recurring each month?
- Am I going to bill per project, charge an hourly rate, or charge a monthly retainer?
Knowing the answers to these questions will help you better understand how to approach your billing process and strategy. If you intend to do billable hours per project, a standard invoice can work. If you decide that you are going to charge a monthly rate, you can create a subscription payment for your client.
To create your first invoice, start your free 14-day trial with Copilot and log into your internal portal. Next, you want to add the client you want to send the invoice to into your client manager. You do this by heading over to the “Clients” tab on the sidebar and clicking on “New client.”
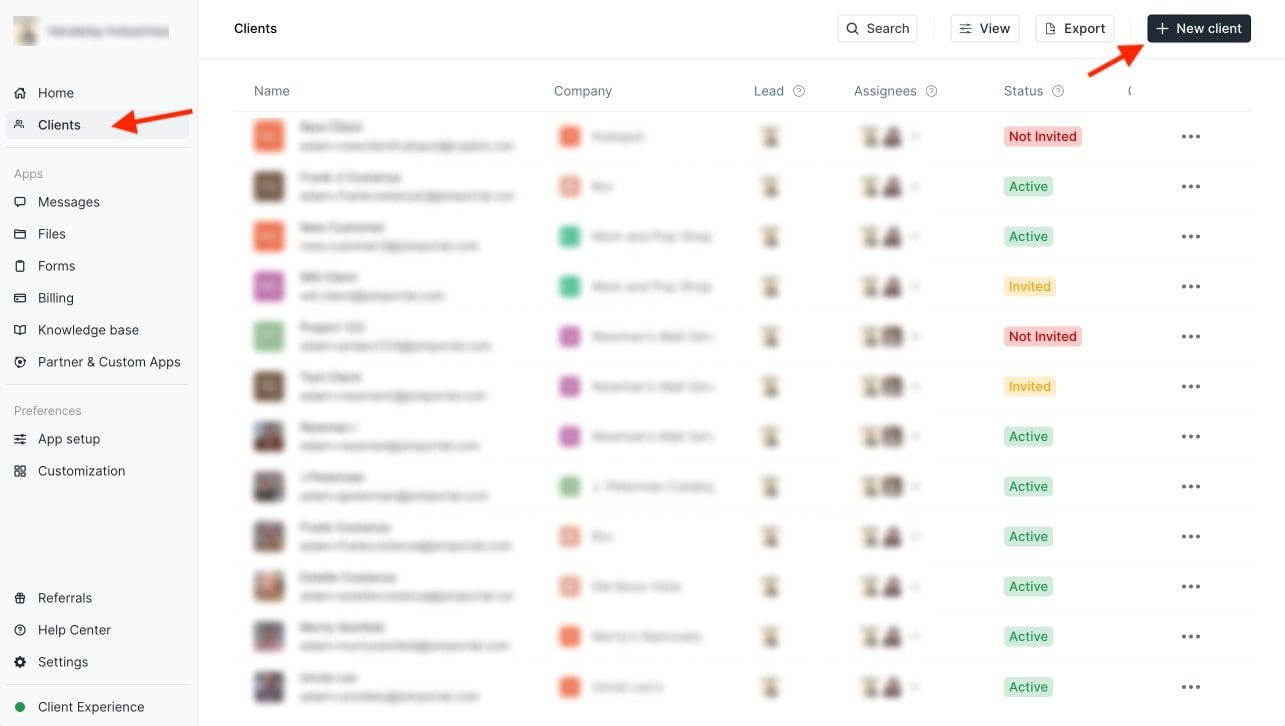
Once you add your client’s contact information, you can send them an invite to create a login for their own white label portal. Once your client is in your client manager, it’s time to send them an invoice.
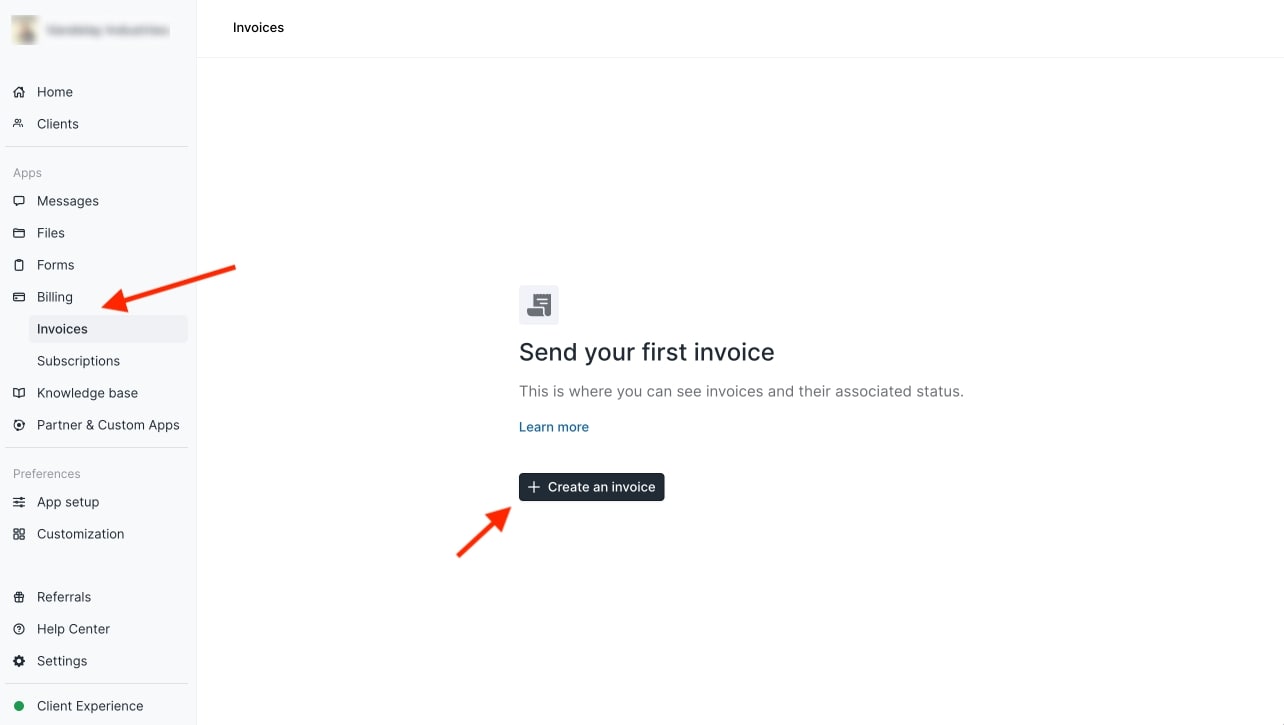
To get started with the invoicing process, click on the “Billing” tab and then click on “Create an invoice.”
Copilot has a built-in invoice template generator, making it easy to add deliverables, payment methods, attachments, and your client's name to each invoice.

If you already have your client’s credit card on hand, you can automatically charge them. If you don’t have their payment method on file, you can notify your client to pay you (by a set due date) based on your payment terms (more on this in a bit).
Once you fill out your invoice template, you can then view a preview of the invoice before sending it off to your client.
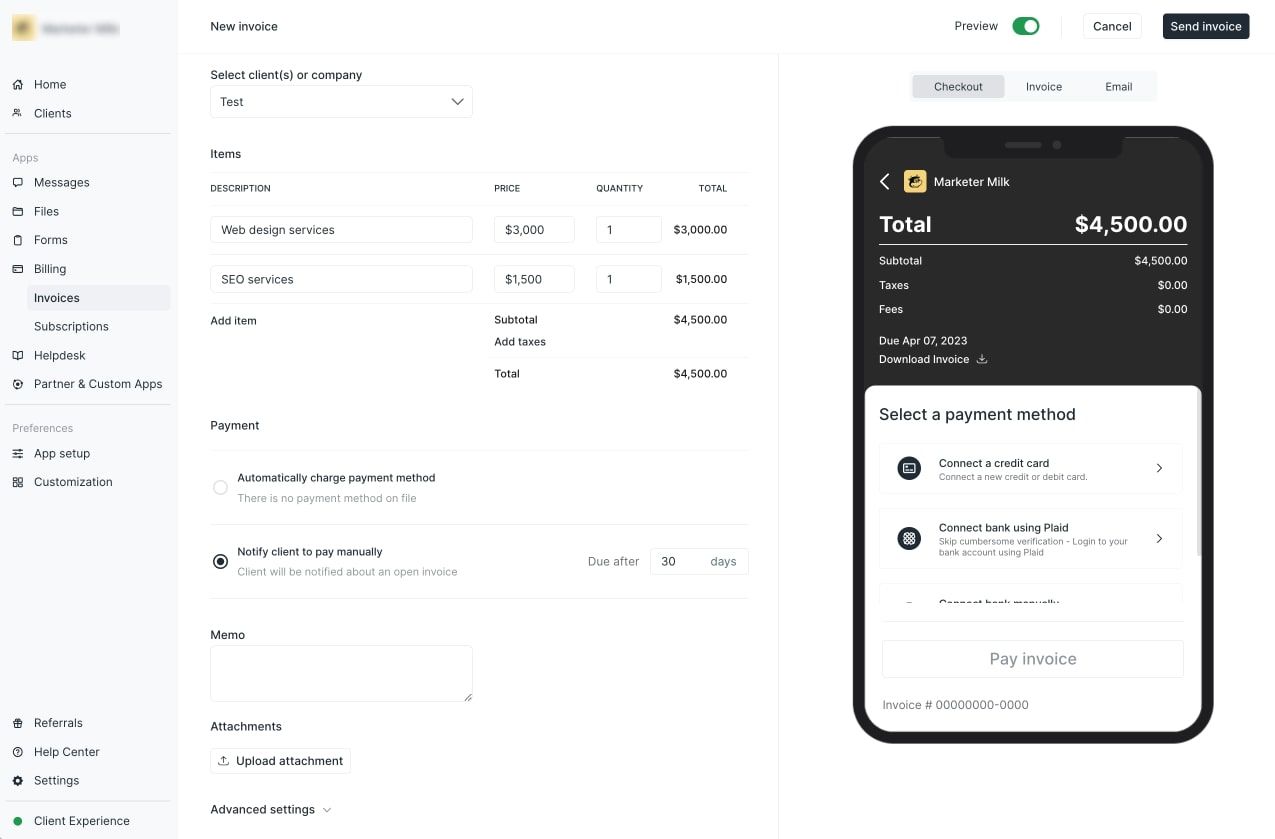
When everything is ready to go, you can click on “Send invoice” and the invoice will be sent via email to your client. Once the invoice is sent, you will see the invoice number and the status. You can also download a PDF of the invoice.
If you have a client that is paying you a fee each month, instead of sending an invoice each month, having to follow up, or dealing with late payments, you can set up an automatic recurring subscription. This is great if you want to productize your services and allow your clients to purchase services straight from your website (like an ecommerce store).
Creating a subscription in Copilot is very similar to creating an invoice. The main difference is that you can set up a recurring payment that’s daily, weekly, monthly, quarterly, biannually, or yearly. You can also set your subscription to start and end on a certain date or keep it running until you or your client decide to cancel.
4. Connect your banking details
In order to successfully have your invoice completed within Copilot, you need to connect your bank account. This way, your clients can pay you directly right when they receive your invoice via email.
To connect your bank account, head over to the “Settings” tab at the bottom of your sidebar and then click on “Billing.”
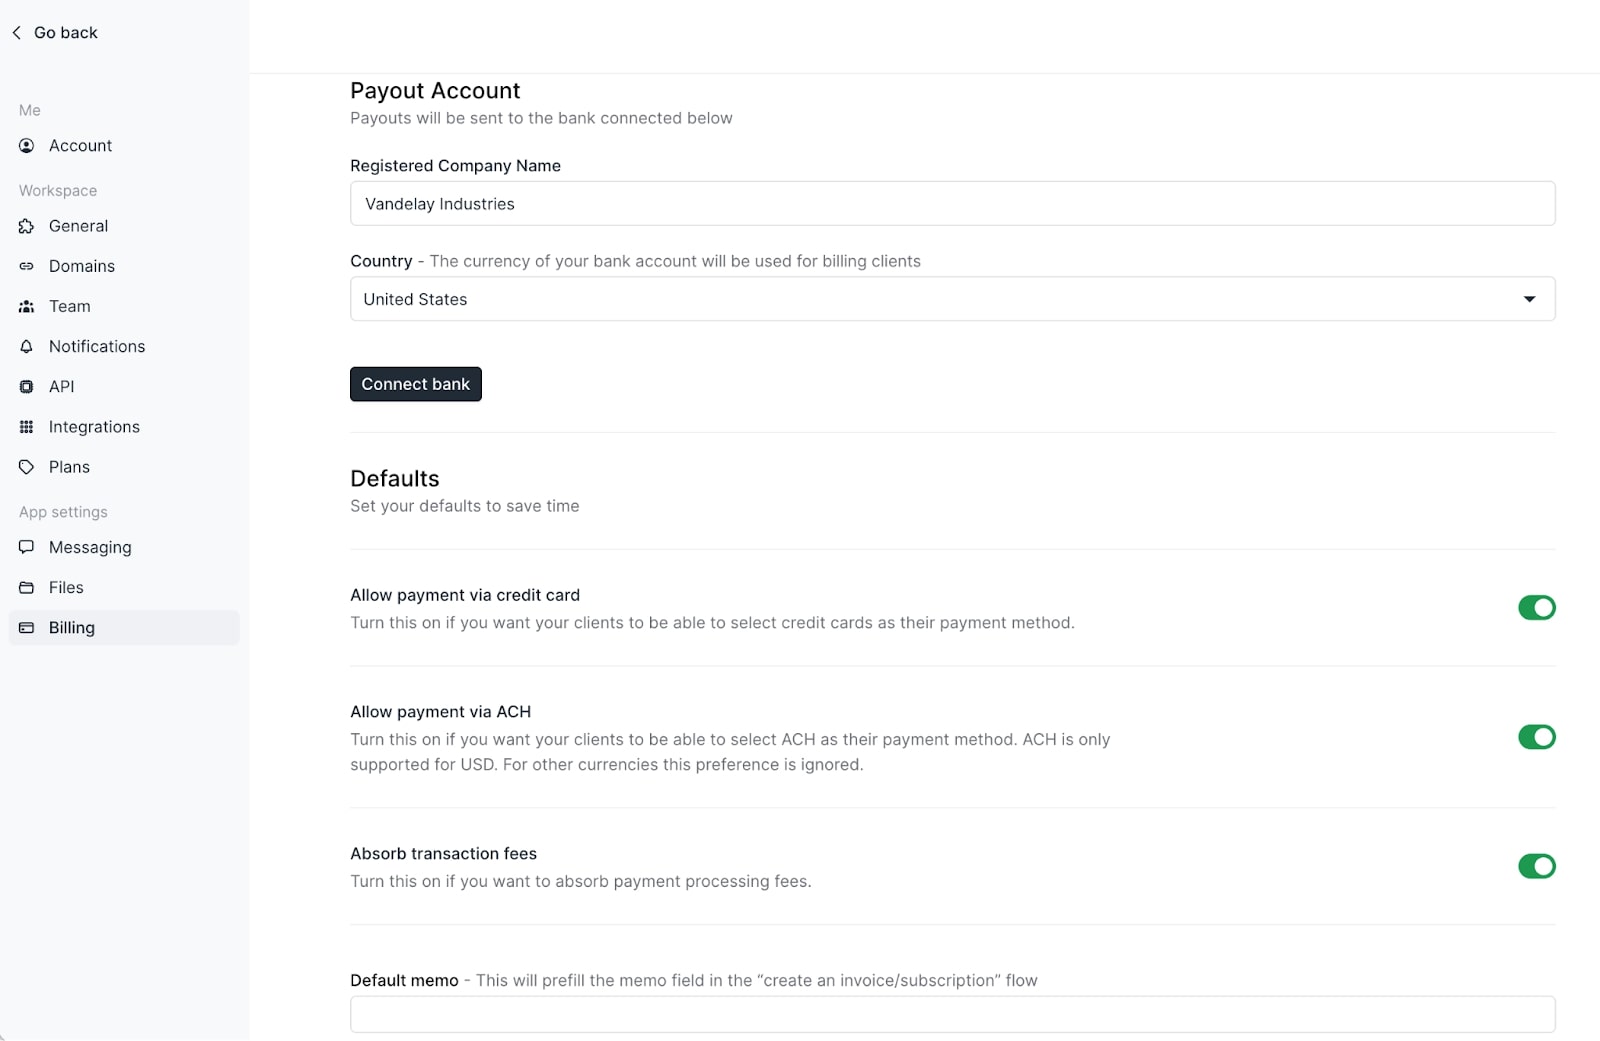
Here you will be able to connect your bank of choice and adjust payment options for your clients. Copilot uses Stripe as an extra layer of security to process payments. You don’t need a Stripe account to get started, but you will need a bank account to get your funds deposited.
In an ideal world, you would get paid right away without any fees. But almost all online payment gateways charge you a small transaction fee and can take anywhere from a few business days to over a week to collect payments.
Credit cards offer the fastest way to send and receive money (2-5 business days), but they also have the highest transaction fees.
ACH direct bank transfers can take up to 5-9 business days to process, but they also have the lowest transaction fees.
It’s a good idea to give your clients as many payment options as possible to make it easy for them. But this part is dependent on how you want to structure your payment plans and fees. By default, your client will take on most of the transaction fees. But in Copilot, you have the option to “Absorb transaction fees” if you don’t want your client to pay extra fees. This will of course lower your take-home pay, but it can help improve your client’s experience working with you.
Congratulations, you’ve just sent your first invoice and have a way to get your funds deposited!
But now you need to think about the financial health of your small business. Taxes, expenses, income reports, all of these can seem overwhelming if you don’t have a system in place to track data around what money is coming in and out of your business.
5. Connect your accounting software
Staying organized financially is crucial to the longevity of your service-based business — regardless of if you’re a freelance business, agency, or firm.
One of the most popular tools for tracking your finances is QuickBooks. And with Copilot, you can add QuickBooks as an integration into your client portal.
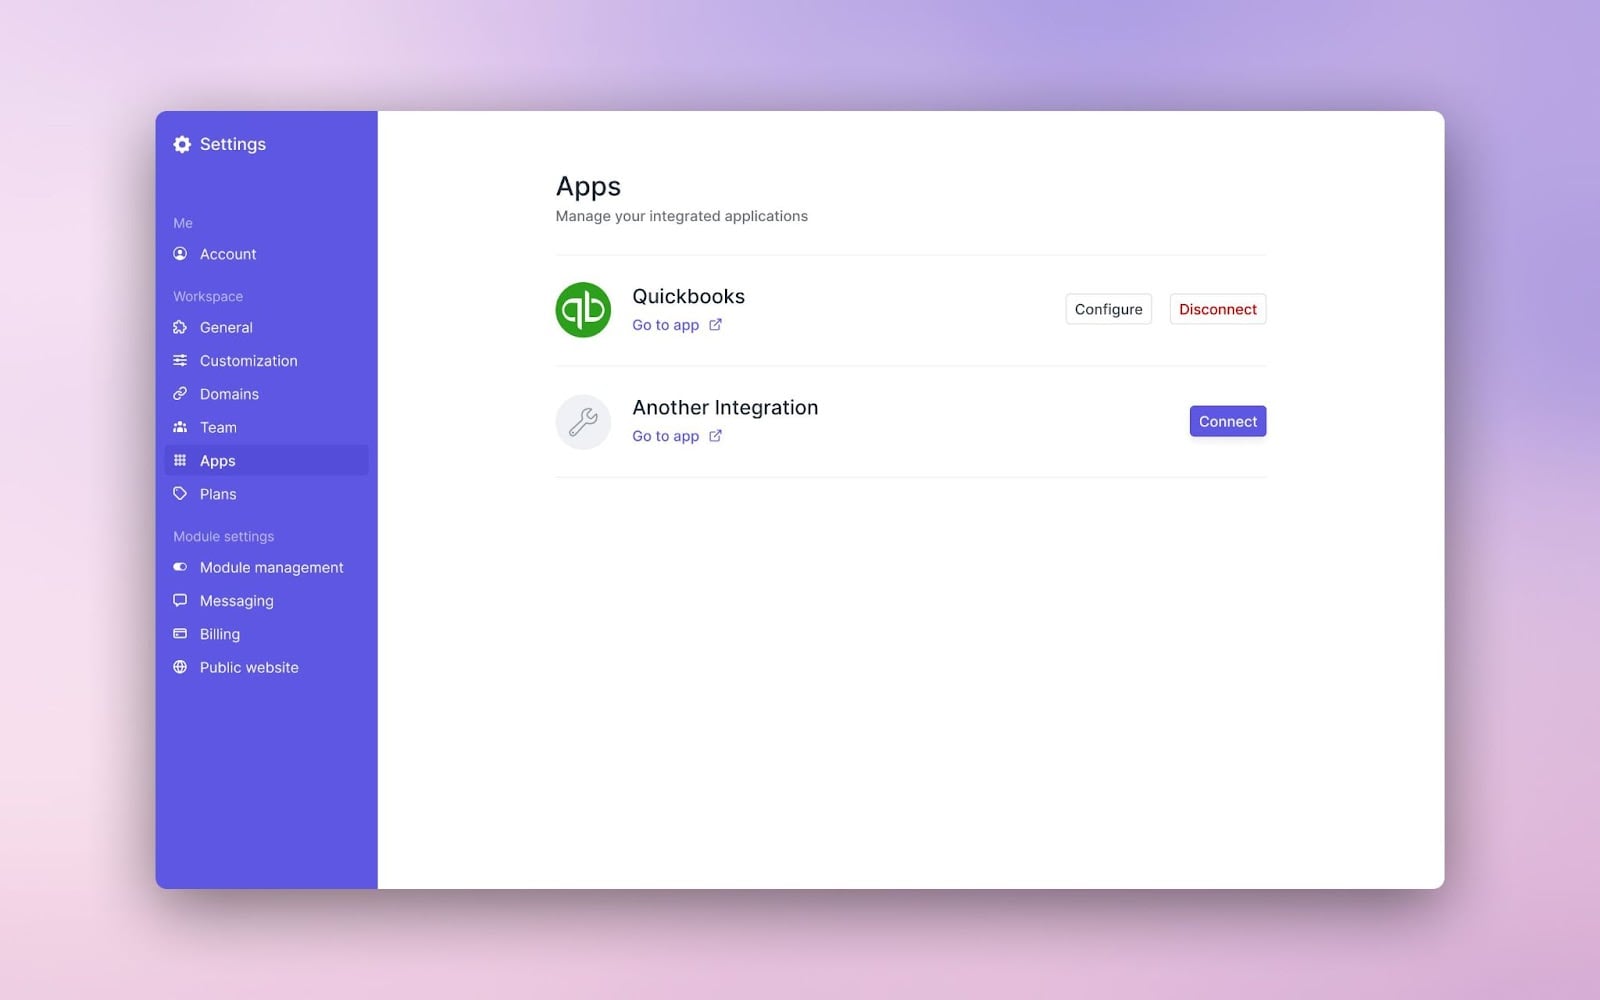
This way, you can create a one-way sync between your Copilot Dashboard and your QBO account — allowing your invoices to pass into your QuickBooks account.
This step is optional, so if you’re billing a client for the first time you may not need to set this up right away. But if your business is taking off, and you have multiple invoices going out, getting your finances in check will lead to fewer headaches during tax season.
Conclusion
Billing a client for the first time can be a daunting task, but it doesn't have to be. By setting up the right systems and invoicing software, freelancers, agencies, and firms can easily manage their client relationships and finances in one central place.
From sending a proposal or statement of work to creating a branded invoice and sending payment reminders, it's important to have a clear and organized approach to billing clients. By following the step-by-step guide above, service-based businesses can confidently ask for what they're worth and get paid in a timely manner while nurturing their client relationships.
If you’re ready to take the next step for your client-based business, be sure to start your free 14-day trial with Copilot!
Share this post
Sign up for our newsletter
Subscribe to our newsletter to receive emails about important announcements, product updates, and guides relevant to your industry.
